

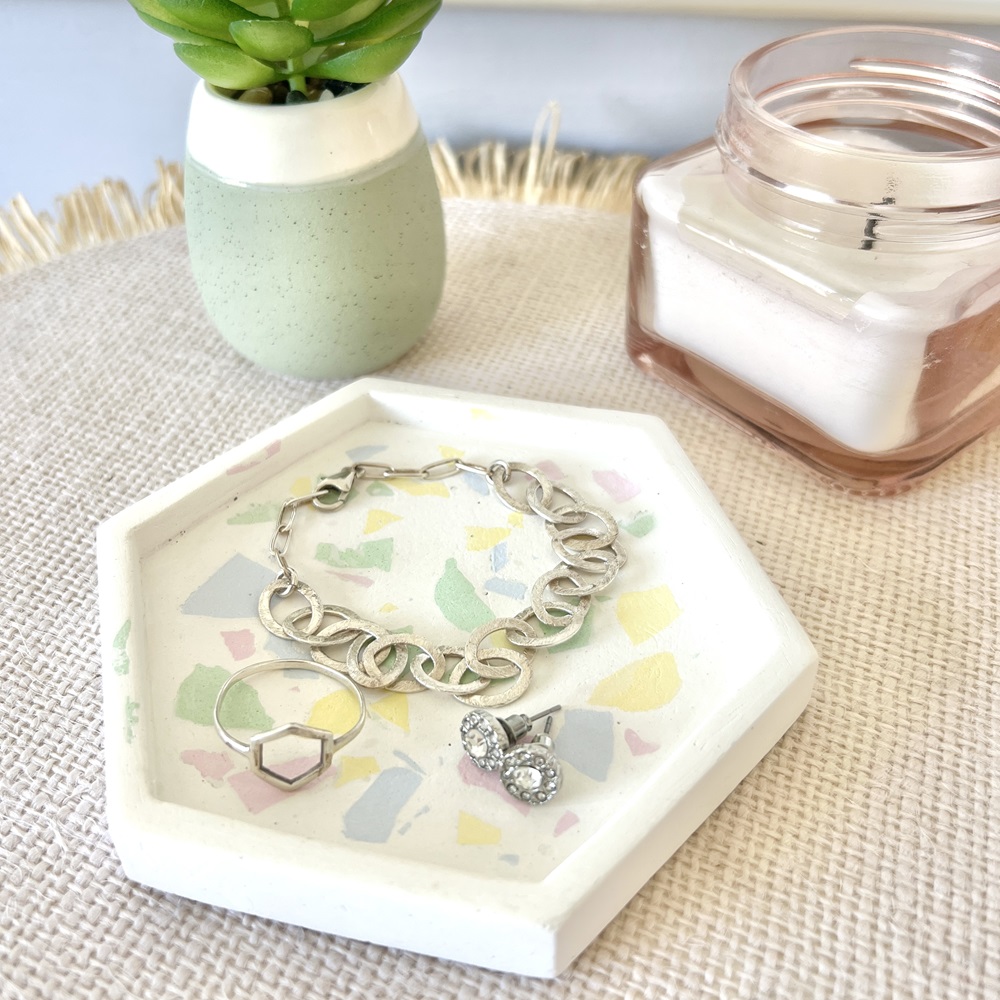
This March, Kirstie Phipps brings us a stylish and creative crafting project that’s both fun to make and beautifully practical! If you love adding a touch of handmade charm to your home, this terrazzo-style trinket dish is the perfect craft to try.
Using Plaster of Paris and the colours of your choice, Kirstie will guide you through creating a chic, speckled dish that’s perfect for holding jewellery, keys, or other small treasures. With endless possibilities for customisation, you can experiment with different colour combinations to match your personal style or home décor.
Whether you’re new to crafting or a seasoned maker, this simple yet stunning project is a great way to explore a trendy design technique while making something unique and useful. Let’s get crafting!
Trinket Dish
Skill level: Beginner
You will need:
- 32g Plaster of Paris for each colour of chips you would like to make
- 24g cold water for each colour of chips you would like to make
- 100g Plaster of Paris for the dish base
- 75g cold water for the dish base
- Acrylic paints – in the colours of the chips you would like in your dish
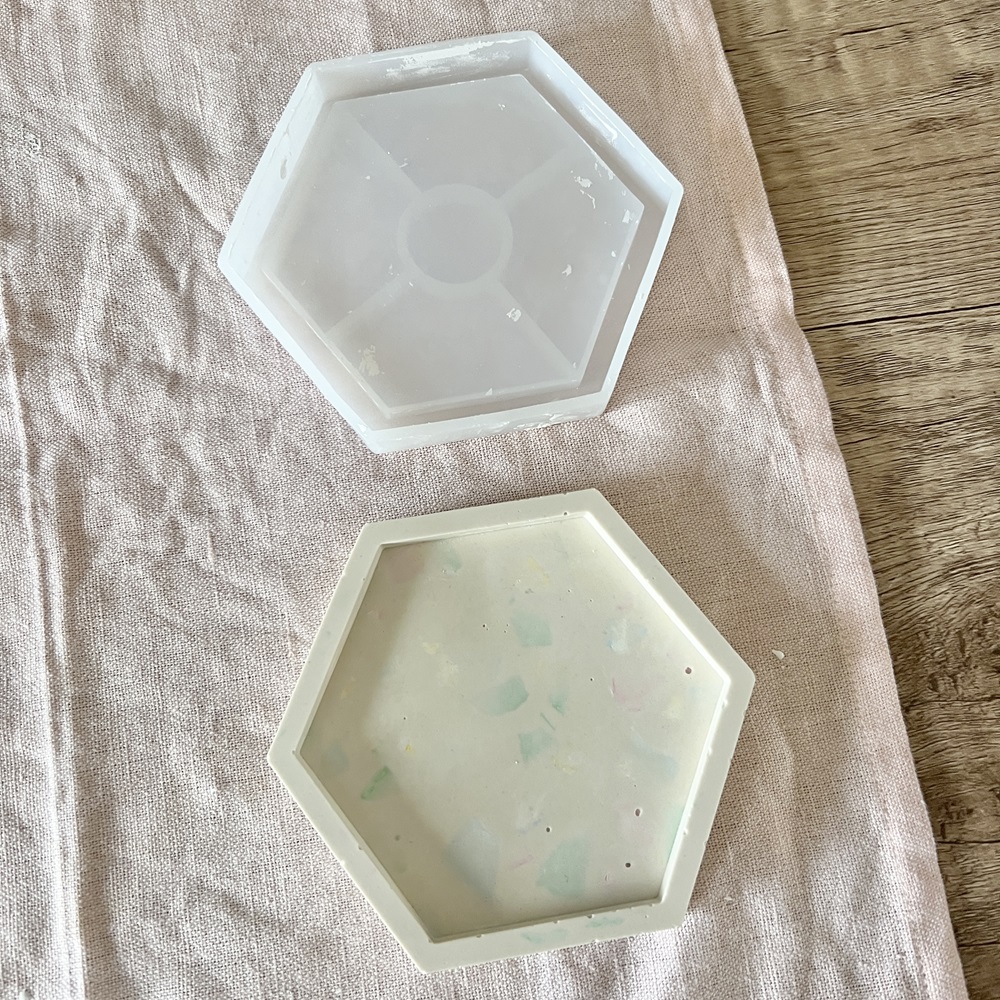
- 10cm x 10cm hexagonal silicone dish mould
- Paper or silicone cup for each colour of chip you would like to make
- Paper cup for dry chips
- Large sized paper or silicone cup for mixing the dish base
- Wooden teaspoons or lolly sticks
- 35cm x 35cm Baking paper
- Sponge and water
- 100 and 1200 grade sandpaper
- Sticky tape
- Weighing scales
- Protective gloves – wear whilst working on this project
- Facemask – wear when mixing the powder and water and when sanding
To make the chips:
Step 1
Place the baking paper on to the table and stick down with sticky tape.
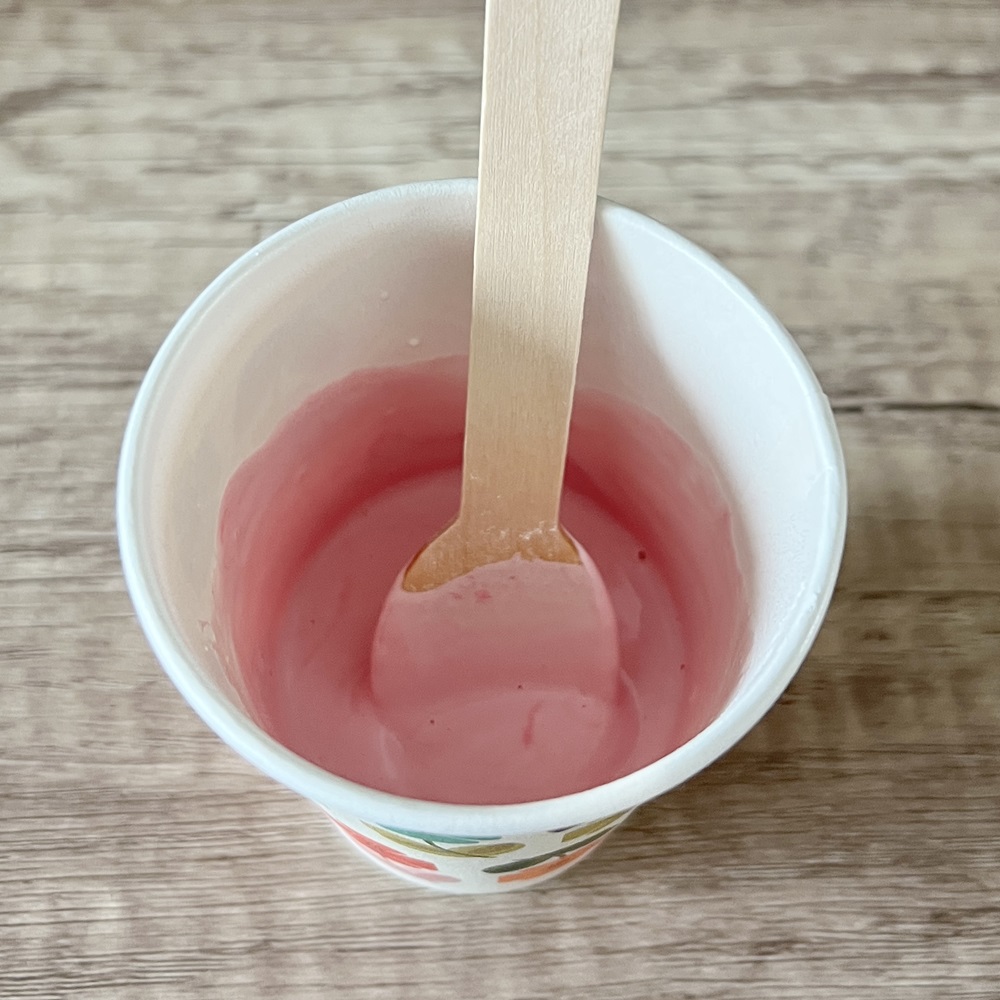
Take one of the small paper cups and place 32g of the plaster into the cup.
Add 24g of water and stir until a smooth paste is formed.
Decide on the colour of the chips you would like in the dish and add a drop of acrylic paint in one of these colours to the mix.
Stir with the wooden teaspoon.
Add more paint until you have created your desired colour – only add a drop at a time.
Stir until the colour is well mixed.
Work quickly as the plaster may begin to dry in the cup within a few minutes.
Step 2
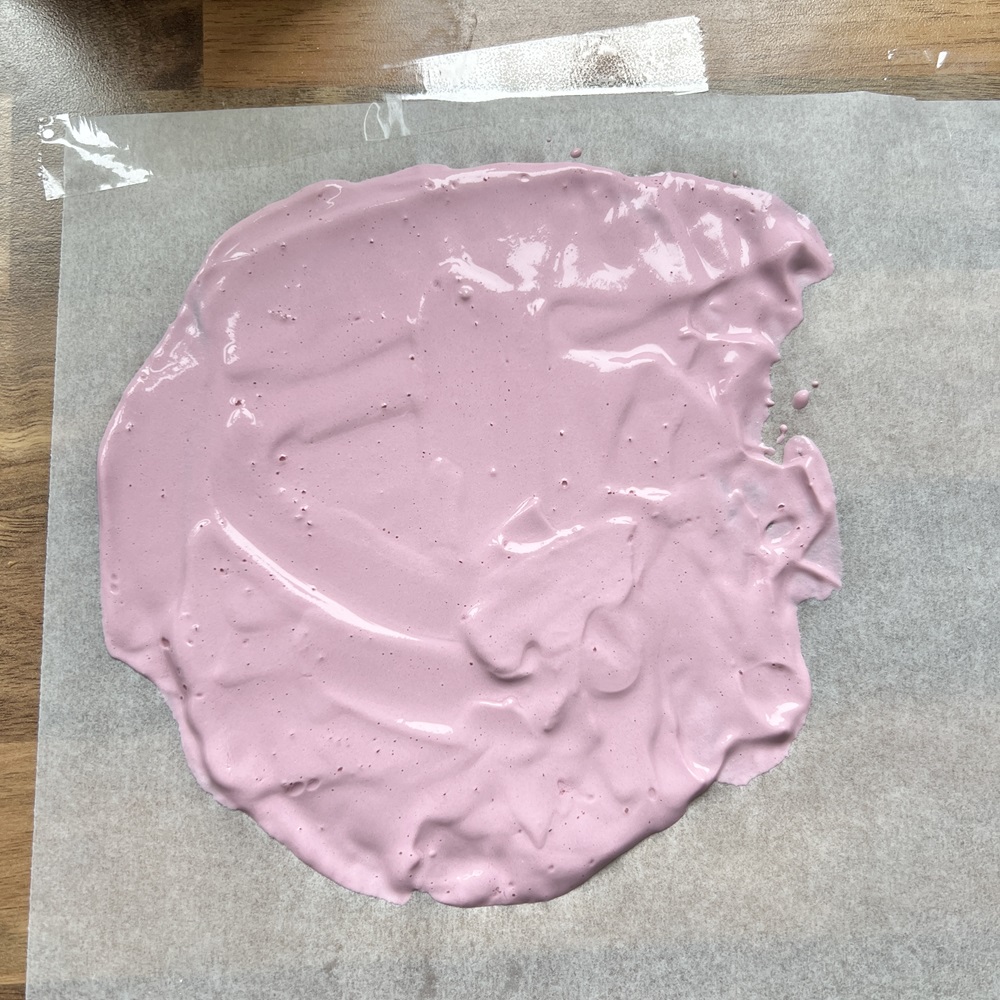
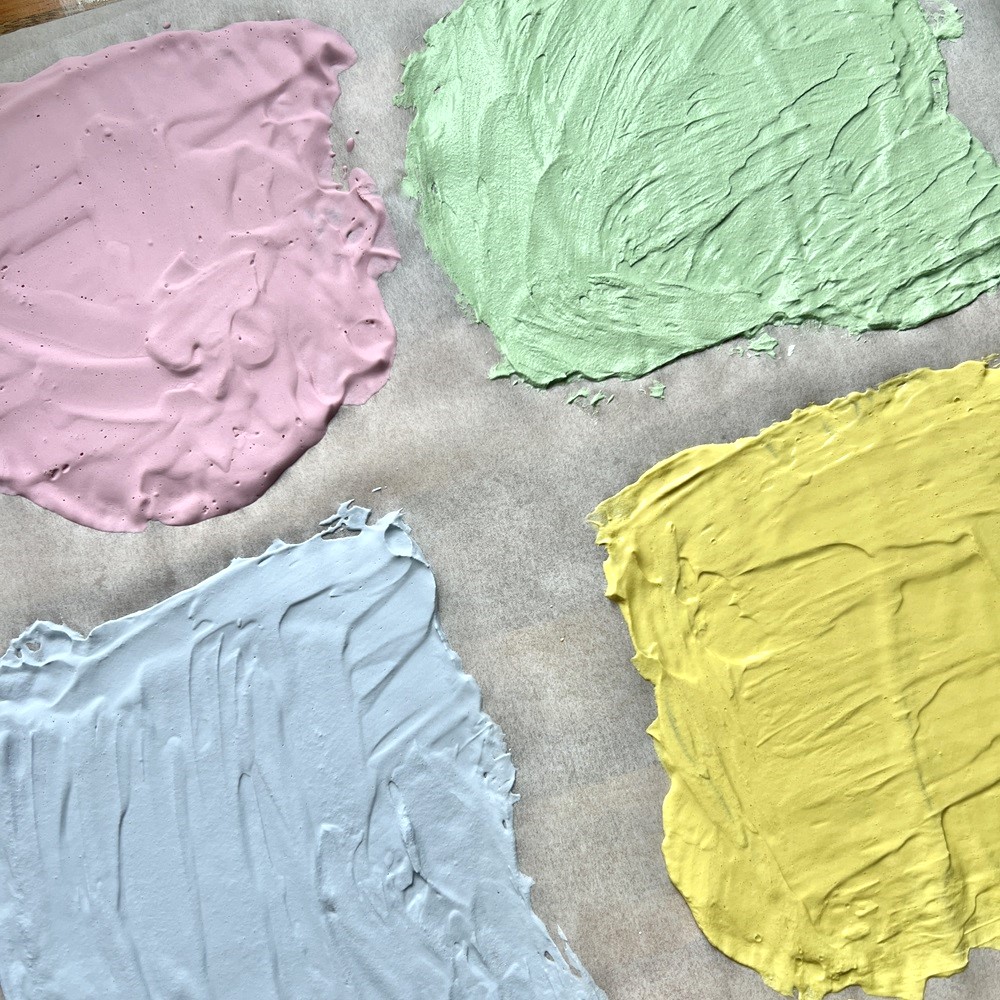
Pour the mixture on to the baking paper and spread out to approximately 0.5-1mm thick.
Leave to dry at room temperature. This will take around 30 minutes.
If you would like to create chips in more than one colour, repeat the process above for the different colours you would like to make.
Step 3
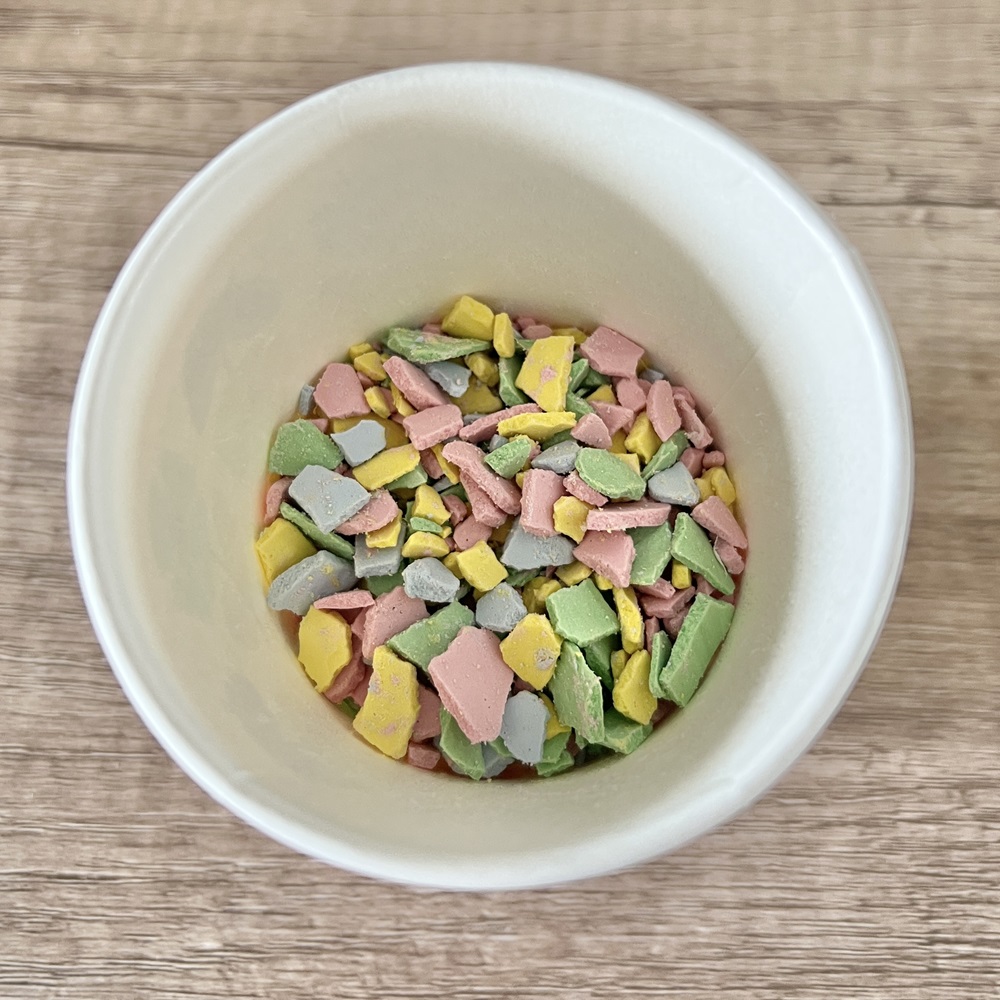
When dry, take a coloured plaster piece and carefully remove it from the baking paper.
Break the pieces into small sized chips and place in a clean cup.
Do this for all of the coloured plaster pieces you have made.
To make the dish:
Step 4
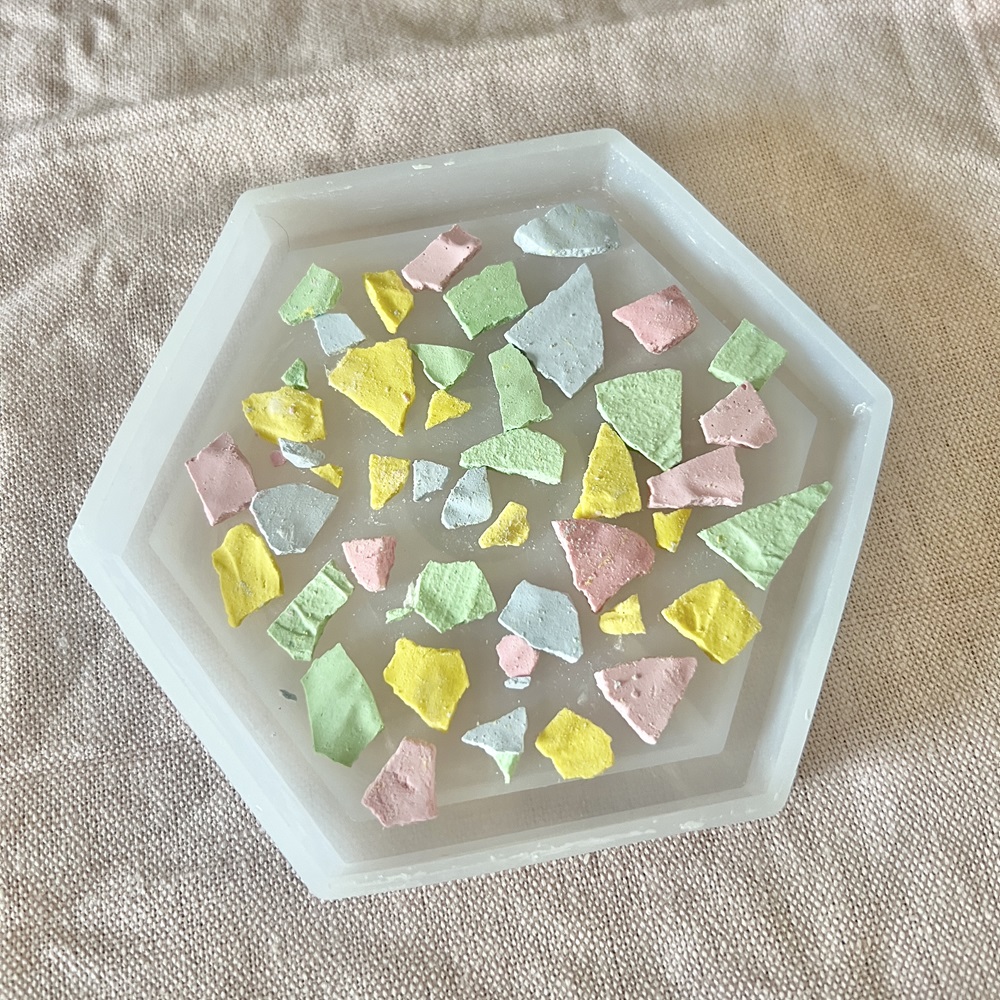
Take some of the chips and place them on to the silicone mould.
Step 5
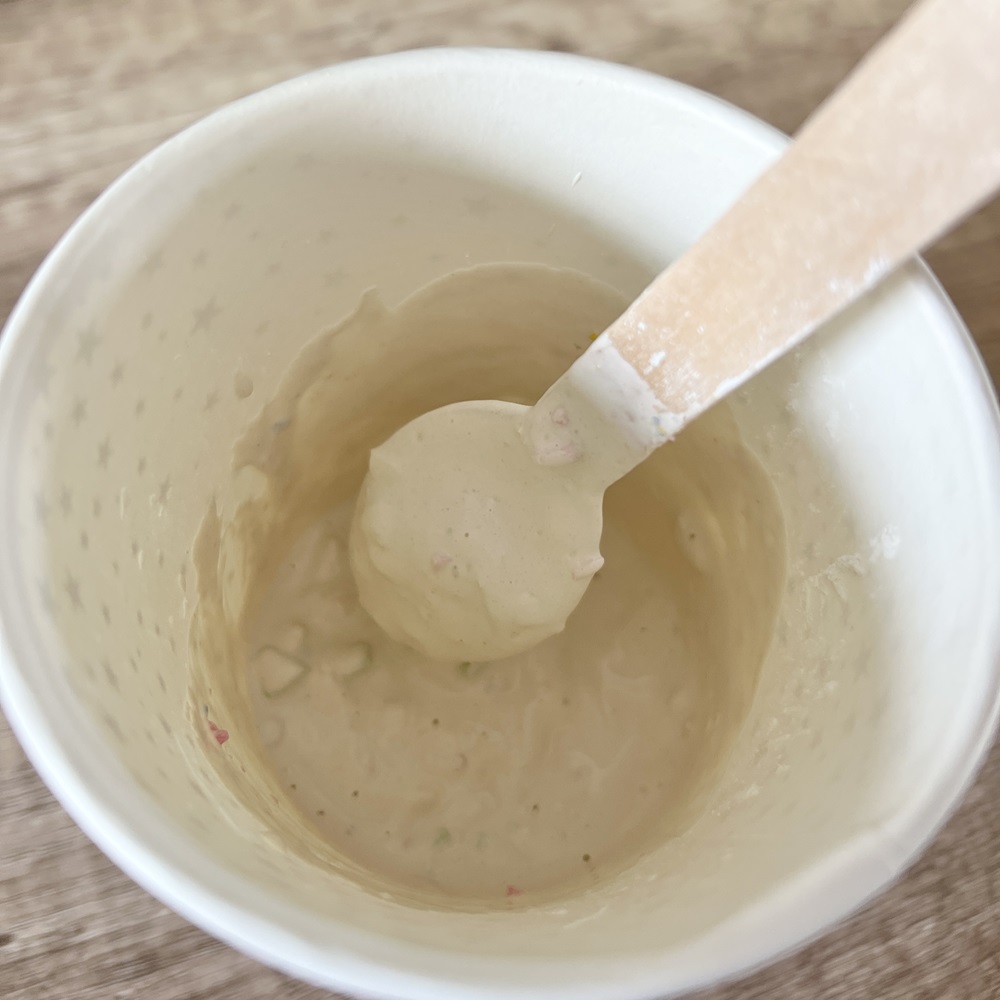
Take one of the paper cups and place 100g of the plaster into the cup.
Add 75g water and stir until a smooth paste is created.
Pour the coloured chips into the wet mixture – use as many as you would like.
Stir well with the wooden teaspoon.
Again, work quickly as the plaster may begin to dry in the cup within a few minutes.
Step 6
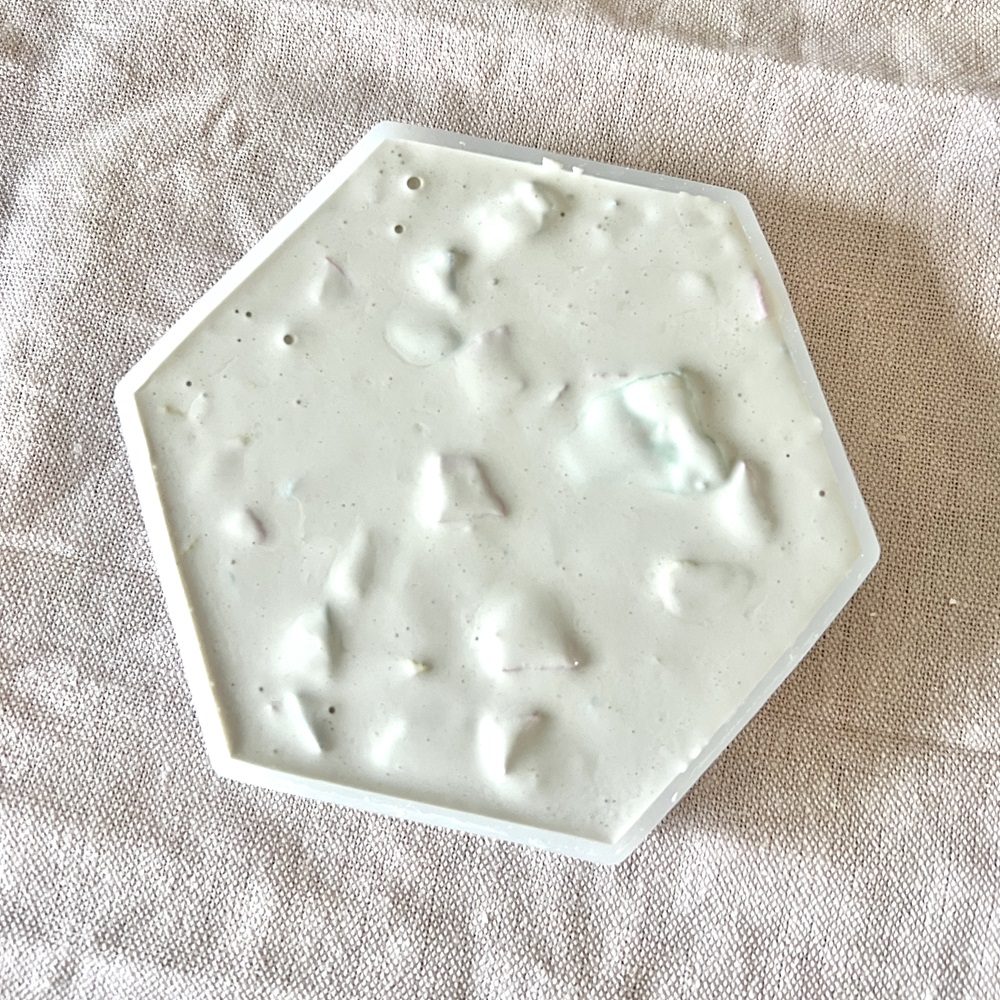
Pour the plaster mixture into the mould until it is full.
Use the wooden teaspoon/lolly stick to ensure the mixture has filled all the edges and then carefully tap the sides of the mould for about a minute to remove air bubbles.
Leave to dry at room temperature for 45 minutes. The mixture will get warm as it dries.
Step 7
Remove the plaster from the mould and leave to fully dry.
Step 8
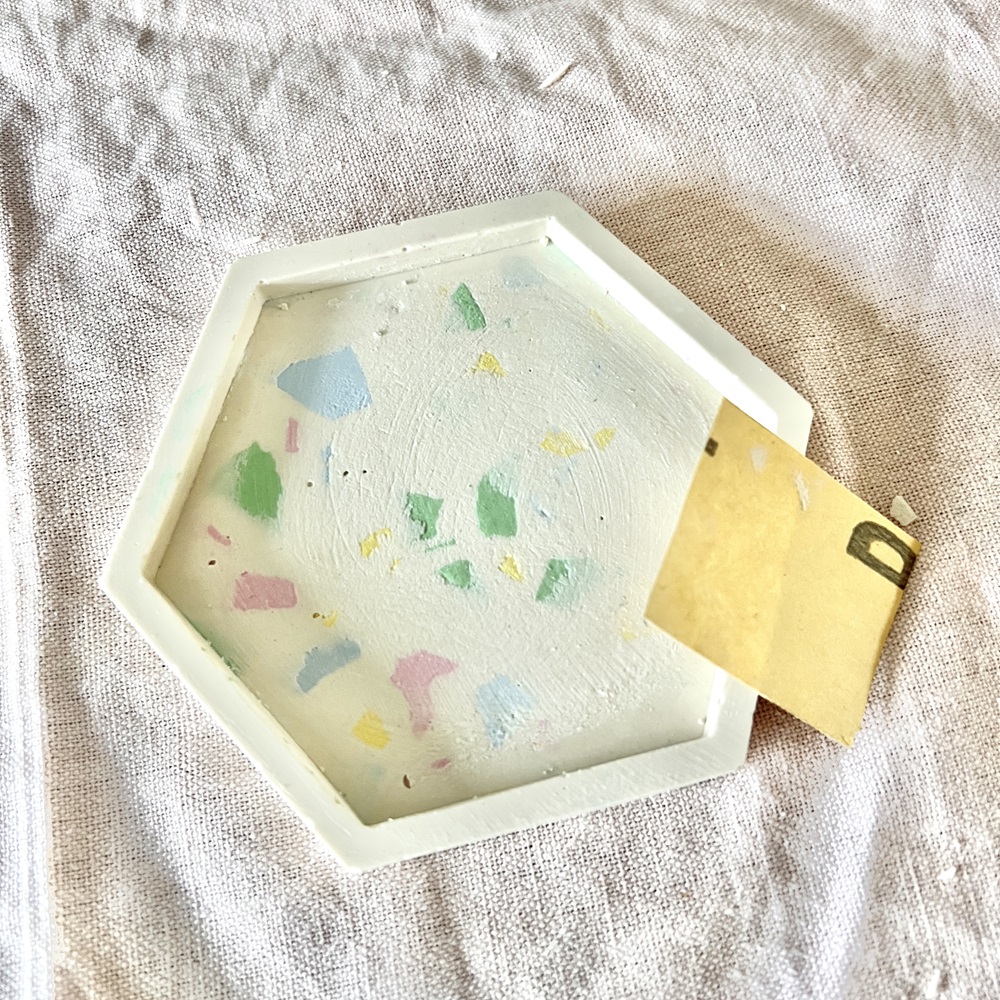
Very gently sand the dish with the 100-grade sandpaper to expose the colours of the chips and remove any air bubbles.
You may need to also sand the bottom side of the dish to ensure it sits flat on the table.
Then sand again with the finer, 1200 grade sandpaper to smooth.
Use a damp sponge to remove the dust from the sanding.
Leave to dry.

Further information, tips and ideas
- Ensure you thoroughly read the manufacturer’s safety information regarding use of the plaster.
- Do not inhale the plaster
- Do not apply the plaster to the body as heat is created when the plaster cures.
- If plaster powder or wet plaster comes in contact with the skin, wash immediately.
- Check the manufacturer’s instructions regarding the amount of plaster and water required as this may differ slightly.
- Cover surfaces when working with the paint and plaster.
- Mix more coloured plaster (using the ratios used – we used 100 Plaster of Paris to 75 cold water) to create excess chips for use for other projects.
- If you make smaller items, make smaller chips.
- You may want to add a sealer to your dish to protect it.