
Hello August! This month Kirstie has provided some fantastic projects for you to try at home; Plant & Bird Decorations made from Polymer Clay and Fairy Garden Inspiration!
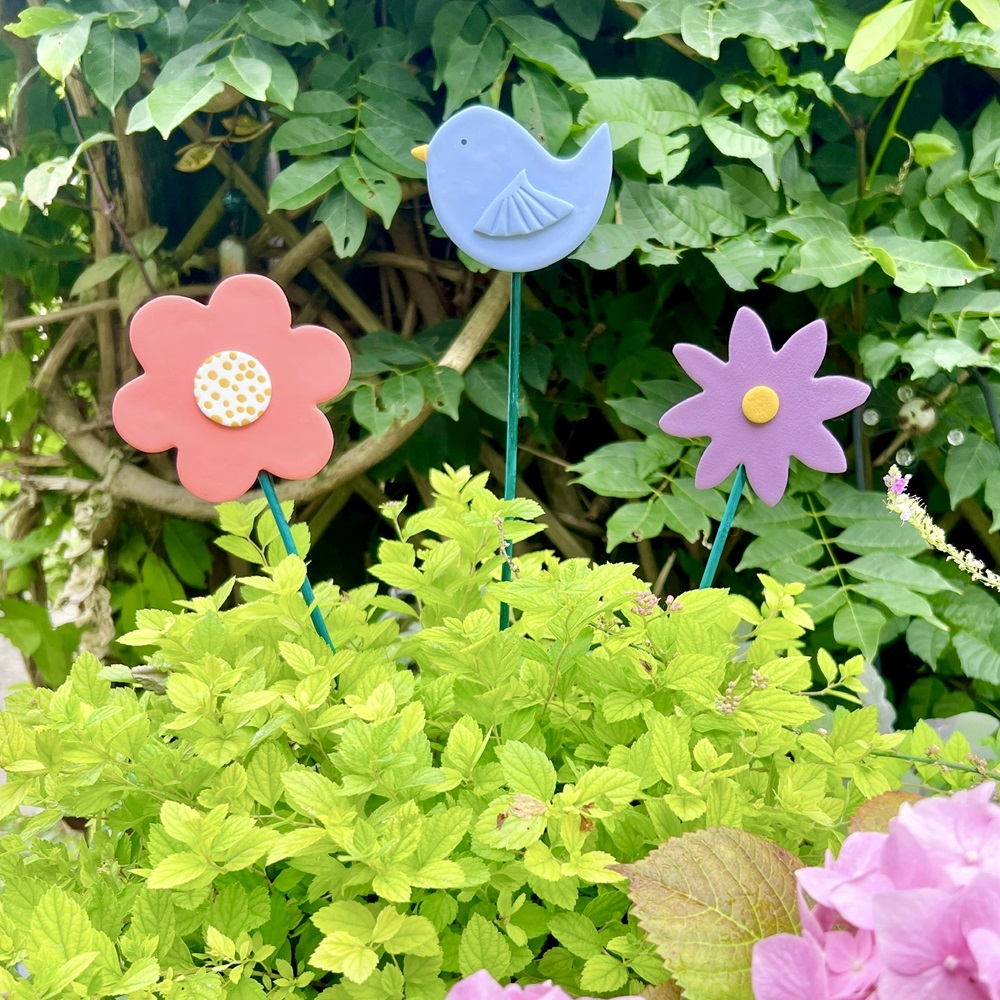
Plant & Bird Decorations
Skill level: Beginner
To make the pink flower decoration you will need:
- Polymer clay
- Pink – Approx 40g (we worked with a whole 57g pack to allow a little extra when rolling)
- White – Approx 5g (we used 10g to allow a little extra when rolling)
- Mustard – Pea-sized amount
- Cookie cutter shapes
- Flower – 9cm diameter
- Circle – 3cm diameter
- Flat ceramic tile
- Acrylic rolling pin
- Liquid clay
- Flat wooden dowel rod x 2 – 3mm thick x approx. 20cm
- Strong glue – suitable for outdoor use
- Bamboo cane – approx. 3mm x 45cm
- Protective gloves (optional)
- Use of an oven
Tips and ideas
- This is a great activity for children to help with. They can roll the clay, cut the clay, and experiment with textures, colours and shapes. Children should be supervised at all times when working on this activity. Children must not use the oven or glue.
- Unique clay colours can be mixed by adding different colours of clay together and rolling until the colours have mixed.
- Use items throughout your home to create different shapes and textures.
- If you make a mistake before baking, reroll the clay and start again.
- If you don’t have liquid clay, bake the pieces separately and stick them together with strong outdoor glue.
- If the edges of the clay require some smoothing after they have been baked, lightly sand the edges with a high grade sandpaper.
- The plant decorations could be used in the garden or in plant pots in your home.
- You can also use smaller cutter to create plant markers, stamping the plant/vegetable/fruit name with letter stamps on to the clay before baking.
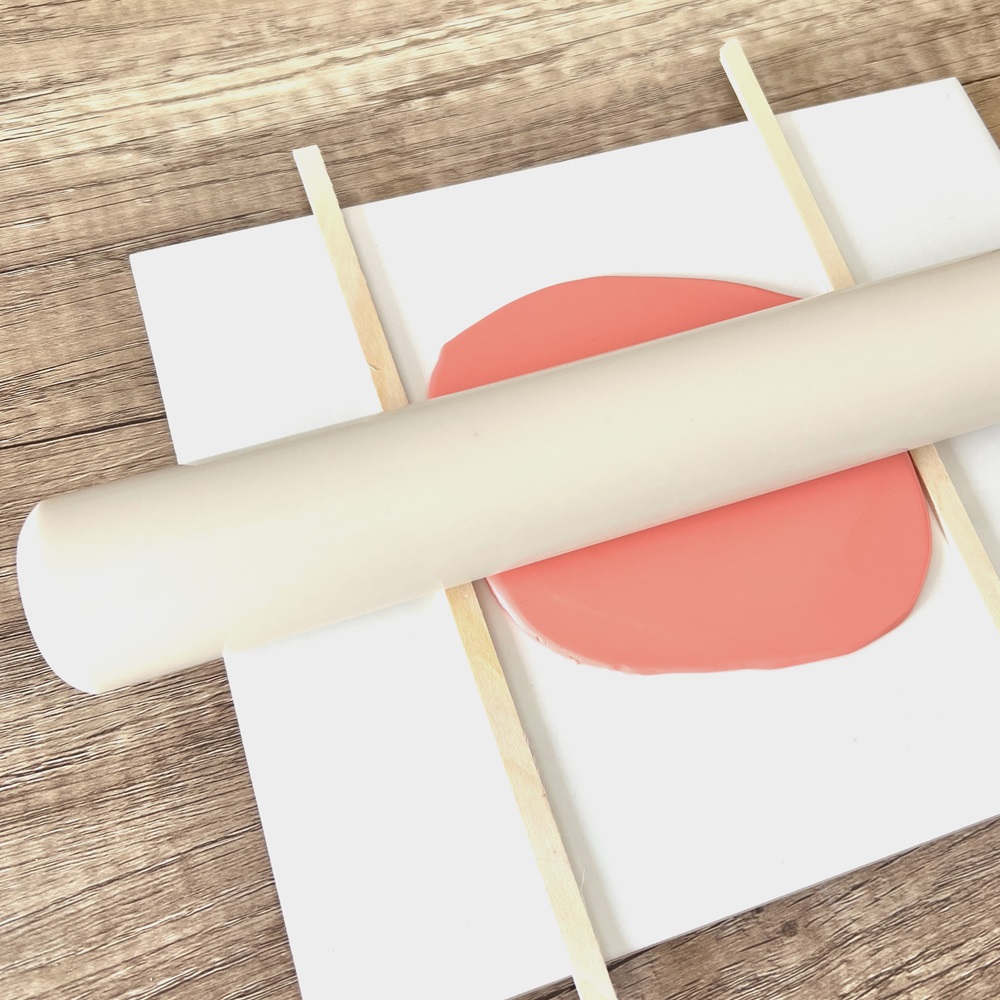
Step 1
Ensure the working area, tile, and equipment are clean and lint free.
Take the polymer clay and warm it up by rolling it by hand, and with the rolling pin on the tile. To check if the clay is ready to use, roll it out, pick it up and fold it in half. If the clay is ready, it will not break or crack when folded.
Place the wooden dowels vertically on the tile approximately 10cm apart.
When the clay is ready to use, place it on the tile in between the wooden dowels and roll out until the clay is the thickness of the dowels.

Step 2
Leave the clay on the tile. Take the flower shaped cookie cutter and cut the shape from the clay.
Remove the excess clay.
Step 3
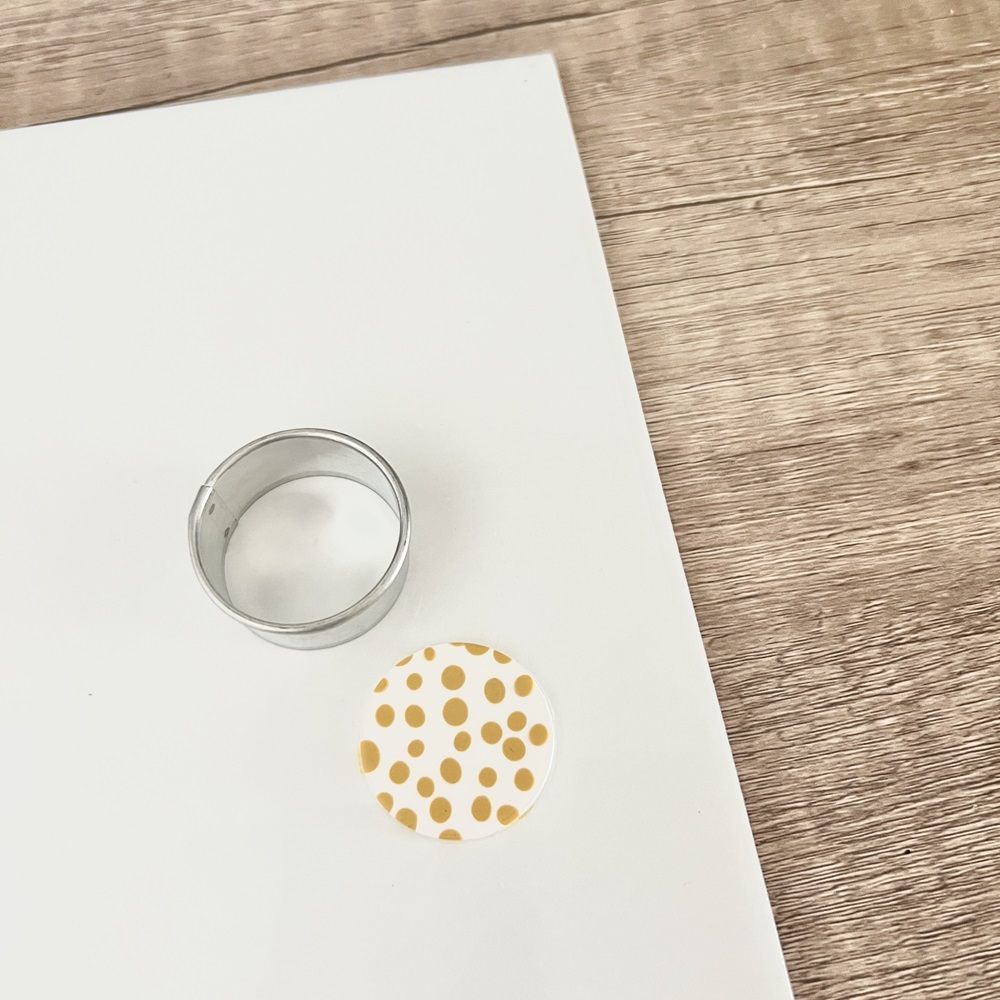
Repeat step one with the white clay.
Take a very small piece of the mustard clay, roll into a 1mm ball. Place the ball on to the white clay.
Create more balls of mustard clay and place them, slightly spaced out, on to the white circle.
When you are happy with the design, roll over the clay once with rolling pin to embed the mustard balls into the white circle.
Cut the circle shape from the clay with the cutter and remove the excess clay.
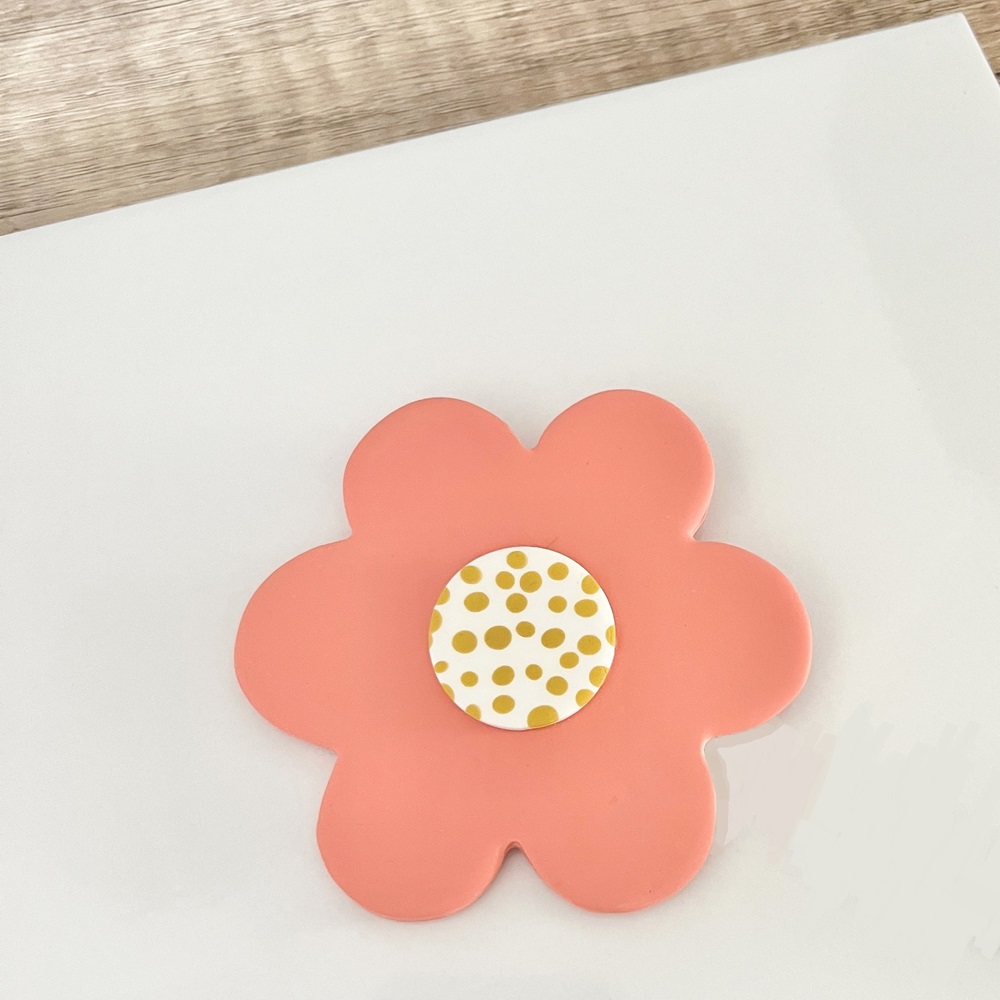
Step 4
Add a coat of liquid clay to the back of the white circle and place in the middle of the flower.
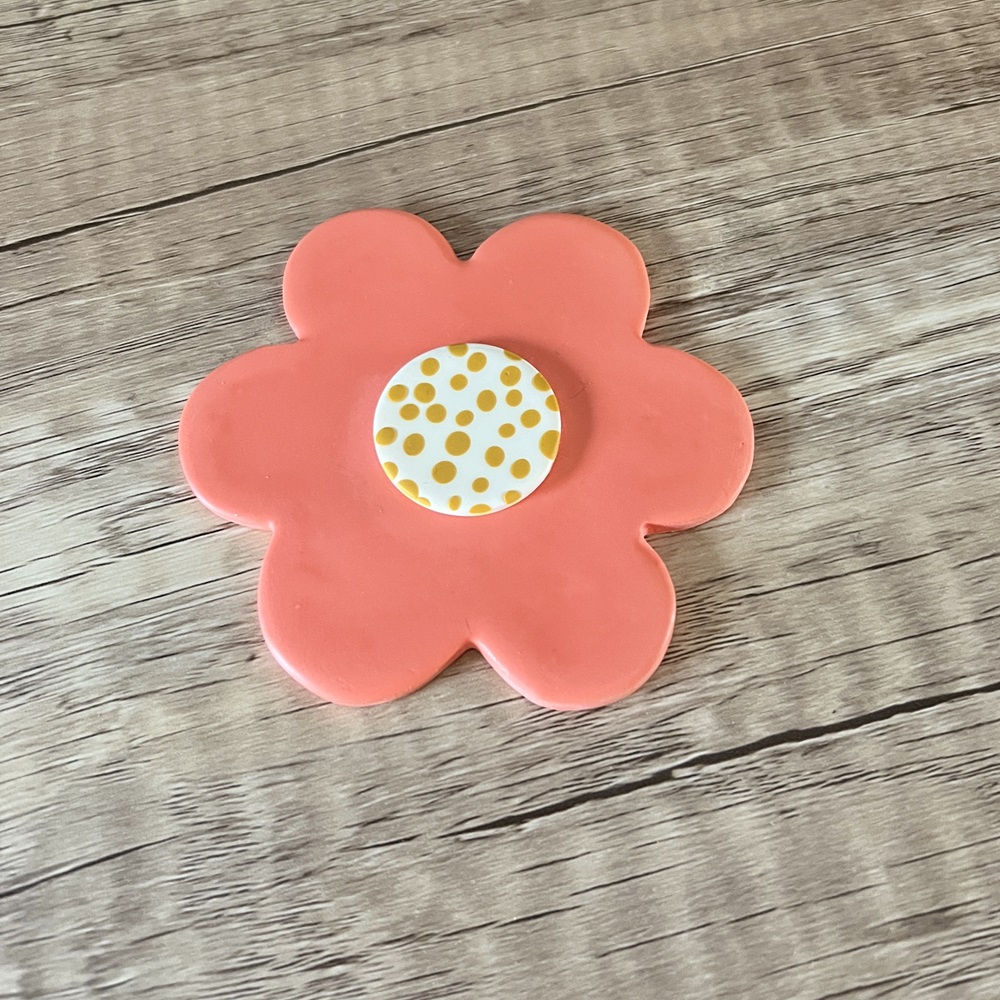
Step 5
Follow the manufacturer’s instructions to bake the clay. The clay can be baked directly on the tile.
When baked, remove from the oven and leave to cool.
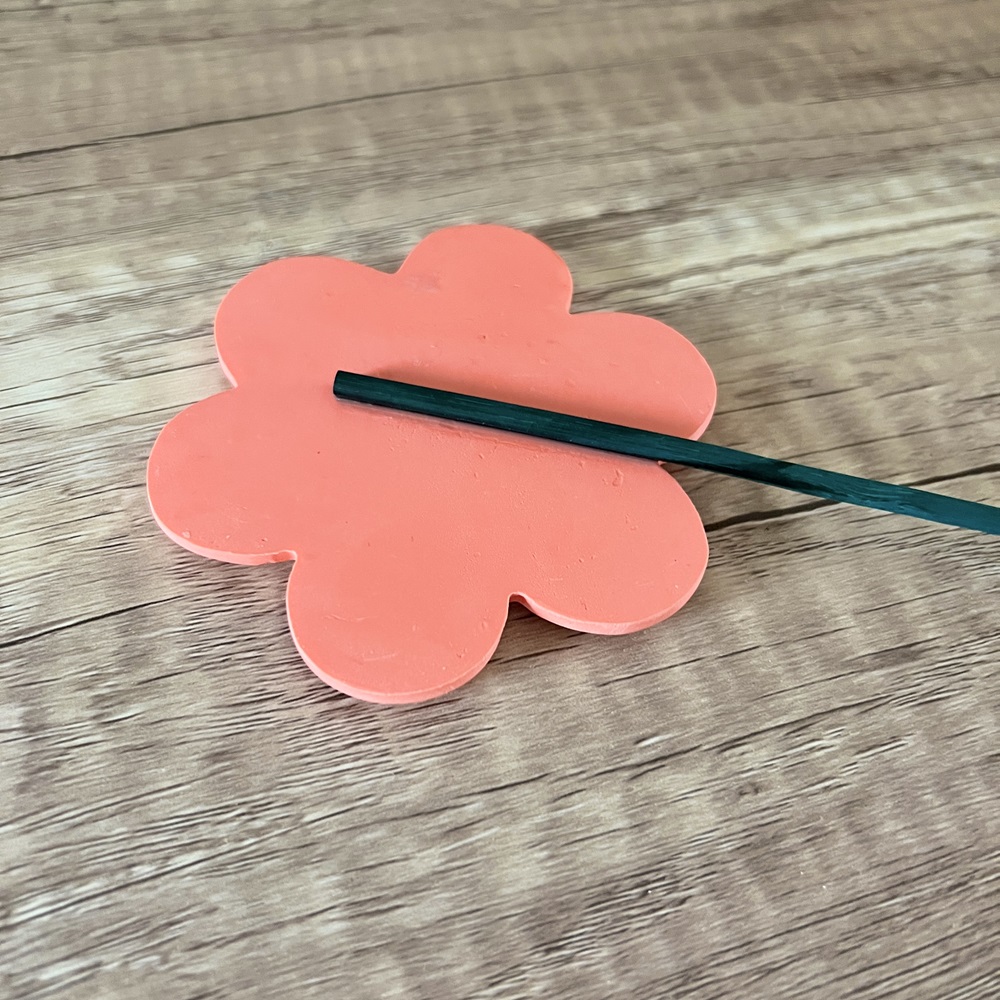
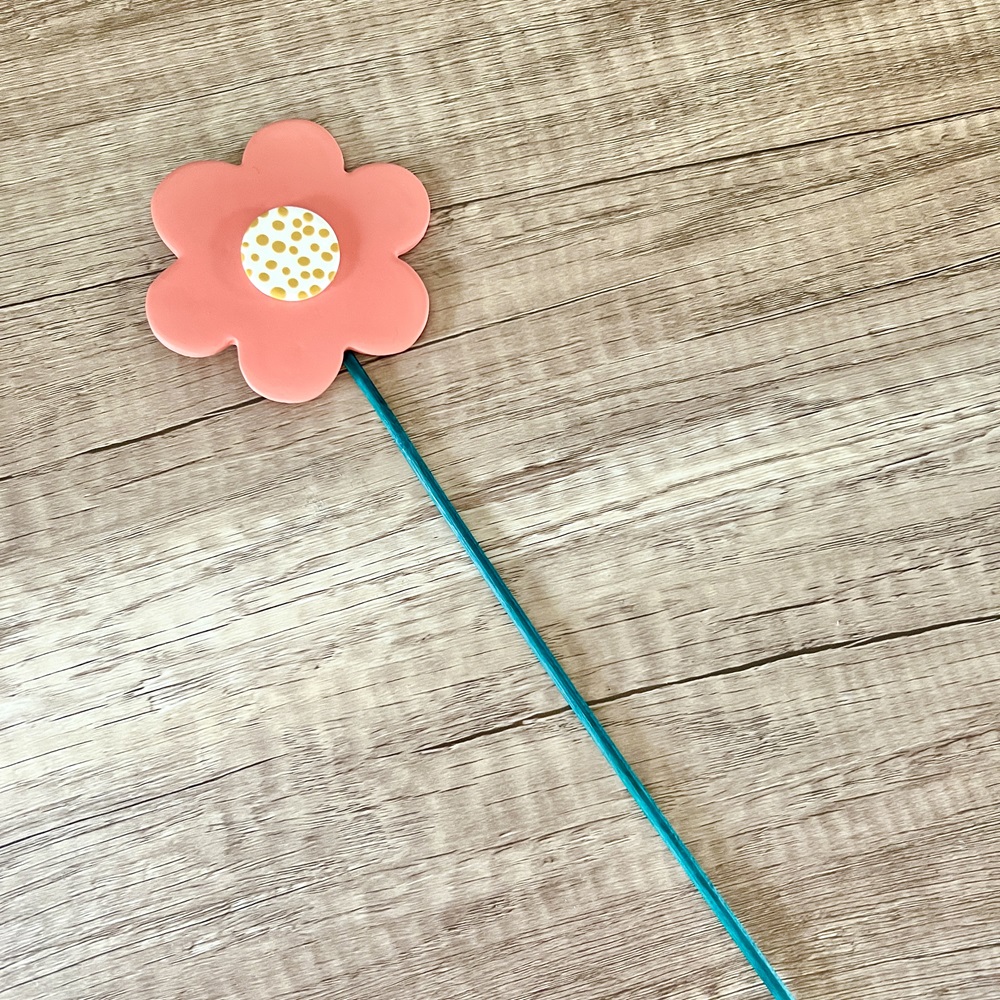
Step 6
Remove the flower from the tile, lay the flower face down and apply a line of the strong outdoor glue vertically down the centre of the flower, leaving a couple of centimetres at the top. Place the bamboo stick on top of the glue and hold in place until firmly attached.
Polymer clay is a versatile material and it’s great to experiment with different techniques, colours, and shapes.
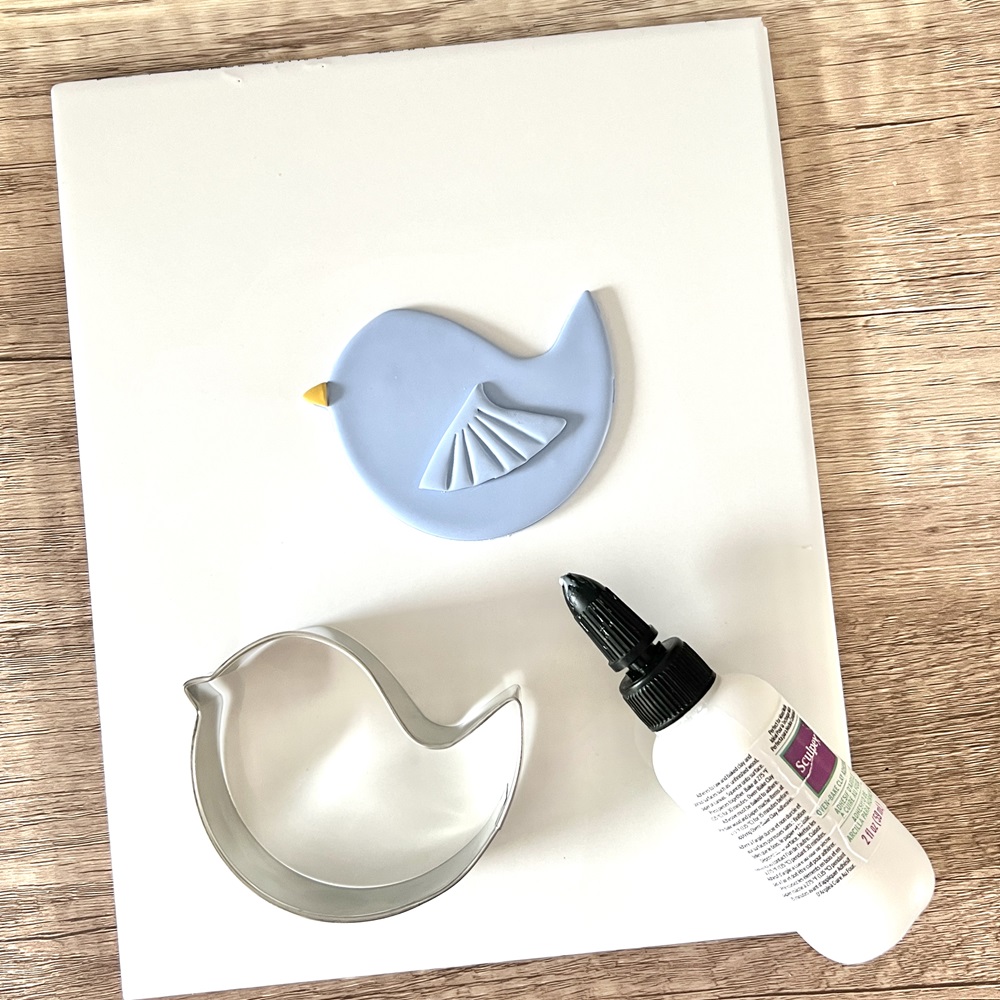
For the bird decoration, we used a bird shaped cutter for the main body, and then also cut the beak shape again in a small amount of mustard clay. This was then stuck to the main body with the liquid clay.
The wing was cut using the right side of the cutter and was also attached to the main body with liquid clay. To create the feathered effect, we used a cocktail stick to make indents in the clay before baking.
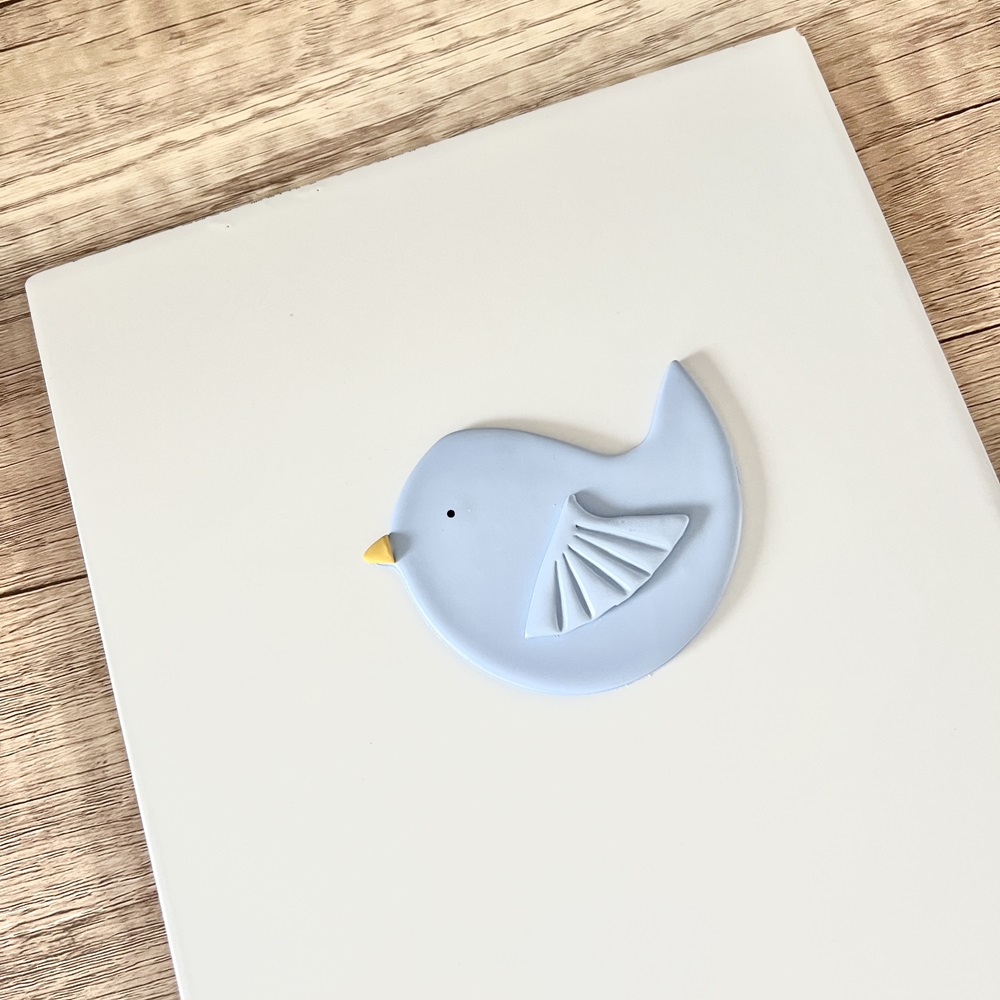
When baked and cooled, we added a black eye with an acrylic paint pen, we then attached the bamboo stick on the back.
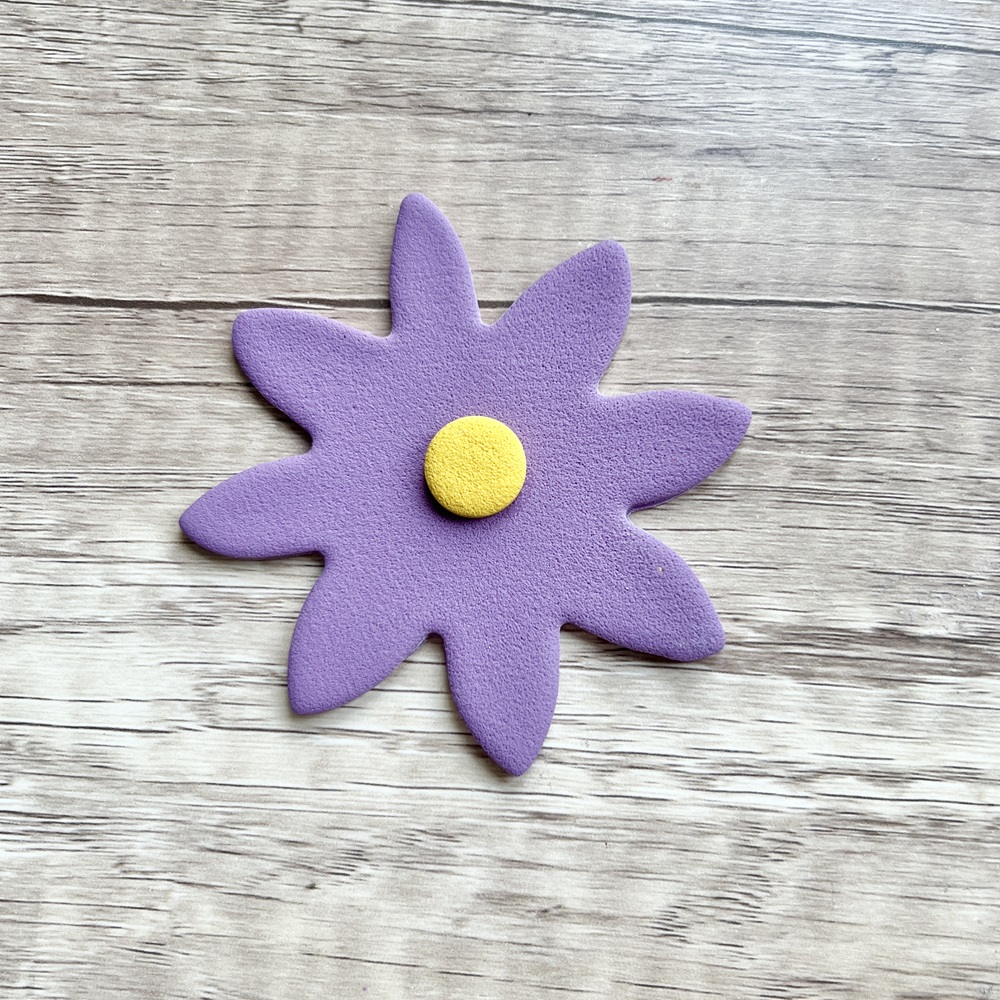
For the purple flower decoration, after rolling out the purple and mustard clays, we placed a piece of grade 60 sandpaper on top of the clay and rolled over it to create the textured effect. We then cut the flower shape and circle shape with cutters and added the circle to the flower shape with the liquid clay and baked. When cool, we added the bamboo stick to the back of the flower.
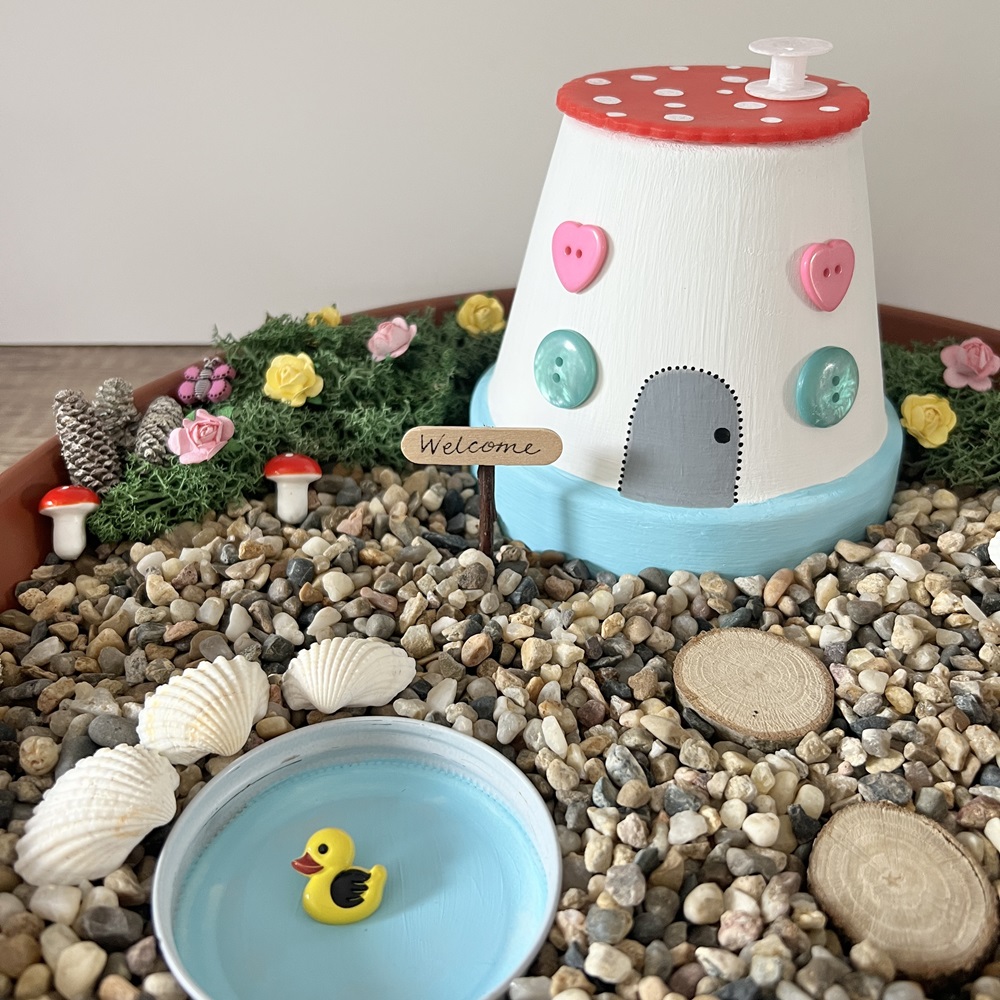
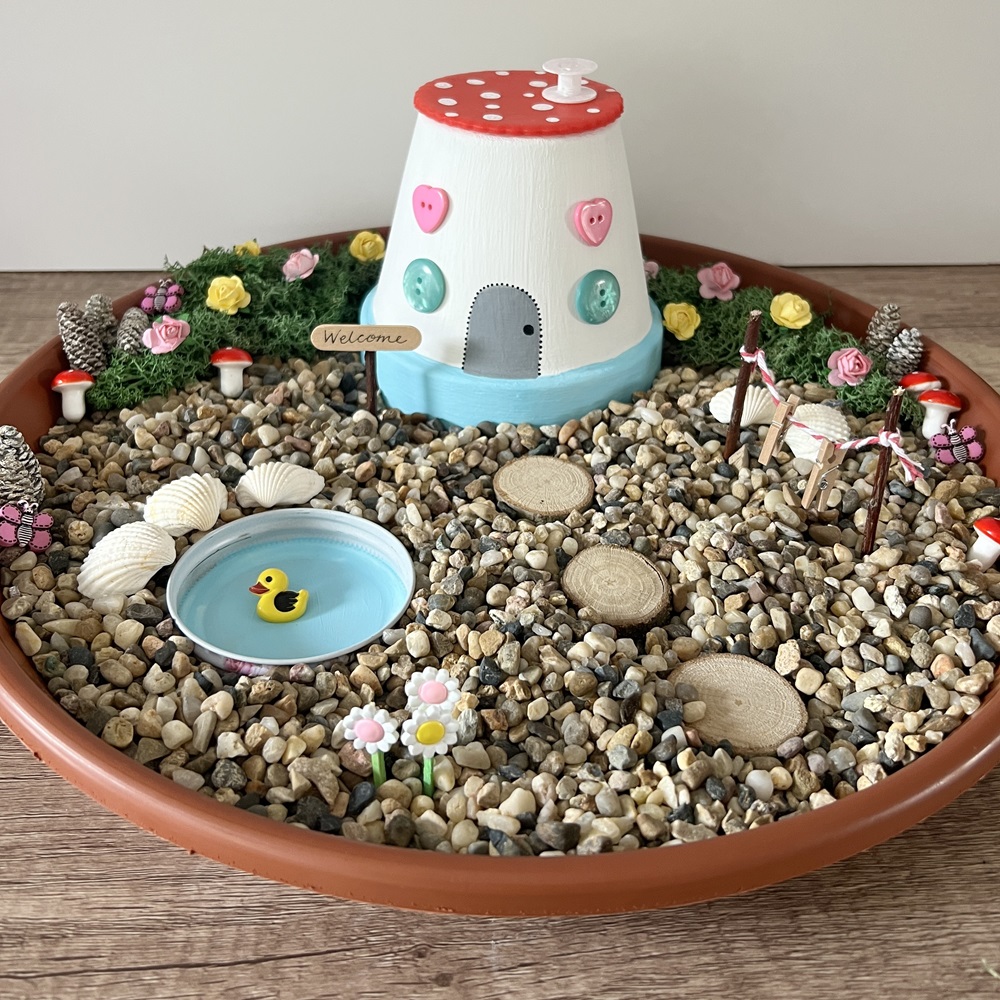
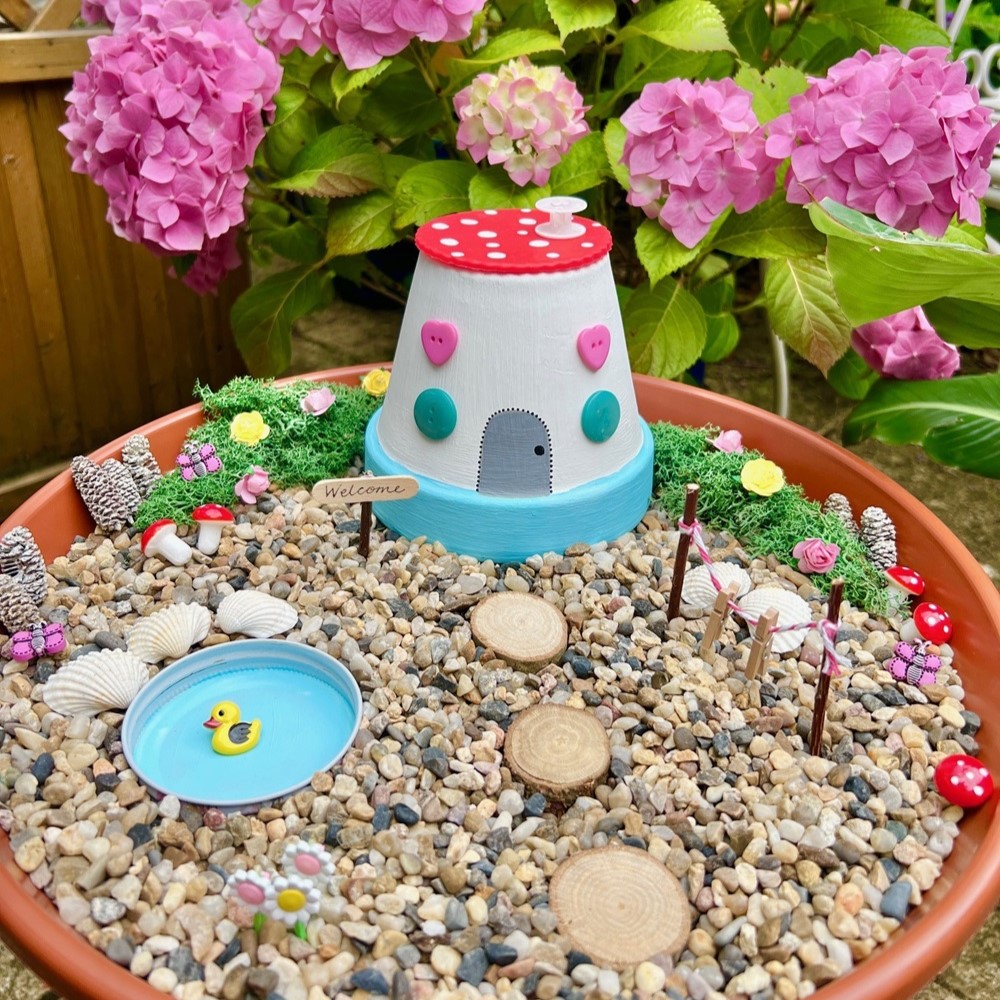
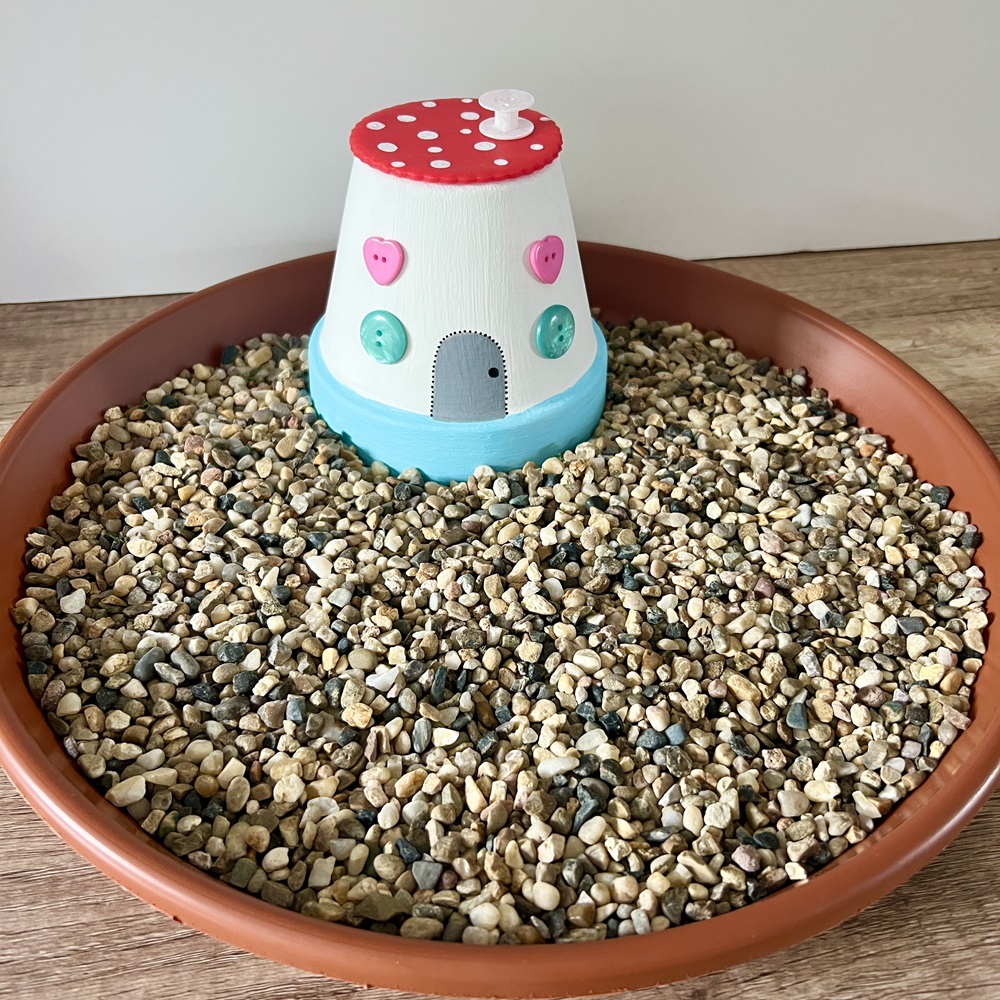
Fairy Garden
Skill level: Beginner
You will need:
Materials
- 40cm plant saucer
- 13 cm terracotta plant pot
- Acrylic paints (non-toxic, including blue for the pond water)
- Acrylic paint pens (non-toxic)
- Sealer
- Buttons x 4 (for windows)
- Aquarium stones (washed) – approx 1kg
- Reindeer moss – approx 20g
- Buttons – duck, flower and butterfly shapes
- Mini toadstool embellishments
- Mini artificial flowers
- Wood slices x 3 – 3-4cm diameter
- Twine – 10cm
- Mini pegs x 2
- Matchsticks x 3 – length 3cm
- Shells x 5
- Jam jar lid
- Small twigs x 3 – length 5cm
- Mini lolly stick
- Black acrylic paint pen
- Bobbin
- 25g red polymer clay
Tools
- Paint brushes
- Scissors
- Round cookie cutter – the same size as the base of your plant pot
- Ceramic tile
- Acrylic rolling pin
- Strong glue – suitable for outdoor use
- Sticky tack
- Use of an oven
- Table cover
Tips and ideas
- Children can help to make the fairy garden and paint the fairy house. If children are helping, ensure they are supervised at all times.
- If you don’t have the exact items listed above, use similar items you have in your house/garden/craft stash – be creative!
- Create seasonal gardens by adding different components – for example, add festive decorations (mini Christmas tree, mini fairy lights, ‘snow’ etc.) for a Christmas themed fairy garden.
- Although the items used are fine to be outside, we recommend taking the fairy garden inside if there is bad weather.
- Avoid using very small parts if very young children will be playing with the garden.
- Cover your work surfaces when using paints and glue.
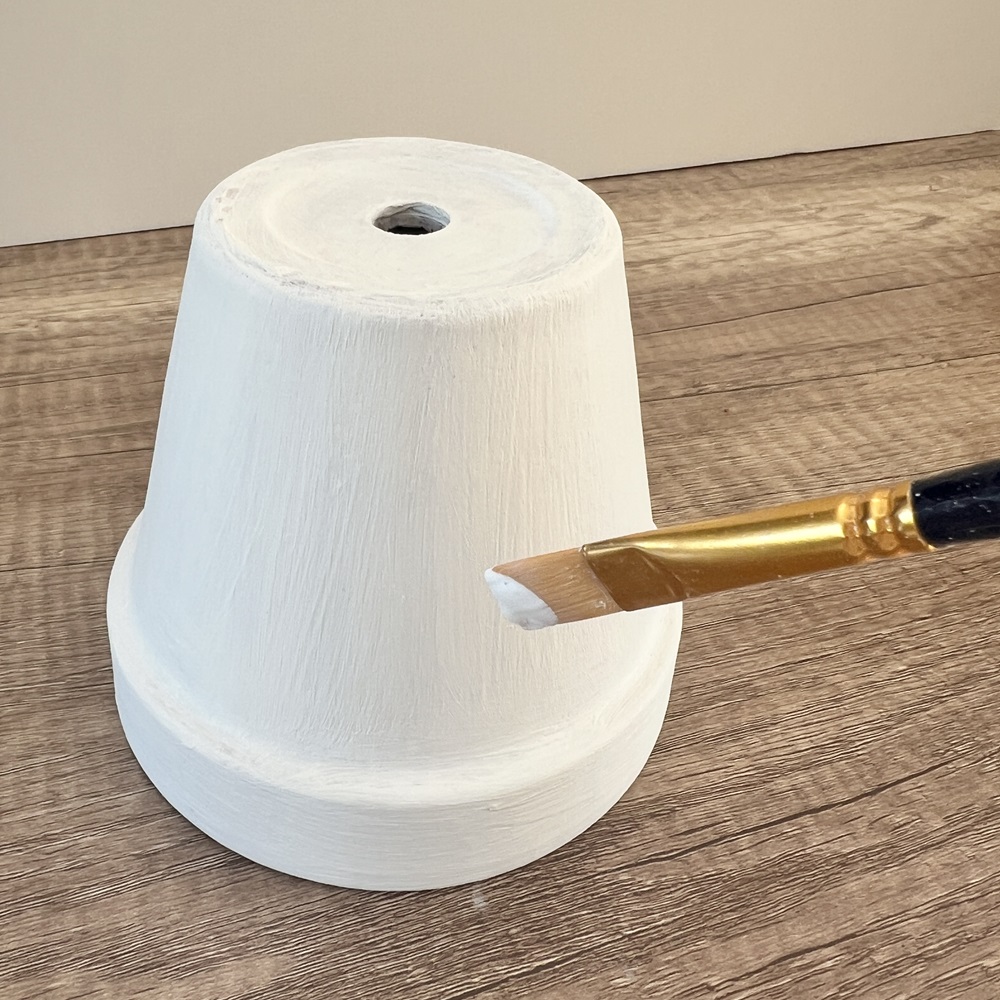
Step 1
Take your plant pot and paint the outside with white acrylic paint. Leave to dry. You may need to do 2-3 coats of paint for full coverage. Allow to dry after each coat of paint.
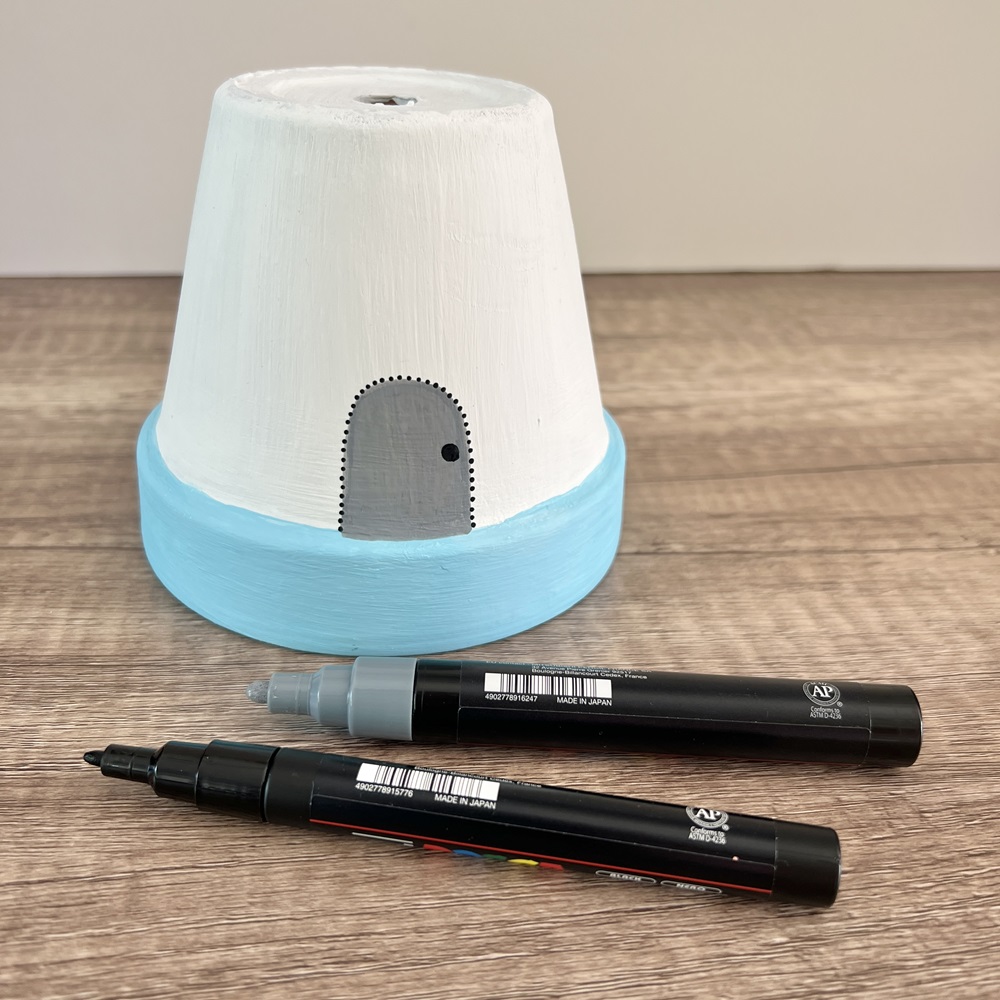
Step 2
Using your paints and paint pens, turn the pot upside down and paint a door just above the rim of the pot. Add any other painted designs you would like on the house. When dry, add a coat of clear sealer. Put the pot to one side and leave to dry.
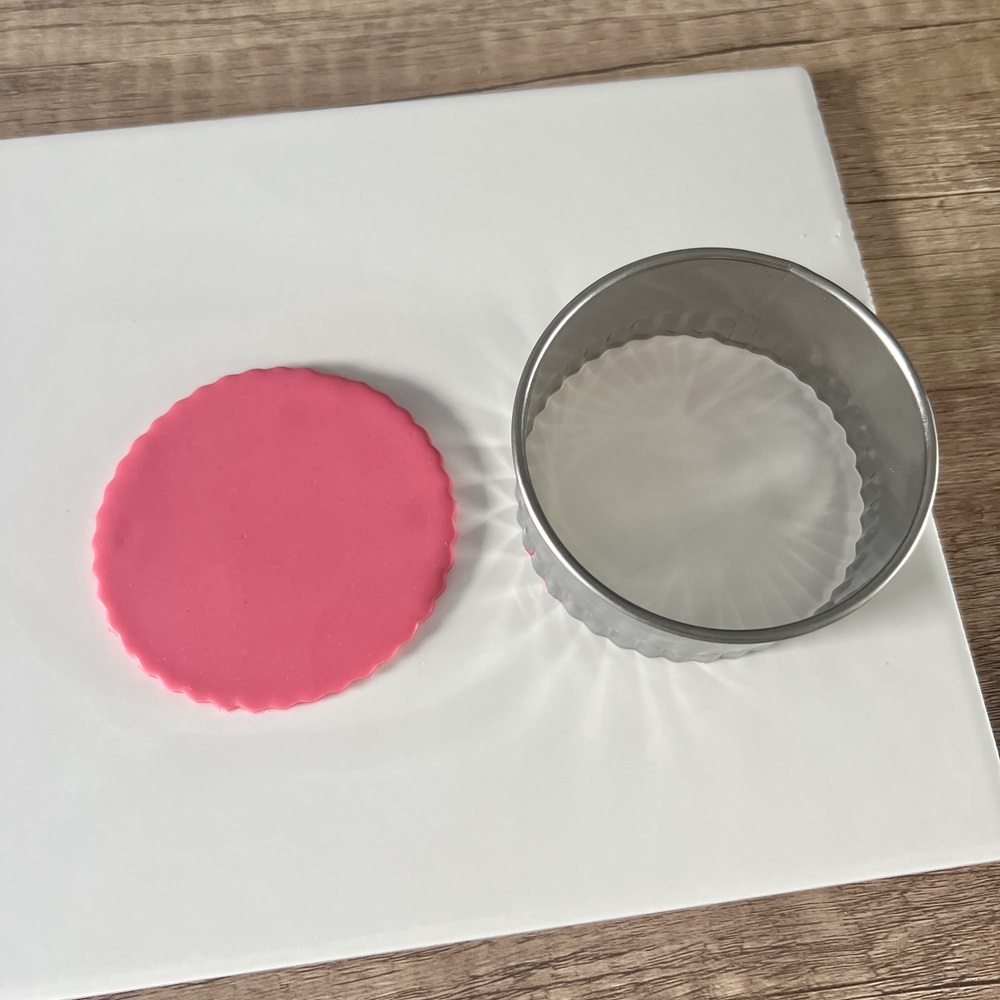
Step 3
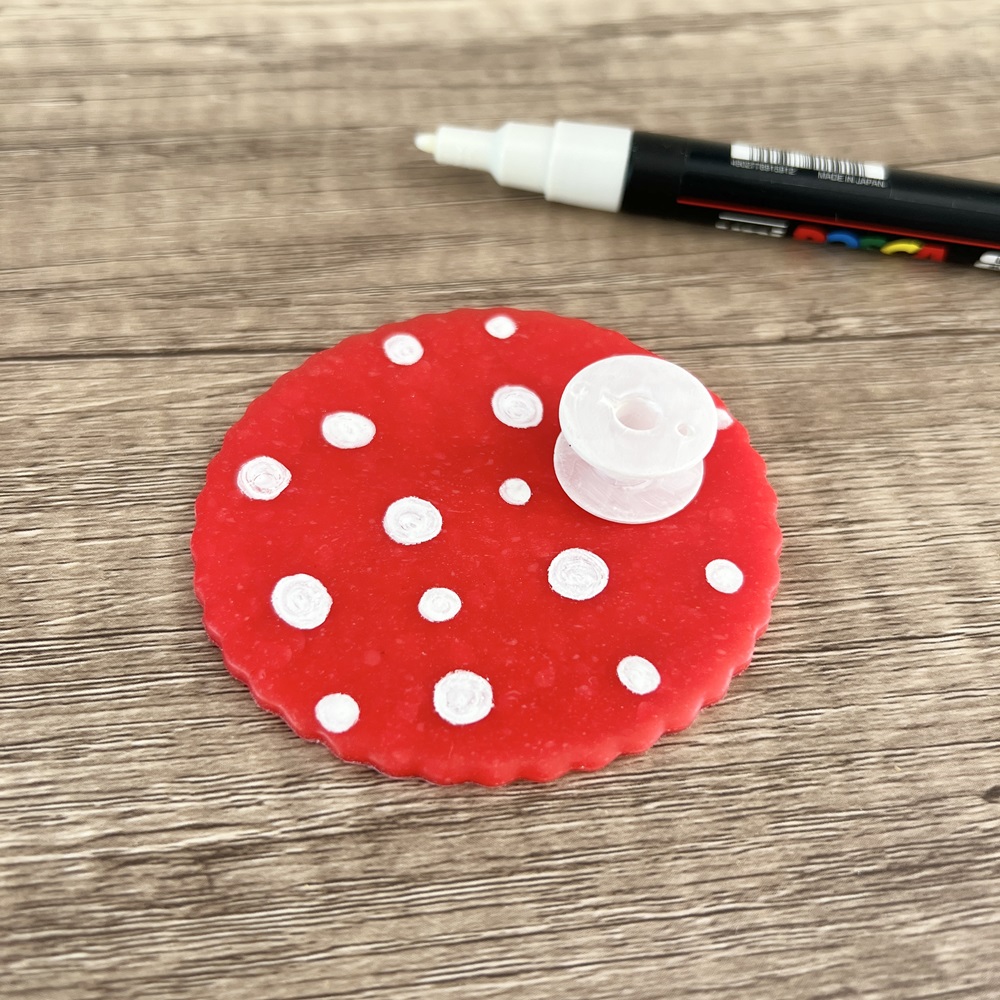
To create the roof of the house –
Ensure the working area, tile, and rolling pin are clean and lint free.
Take 25g of polymer clay and warm it up by rolling it with your hands and with the rolling pin on the tile. To check if the clay is ready to use, roll it out, pick it up and fold it in half. If the clay is ready to use, it will not break or crack when folded.
When the clay is ready to use, roll it out on to the tile, 3mm thick.
Take the cookie cutter, cut the roof shape out of the clay. Remove the excess clay from the tile.
Follow the manufacturer’s instructions to bake the clay. The clay can be baked directly on the tile.
When baked, remove from the oven and leave to cool.
Step 4
Take the roof you have made and decorate with spots of white acrylic paint.
Paint the bobbin in white acrylic paint. When dry, glue the bobbin to the roof.
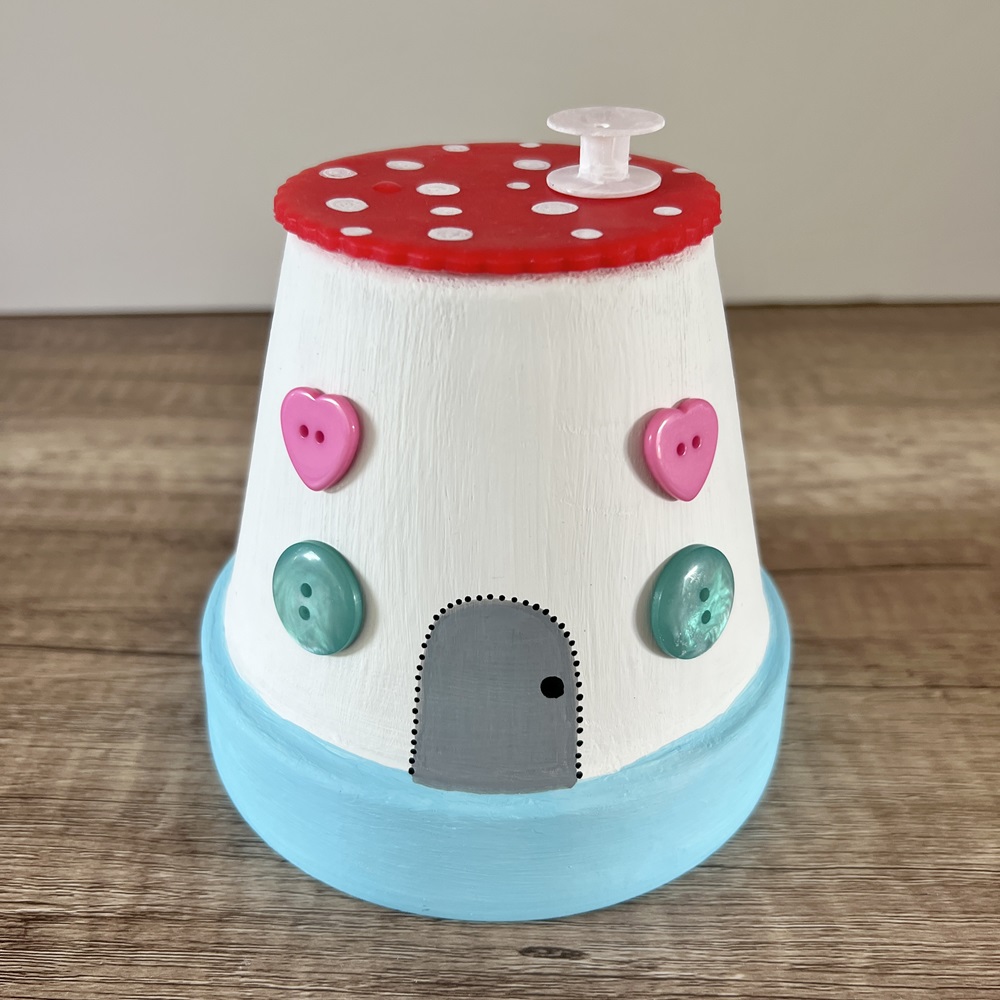
Step 5
Apply glue to what is now the top of the plant pot and place the roof you have created on to the glue to stick it on.
Apply glue to the back of each ‘window’ button and glue them to the plant pot as windows.
Step 6
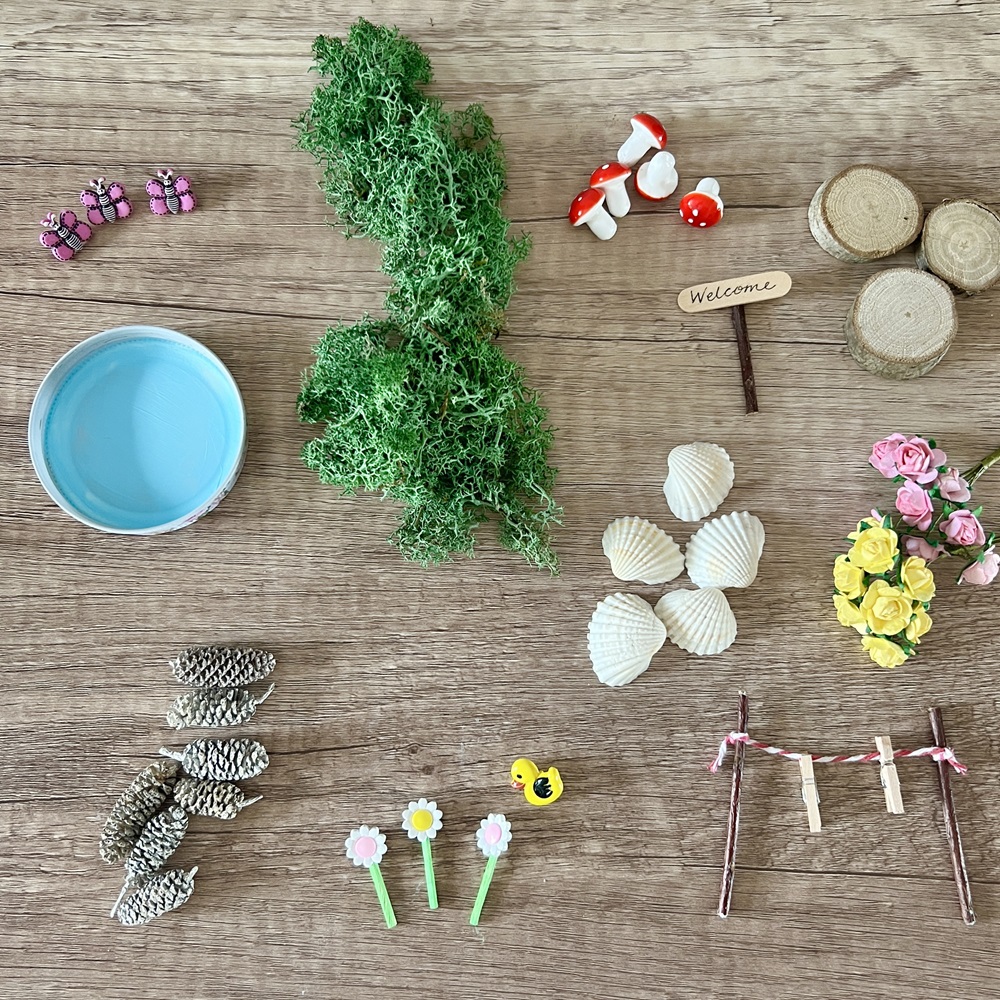
Collect together the pieces you would like to add to your garden.
Along with the embellishments, we used blue acrylic paint to paint inside the jam jar lid (pond), and we also created some items:
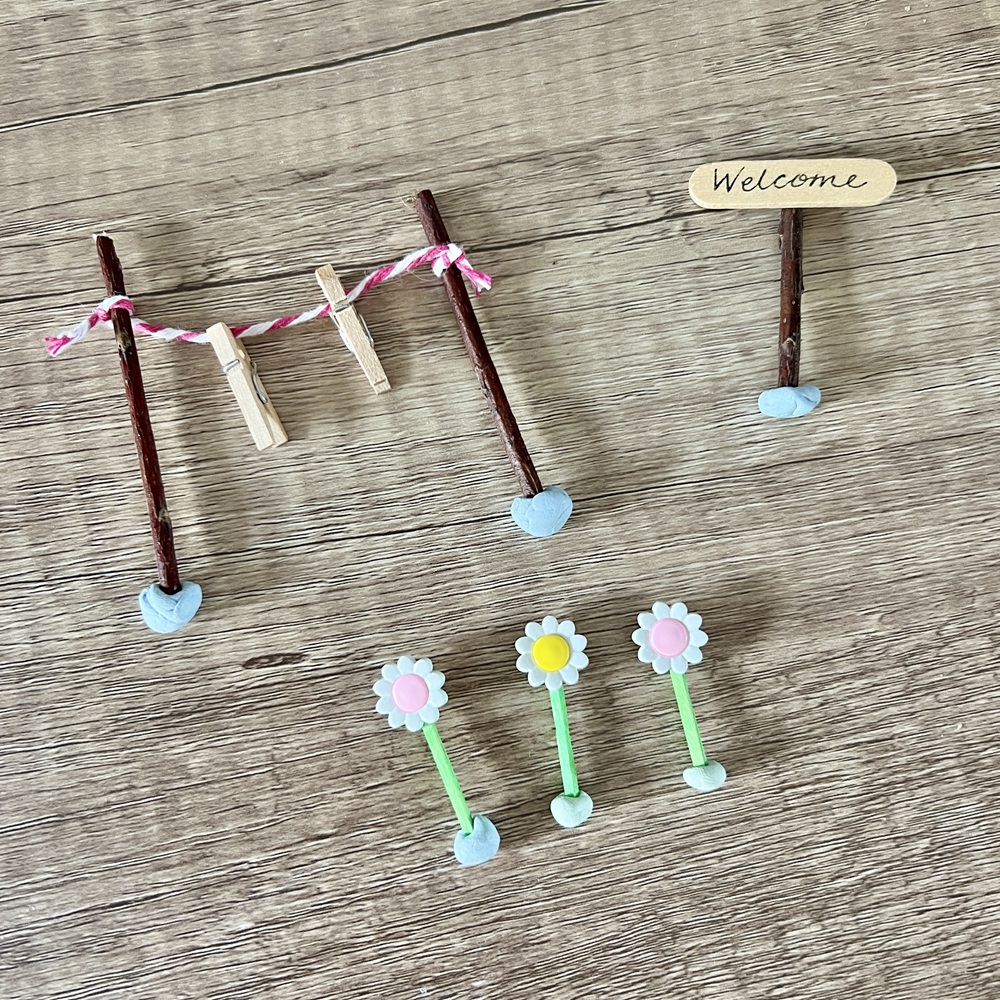
- Washing line
Take two twigs (length of 5cm each) and a piece of twine approx. 10cm long
Knot one end of the twine near to the top of one twig.
Knot the other end of the twine near to the end of the other twig.
Peg two small pegs on to the twine,
Add a small ball of sticky tack to the bottom end of each of the twigs. - Welcome sign
Take the mini lolly stick and write ‘Welcome’ on to it in acrylic paint pen.
Add a layer of sealer and leave to dry.
Glue a 5cm twig to the middle of the back of the mini lolly stick.
Add a small ball of sticky tack to the bottom of the twig. - Flowers
Using the acrylic paint/pens, paint the matchsticks green.
Apply a small amount of glue to the back of each flower button and add a matchstick to each one.
Add a small ball of sticky tack to the bottom of each matchstick.
- Washing line
Step 7
Take the plant pot saucer and place the house you have made at ’12 o’clock’.
Add a layer of the aquarium stones to the saucer, ensuring all of the saucer is covered.
Step 8
Add the other embellishments to the saucer, moving the stones as you do so.