

Hello April! This month Kirstie has provided some fantastic projects to welcome the spring!
Embroidered T-Shirt
Skill level: Beginner
You will need:
- Cotton t-shirt (pressed)
- Embroidery threads
- Needle
- Scissors
- Dissolvable/magic paper for embroidery
- Iron-on ‘cover-a-stitch’/stabiliser
- Iron
- Pencil
- Bowl of water
Tips and ideas
- Use small stitches where possible.
- You may want to place the t-shirt into an embroidery hoop when stitching.
- You could embroider text instead of images.
Step 1
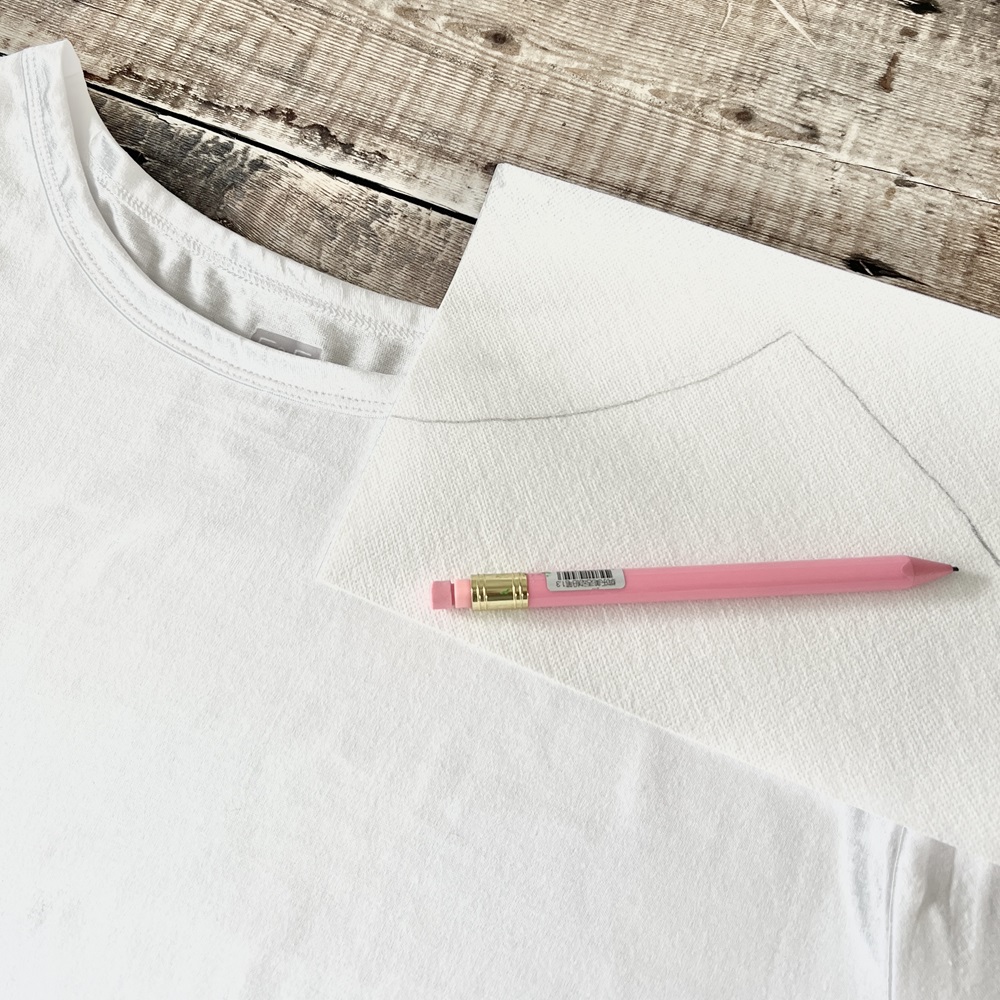
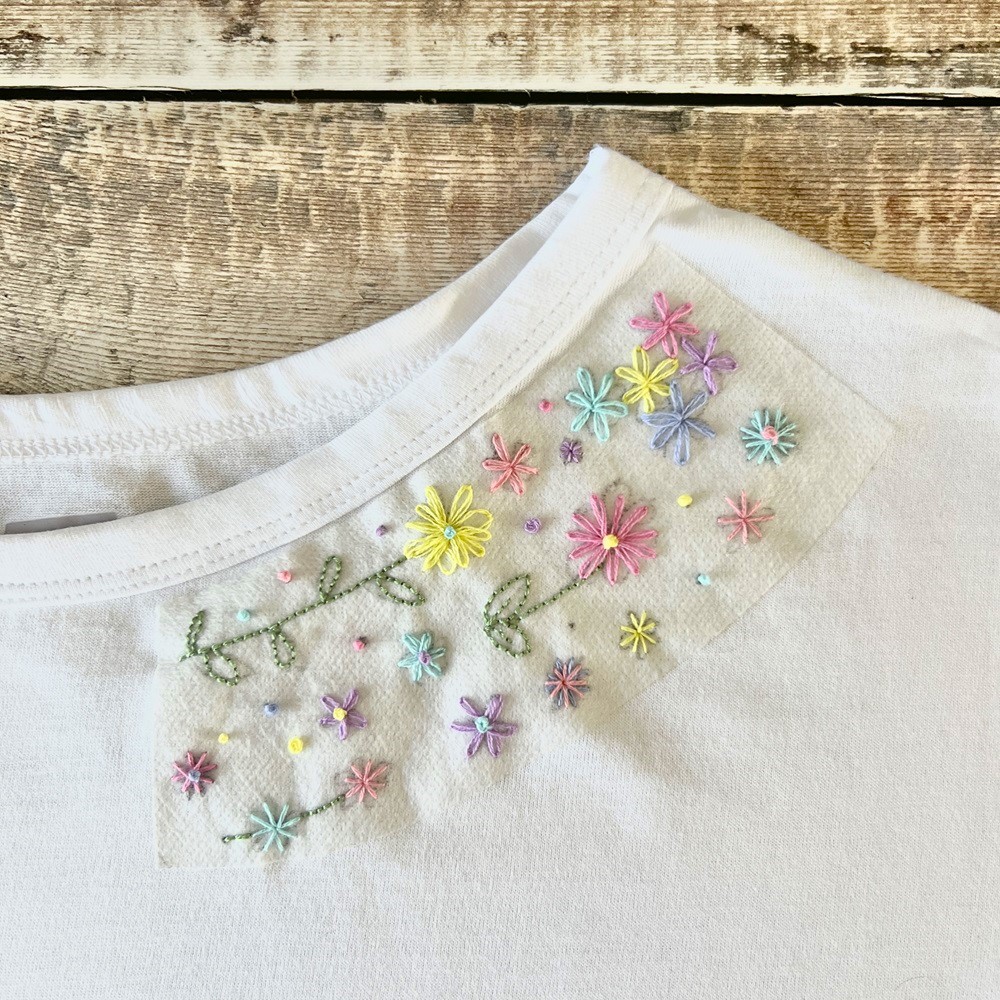
Look at your t-shirt and decide on where you would like to put your design and the size you would like it.
Draw an outline of the area on to the dissolvable paper.
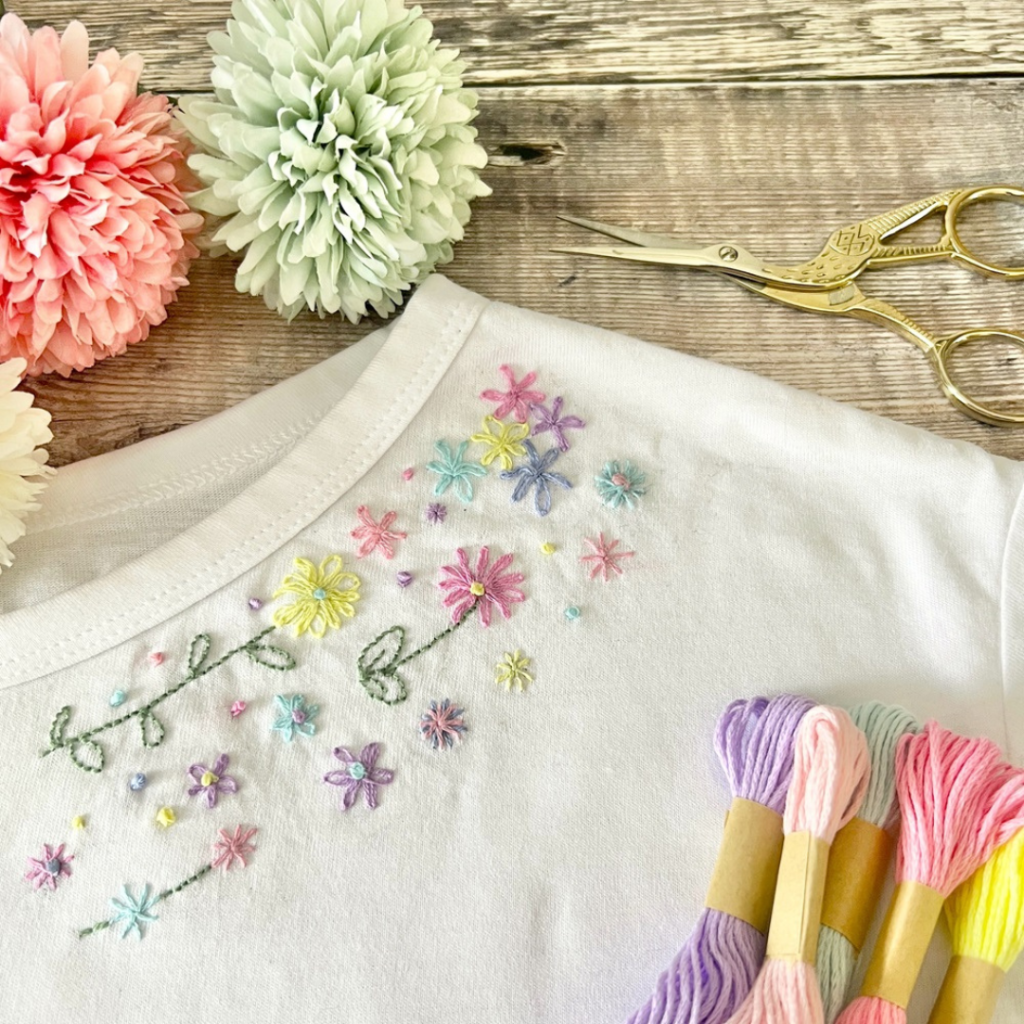
Our design is at the top of the t-shirt around one half of the neckline.
Step 2
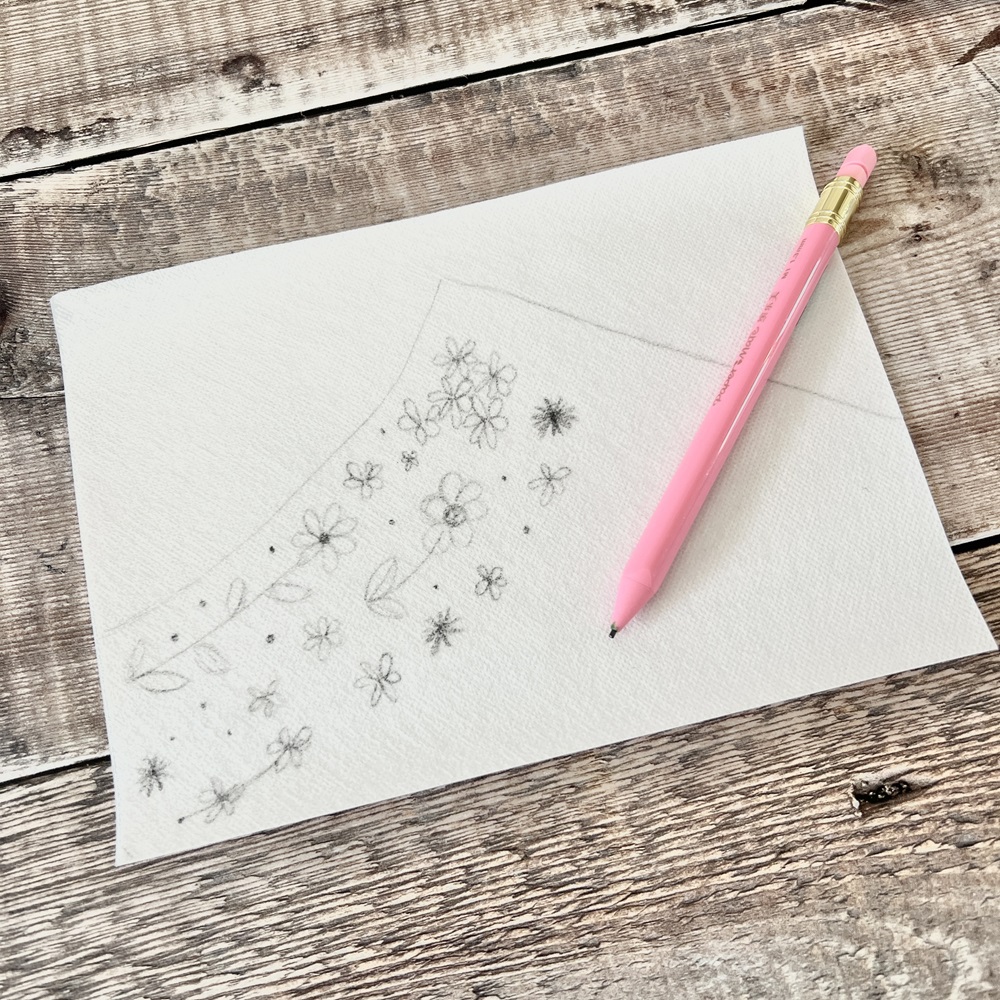
On the dissolvable paper, draw the design you would like to embroider within the area you have drawn in step 1.
The design we have drawn is made up of flowers, stems, leaves and dots.
Step 3
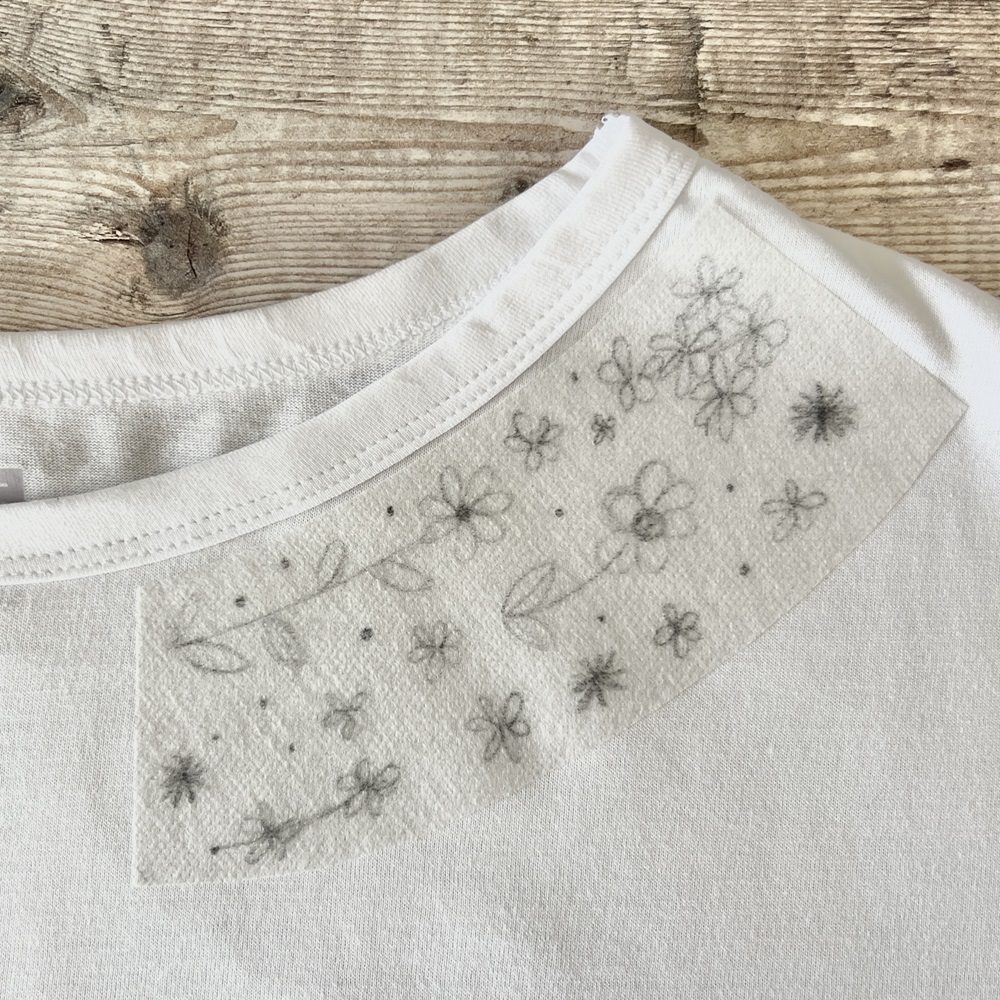
Cut the design out of the dissolvable paper as one piece.
Ensuring the t-shirt is flat on the table, remove the sticky backing of the dissolvable paper and place it on to the area of the t-shirt you would like to stitch.
Step 4
Separate two single threads from the skein, thread your needle with the two threads and add a knot at one end.
Embroider the pattern you have drawn on to the fabric.
On our design we have used four basic stitches – see stitches listed below.
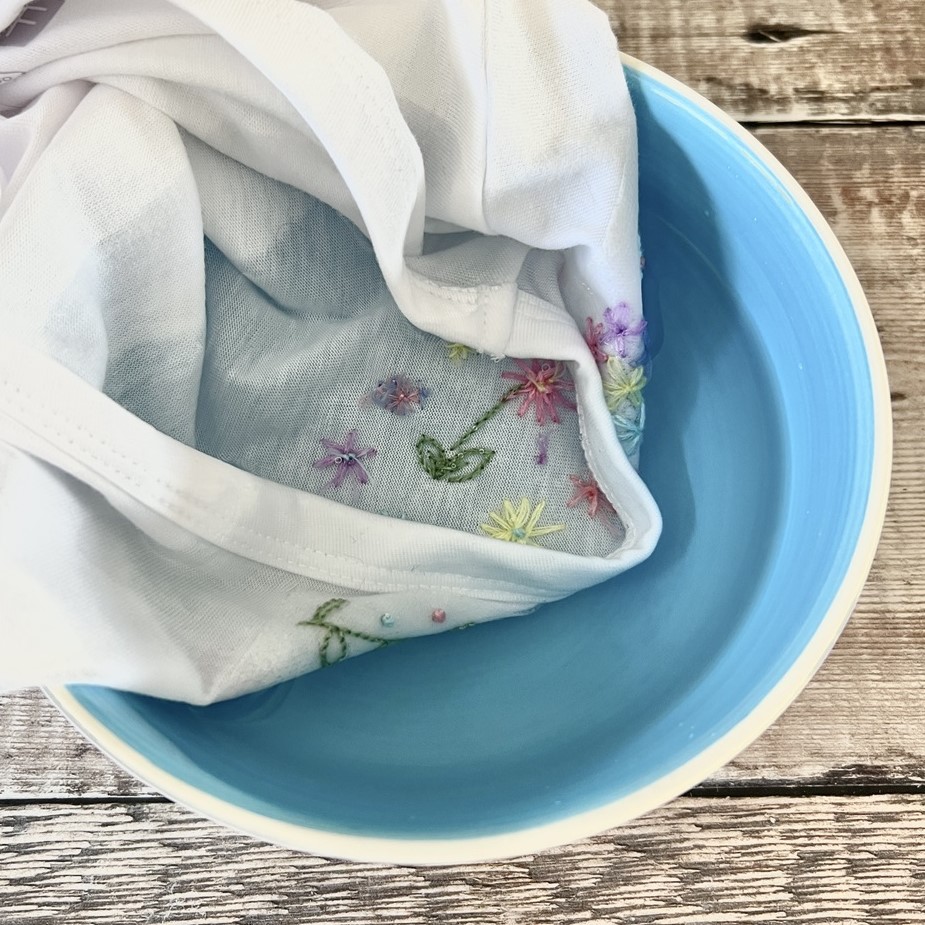
Step 5
When the embroidery is complete, place the area of fabric into a bowl of water or run it underneath a cold tap to remove the dissolvable paper.
Leave the t-shirt to air dry.
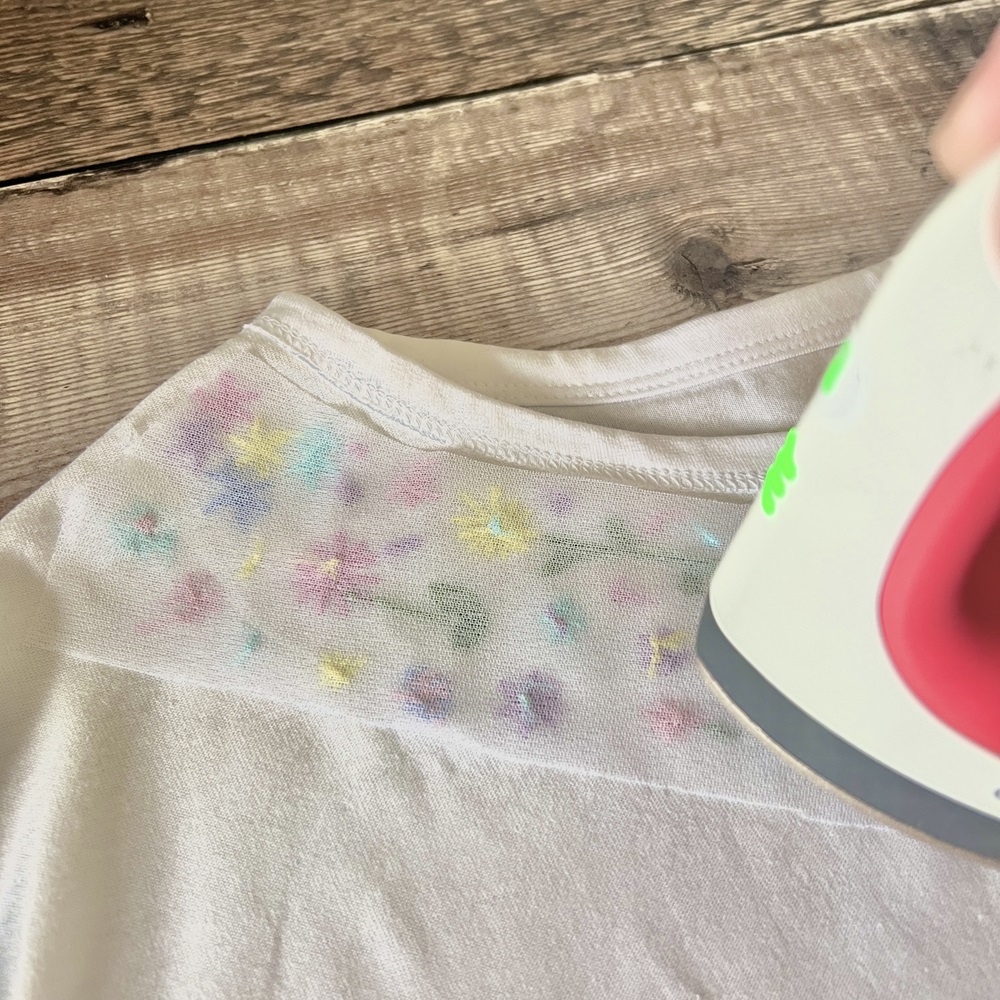
Step 6
Turn the t-shirt inside out.
Cut out a piece of the iron-on stabiliser, slightly bigger than the back of the stitched design.
Place the rougher side of the stabiliser face-down onto the back of the stitching.
Press the stabiliser onto the fabric with the hot iron (check the manufacturer’s instructions for the length of time to press).
Stitches used in this design
Lazy Daisy Stitch (flower shapes with petals)
Bring your needle up from the back to the front of the fabric, in the middle of the flower. Pull thread through leaving a petal shaped piece of thread on top of the fabric. Reinsert the needle into the middle of the flower, just next to the original hole, leaving the petal shaped piece of thread. On the edge of the petal, make a tiny stitch, catching in the end of the petal. Repeat for all of the petals on your flower.

Back Stitch (stems and leaves)
Bring your needle up from the back of the fabric to the front, create a small stitch approximately 5mm long. Bring the needle back up through the fabric from the back to the front, approximately 5mm from the previous stitch. Then, push the needle back through the hole at the end of the previous stitch.

Straight Stitch (pointed flowers)
Bring your needle up from the back of the fabric to the front, create a stich approximately 10mm long. Continue making stitches as below.

French Knot (dots)
Bring your needle up from the back of the fabric to the front where you would like the knot to sit. When you have pulled all of the thread through, take the thread near the fabric and wrap it around the needle three or four times. Holding the thread taut in one hand and your needle in the other, reinsert the needle into the fabric in the original hole or as close to it as possible. Do not let go of the thread in your hand until you have pulled the needle all the way through.

Embroidered T-Shirt Step-by-Step Guide download the printer friendly pdf here
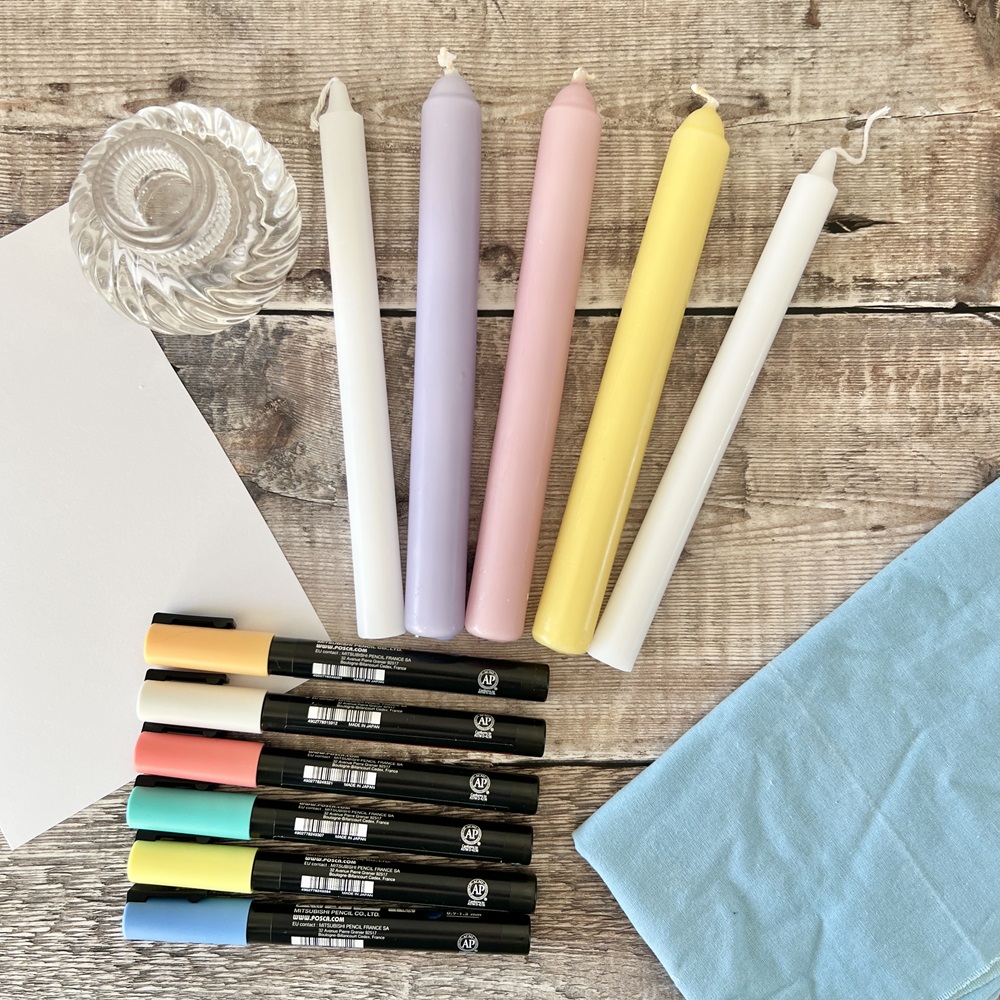
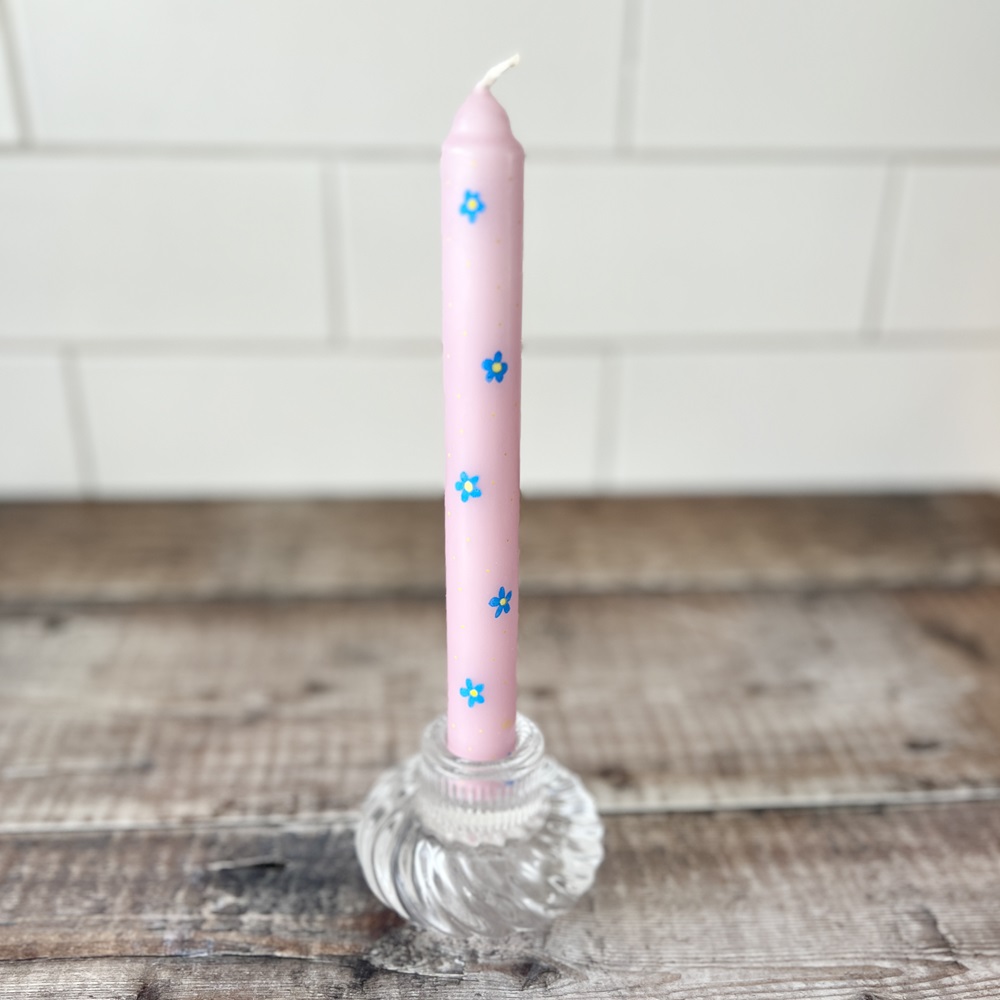
Painted Candles
Skill level: Beginner
You will need:
- Plain dinner candles
- Water-based, non-toxic, acrylic paint pens
- Clean cloth
- Candlestick holders
- Water
- Scrap paper (optional)
Tips and ideas
- Handle the painted candles with care as the paint can chip.
- If you don’t have acrylic paint pens, you could also use water-based, non-toxic acrylic paints, using fine brushes to apply to the candles.
- You could use different coloured candles and paints to create candles for various occasions and festivities.
- Small votive sized candles could be painted with names and used as table settings for a dinner party or wedding.
Important information
- Do not paint on the top of the candle near the candle wick.
- The candles should be used for decorative purposes only.
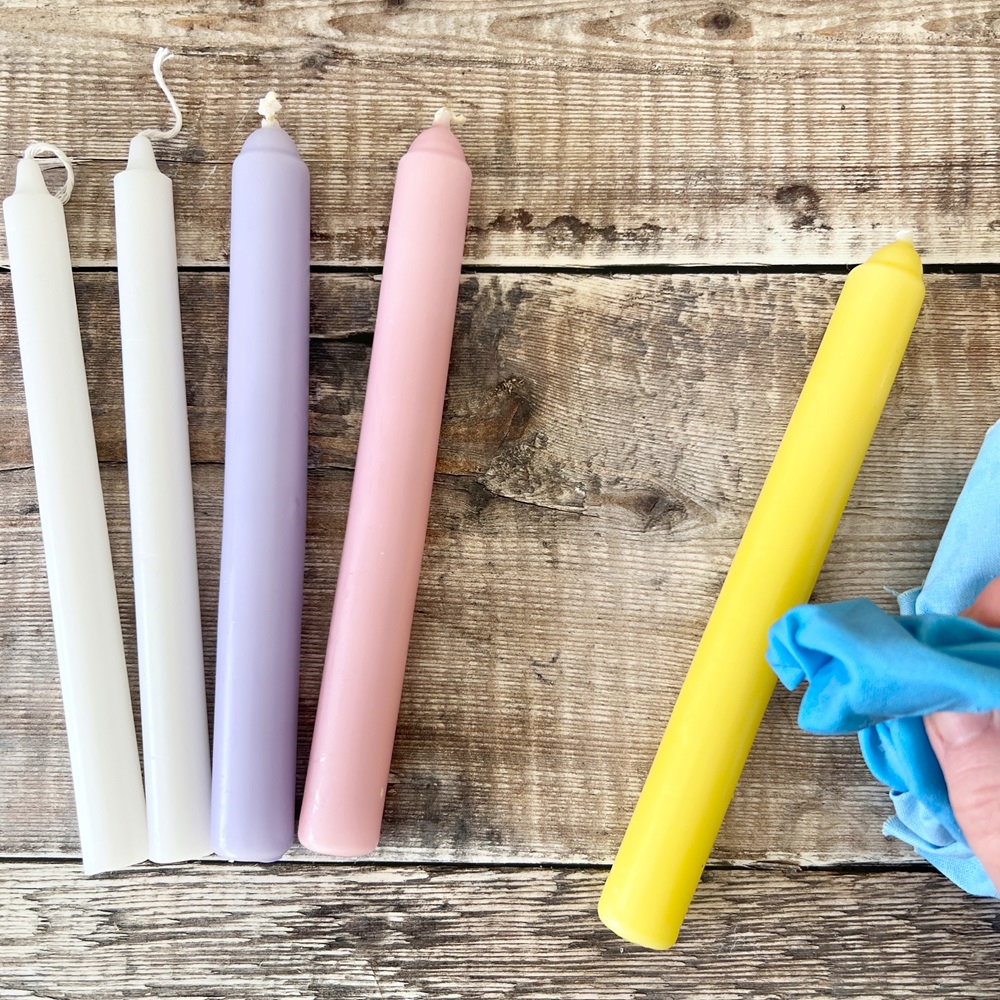
Step 1
Using your cloth and the water, wipe down the candles. Leave to dry.
Step 2
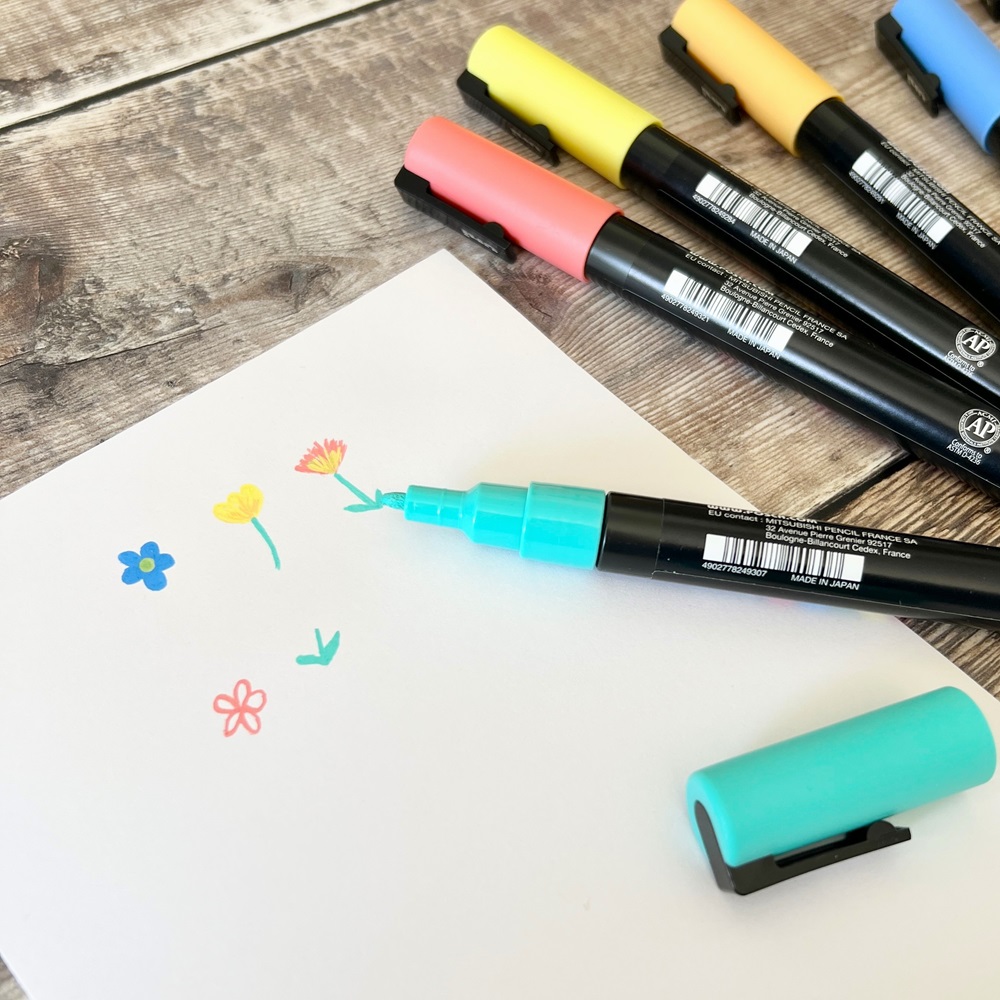
You may wish to practise your designs on paper before painting on to the candles.
Don’t forget you will be drawing on to a curved surface.
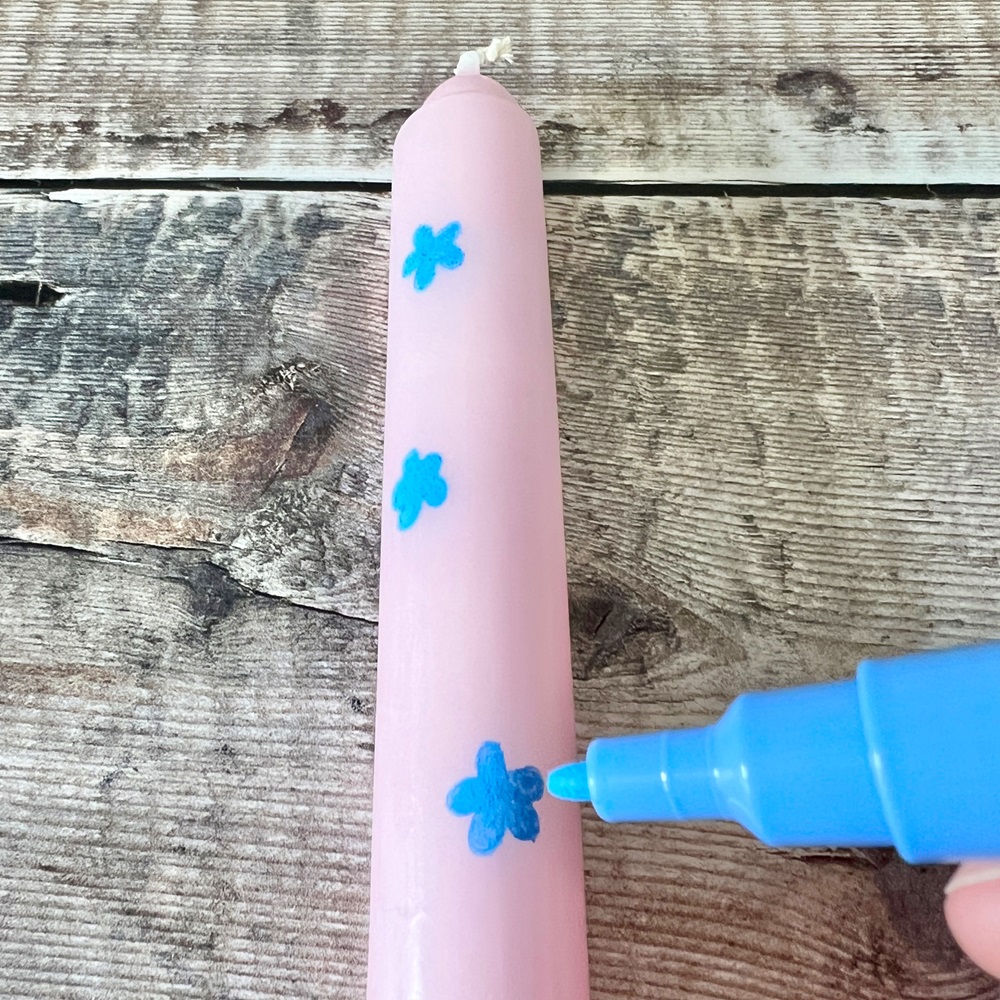
Step 3
Lay the candle on to the table and use the paint pens to draw on your design.
Place the candle into the candlestick holder and leave to dry (this will take approximately five minutes).
You may need to allow one side of the candle to dry before painting the other side to prevent smudging.
Step 4
When the paint is dry, apply a second coat, place back in the candleholder and leave to fully dry.
Painted Candles Step-by-Step Guide download the printer friendly pdf here