May has Mental Health Awareness Week and also Hedgehog Awareness Week happening during the month.
All the May makes are hedgehog related and I don’t apologise for this as I just love these cute little critters as I know many others do.
As hedgehogs should have now come out of hibernation and finished nesting it was the ideal time to make and position a hedgehog hotel for hopefully future guest(s) to investigate. I love seeing a glimpse of it at the bottom of the garden!
I also love the needle felted hedgehogs it is always a pleasure for me to create something needle felted.
The remote control holder is another thing I enjoy making and indeed have made many other versions in the past.
I hope you enjoy these projects as much as I do and are inspired to make something hedgehog related.
Gillian Cain, Bowes Belles WI, Tyne & Wear South Federation
Hedgehog Hotel
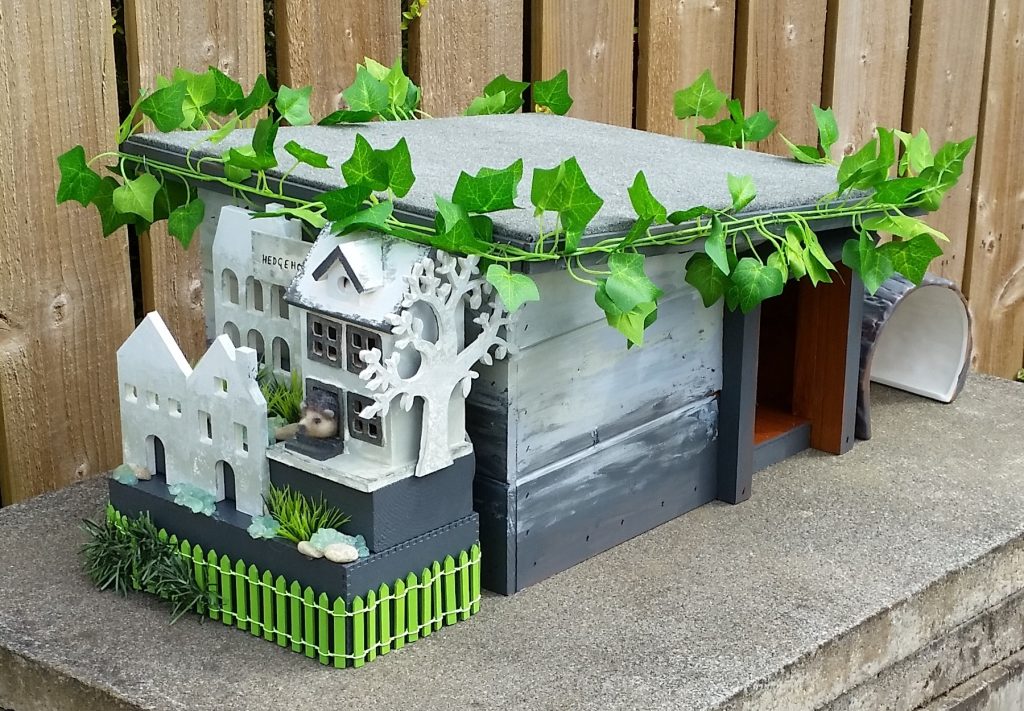
Hedgehog Awareness Week takes place every year at the beginning of May to raise awareness of their declining UK population. We have sporadic hedgehog garden visits during the year, not sure if it is one or more but we feed and water when we see them. I’ve wanted a hedgehog house in the garden in the hope we can provide a safe environment if they choose to take up residence. Hedgehogs prefer to live in a countryside habitat, woodlands and hedgerows, but as these are also declining more are now living in urban garden areas. We are on a quiet estate so I am hopeful that we may attract some especially as I’ve always had a soft spot for the cute little critters. As the time of year comes nearer to hibernation/nesting we will add bedding and make the hotel a warm cosy and safe place.
Materials:
- Readymade hedgehog house – after much research I chose this version as it was predator proof, solid and weatherproof. It is made from responsibly sourced timber with a fixed floor, removable roof for easy cleaning and roomy enough for more than one.
- Paints in colours of your choice – I ensured paints used were animal/child friendly, water based with very low VOC (volatile organic compound) and only painted it on the outside.
- Additional decorative ‘hedgehogtel’ items were made and added but this is personal choice
Instructions:
Using one coat of paint add layers of dark grey, sage green, baby blue and cream in an ombre effect from bottom upwards. I painted with a brush initially and started to finger paint after that to create a weathered look on the walls of the hotel. It is going to get very well weathered in our UK climate! As May also has Mental Health Awareness Week I thought a bit of messy painting would add a fun mindful element to the making of it. It was fun and actually a good way to paint the uneven surfaces and pull away small splinters as I felt them.


I added a small hedgehogtel complex at the side for something pretty to see looking down the bottom of the garden where it is now homed. There is a smaller ceramic shelter at the other side to add bedding for a ‘guest’ to move into the main house themselves but also keep water/food dishes in as well. If either proves off-putting I can easily move elsewhere.
The hedgehogtel complex below is made from two offcut pieces of timber we had as door jambs, painted to match and joined together on top of each other with a plentiful amount of hot glue to create a stepped unit. When I looked into hot glue properties they have no harmful emissions so was happy to use. I then painted wooden house blanks and wooden tree blank in the matching colour scheme, arranging them on the steps before hot gluing down securely. Small pebbles and fake greenery was used to infill and landscape, finishing off with a hedgehogtel notice. The miniature fence at the bottom was wrapped around and tied at the back with string in case it needed removal. I added a mini needle felted hedgehog peeping out of the door.


A twig has been added over the doorway to check on any movements in and out. Now we wait to see if we have future guests – free lodging and meals – let’s hope they don’t have wild late night parties! The hedgehogtel is going to be a nice garden feature either way.
Needle Felted Hedgehogs
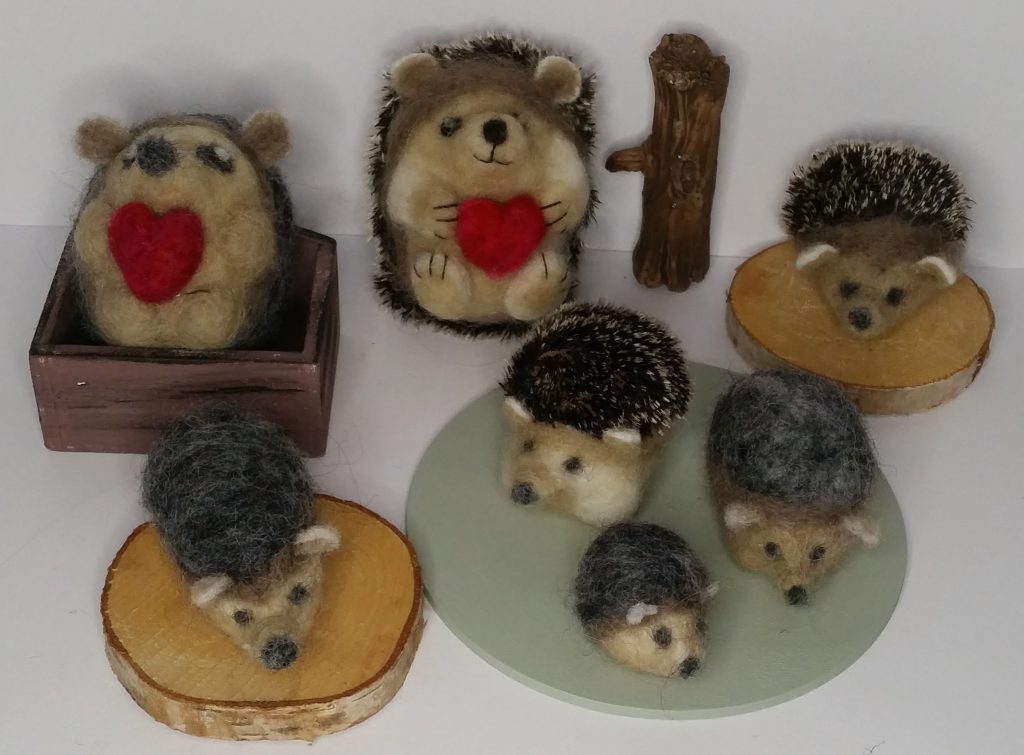
May has Mental Health Awareness Week and also at the beginning of May, Hedgehog Awareness Week. I’m never happier than when I’m needle felting something …… anything. The rhythmic prodding and crunching sounds leading to a make, which started off as nothing more than some ‘fluff’ into an animal, toadstool, fairy or whatever. I adore hedgehogs so knew this was one of the projects I needed to do for the May blog, in particular the cute ‘hedgehugs’. I’ve used some helpful cheats for these making it a lot easier on the hands as there is less needle felting. I’ve used wadding and pre-felted wool eggs as a core on some, but also show how to make a core from scratch with rough wool fibres.
Materials:
- Felting mat and felting needles (always use a felting mat or sponge to prevent injuries and needle breakages)
- Wadding, pre-felted wool eggs, wool fibre toy stuffing, hedgehog coloured (short haired) rough wool felt fibres
- Alternative and optional for hedgehog overcoat – hedgehog fur which has to be cut to size/shape then hand sewn on
- Needle Felted Hedgehog Instructions PDF
Instructions:
- The hedgehogs have been given different settings making them into home décor pieces. The hedgehogs are for purely decorative purposes and should not be mistaken as a toy.
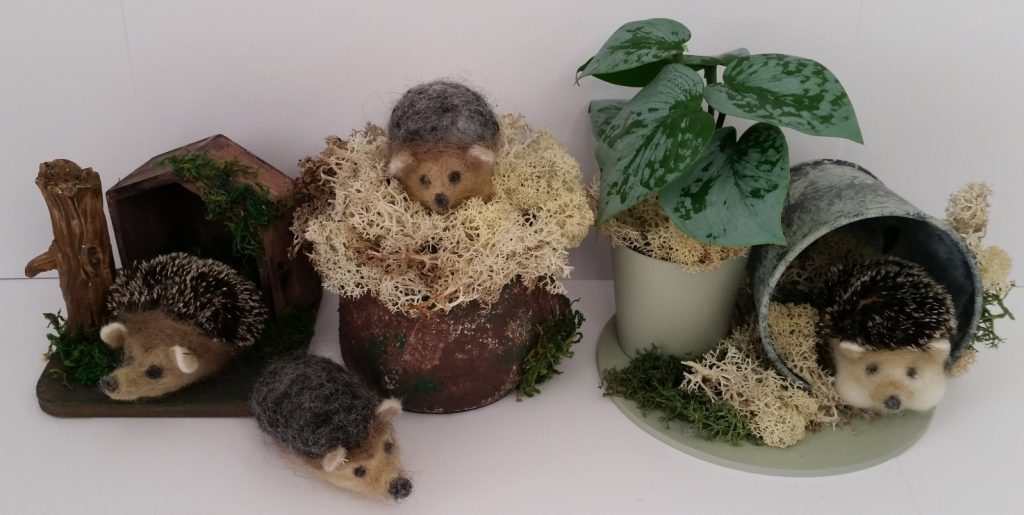
- Below on the left a painted wooden coaster, small open fronted house shape and fairy garden mini tree trunk has been assembled and glued together with small amounts of reindeer moss added.
- In the middle reindeer moss has been glued to a bark effect tree stump tea light stand.
- On the right a larger round wooden coaster, small tin pot container and fake plant/plant pot were painted to match each other, assembled and glued together with more of the same reindeer moss added.
- The hedgehogs can be glued in place or left loose to change position.
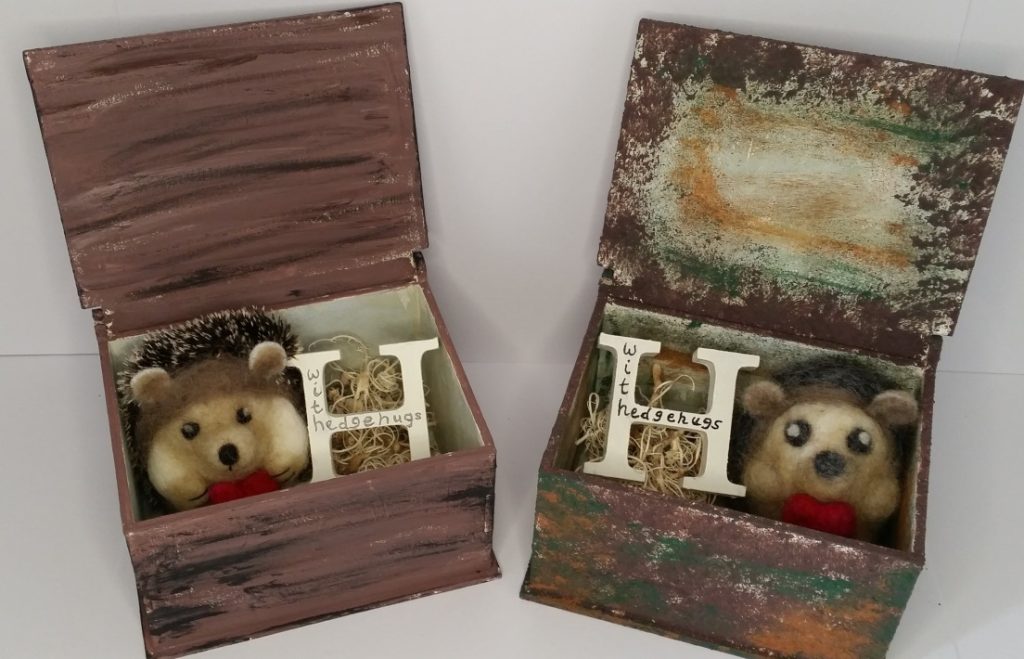
Below I added ‘hedgehugs’ to self-assembly flip top lid boxes for a hidden surprise element.
- The box on the left has been painted wood like using different colour browns with a small swipe of black at the end. It has wood clay on the lid fashioned to look like tree bark.
- The box on the right has been painted to resemble rust as if it has just been dug up from the ground. I stippled with rust effect texture paste first using dark brown, then small amounts of green and rusty texture paste. It does look better in real life.
- Each box had sisal bedding added along with a wooden painted letter H(edgehog) saying ‘with hedgehugs’.
This would be a good gift for someone who needs a ‘hedgehug’ especially during Mental Health Awareness Week.
Hedgehog Remote Control Holder
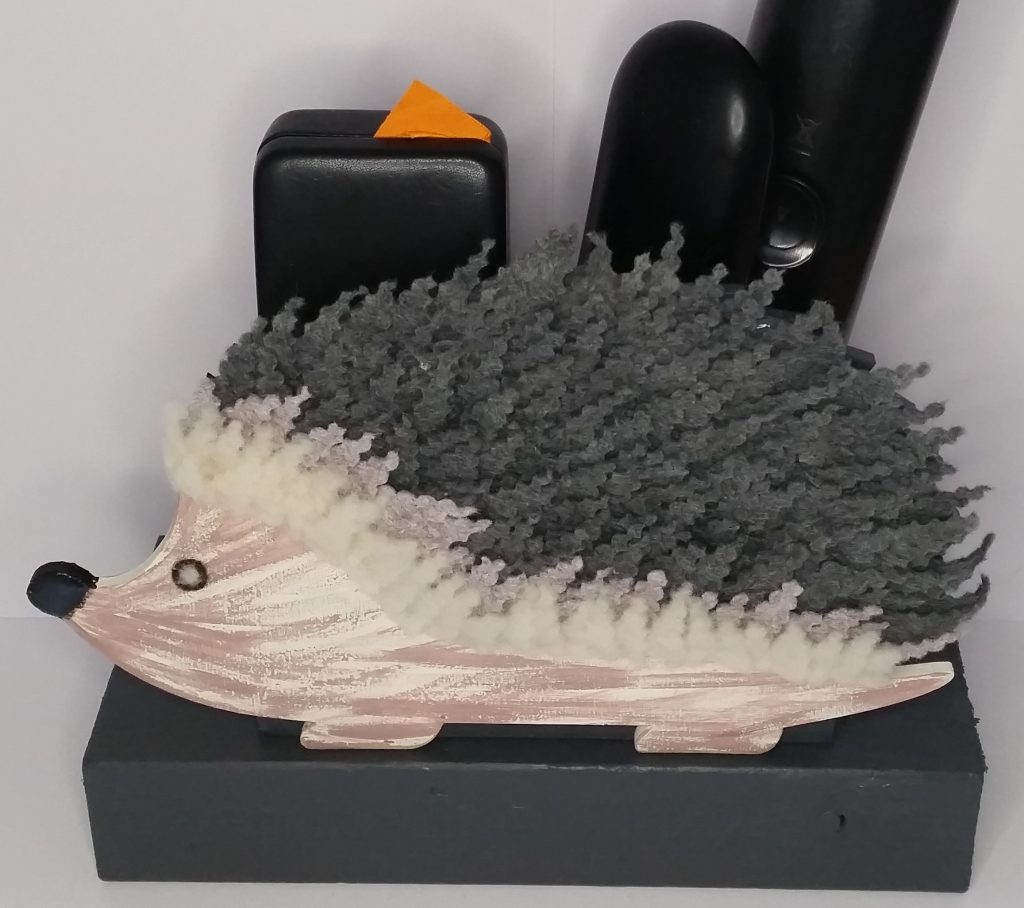
For this hedgehog awareness week project I’ve created a mixed media piece to house all those remote controls and USB leads we seem to collect these days but could be used for anything. This is a quick and easy make that could be adapted for any wooden animal blank that has feathers, fur or scales by simply changing paint colours and fabrics used. All our remote controls are now stored in the chicken version (image at the bottom) so they all have a home at the end of the day and are easy to find.
Materials:
- MDF/plywood/wooden hedgehog blank, small wooden box/letter holder
- Paints, paintbrush, hot glue gun
- Scallop scissors, hedgehog coloured felt or other fabric choice
Instructions:
Paint all sides and surfaces of the hedgehog blank. It is a good idea to paint in colours similar to the fabric prickles being added so gaps don’t show through. Paint the box to match.
Cover the front with grey felt prickles as shown by hot gluing down with a small blob on the straight edge of the ‘prickle’ leaving the tip of the triangle loose so it sticks up and out giving a more realistic look. Glue starting at the top edge of the back in layers covering the painted grey area, overlapping layers underneath each other as shown. As you near the bottom add a layer of beige felt prickles and a final layer cream felt prickles for contrast.
I used scallop scissors to cut out the prickles but zigzag or straight would look equally as good. This was a great stash buster for me using scraps left over from previous projects and workshops. Keeping a bag of scraps to dip into is so useful especially when you just need small pieces.
Add a painted nose and eye. I actually glued small circles of felt on this version but have also previously used a mini button as an eye. Glue the finished hedgehog to the side of the box. I added a red felt heart on the inside of the box to cover the heart shaped hole in the box, adding a hidden ‘hedgehug’ which I thought was a nice touch.

The chicken versions below used the same style wooden chicken blank each time with different style and size boxes/letter holders, some of which were large enough to hold cookery books etc, a nice addition for any kitchen.


