

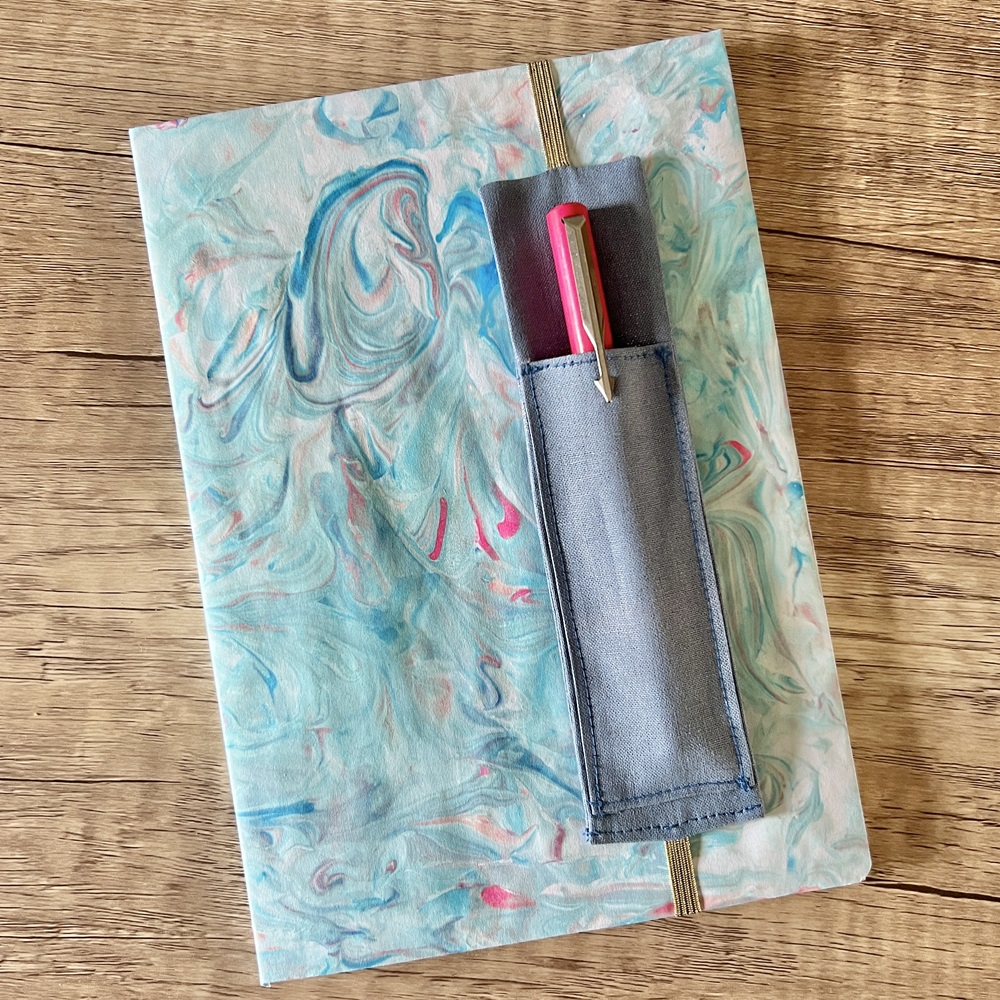
Hello May! This month Kirstie has provided some fantastic projects for you to try at home; A marbled journal cover and handy pen holder…
Marbeled Journal
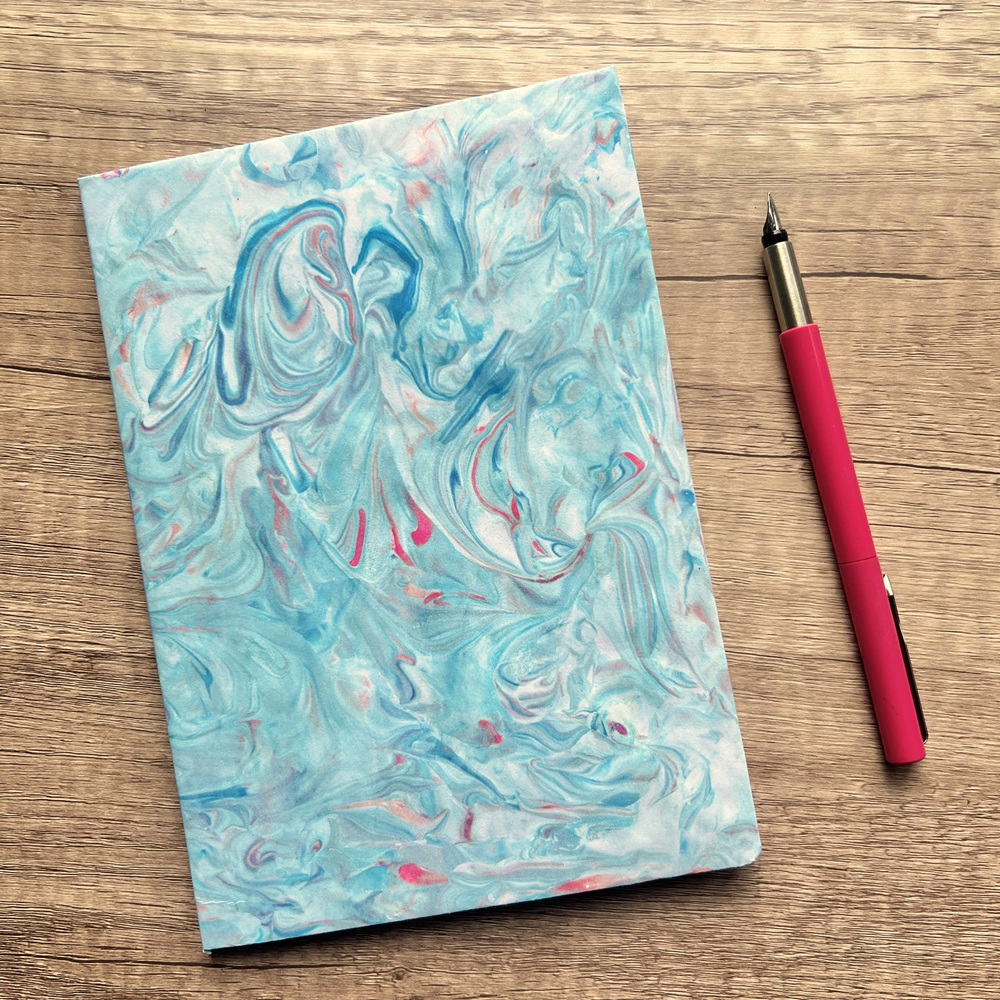
Skill level: Beginner
You will need:
- 200ml can of shaving foam (not gel)
- A3 Paper
- A5 notebook
- Food colourings
- Plastic tray/shallow plastic box
- Paper straw
- Newspaper/table cover
- Scissors
- Item for scraping – such as a piece of cereal box approx. 30cm x 10cm
- Spatula
- Pencil
- Double sided tape
- Ruler
- Protective gloves
To make:

Step 1
Measure the width of the notebook (front x 2, plus the width of the spine) and the vertical height of the notebook.
Add 4cm to each of the measurements.
Our notebook was:
Width: 14.5cm + 14.5cm + 1 cm = 30cm + 4cm = 34cm
Height: 21cm + 4cm = 25cm
Cut a piece of the A3 paper to the size measured.
Step 2
Take the tray and add a layer of the shaving foam, approximately 1.5cm deep. Spread the foam evenly with the spatula.

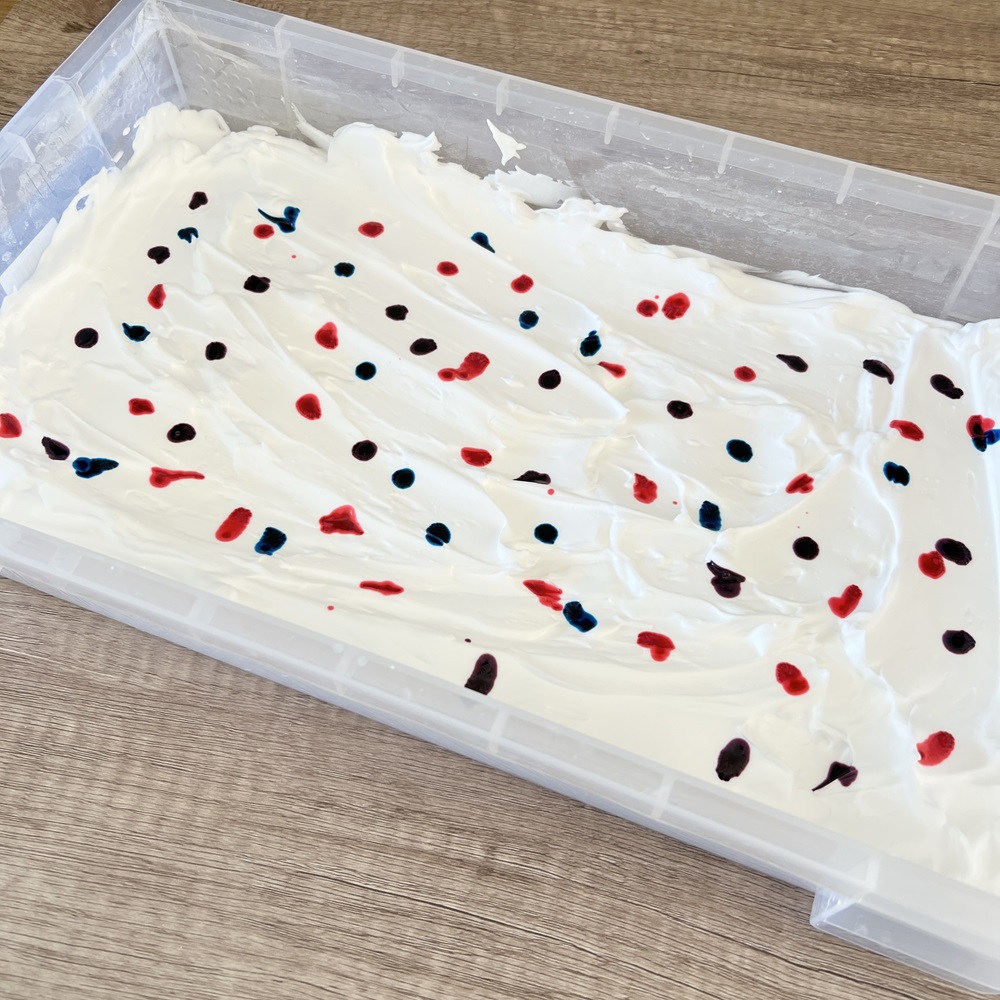
Step 3
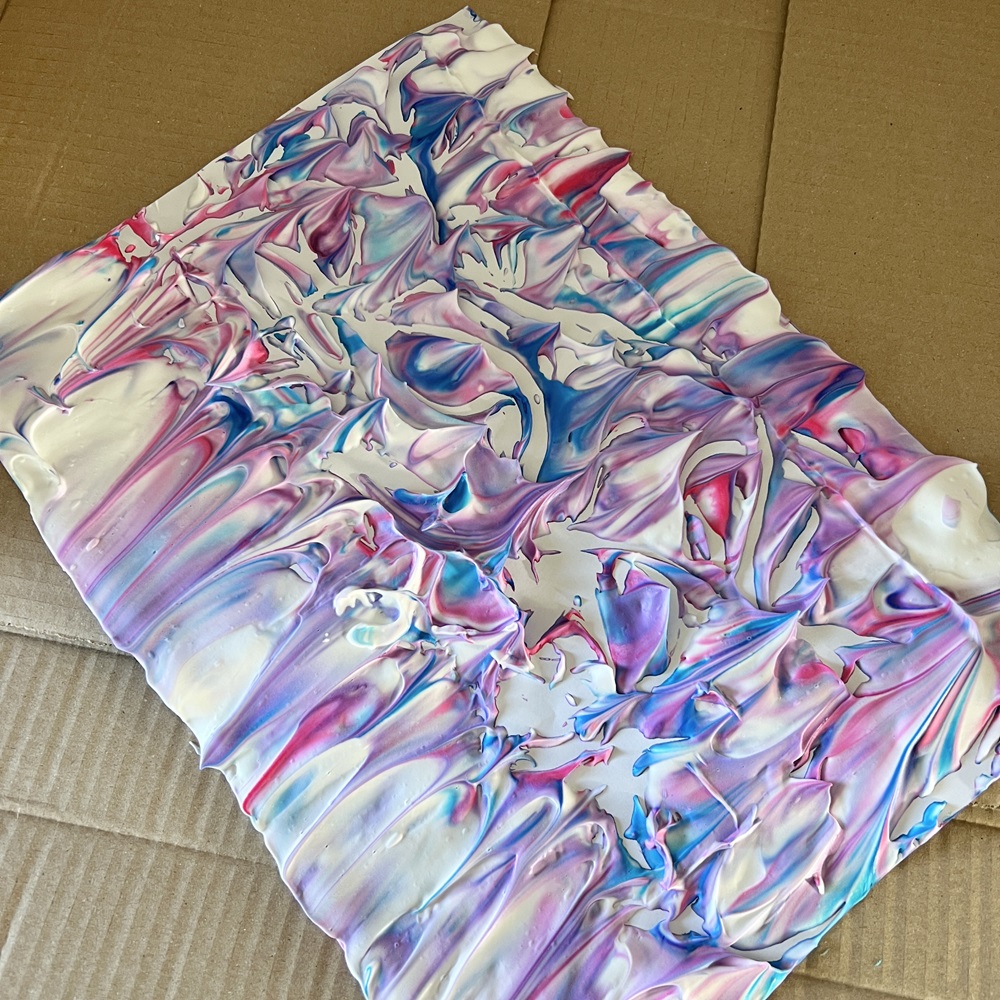
Put on your protective gloves. Add drops of food colouring to the top of the shaving foam.
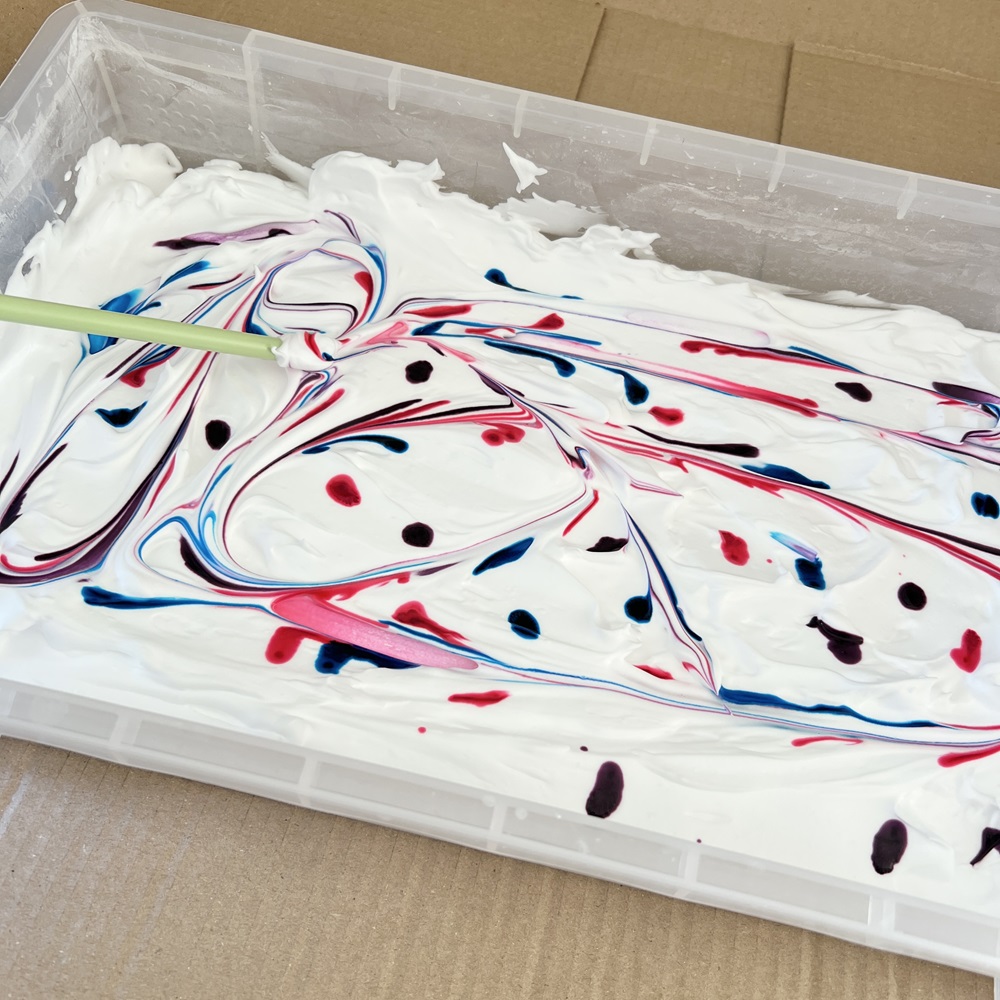
Step 4
Using your straw, lightly swirl the food colouring in the foam, covering as much of the foam as possible. Add more drops of food colouring if required and continue swirling. Be careful not to overmix the colours too much.
Step 5
Take your paper and gently place it on to the top of the foam. Carefully push the paper into the foam to ensure the side in the foam is covered. Do not fully submerge the paper.
Step 6
Remove the paper from the foam and place (foam side up) on to a flat surface.
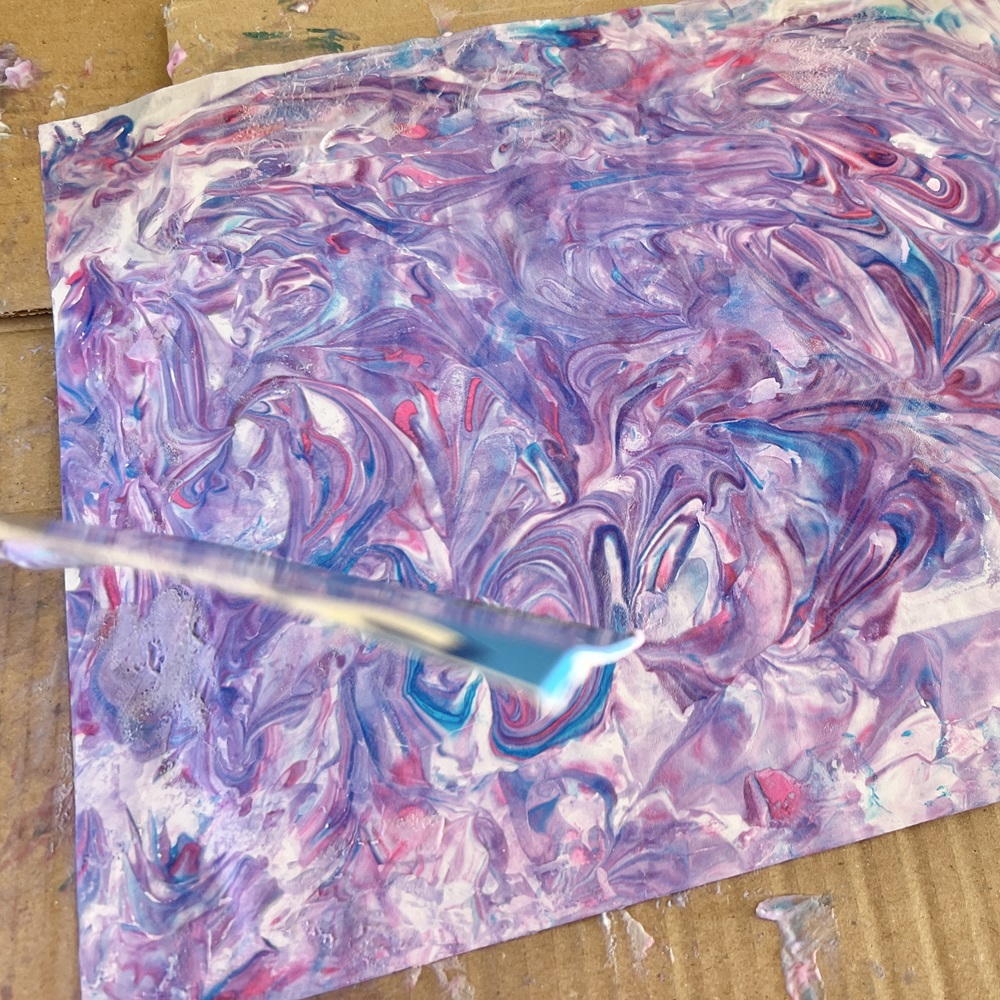
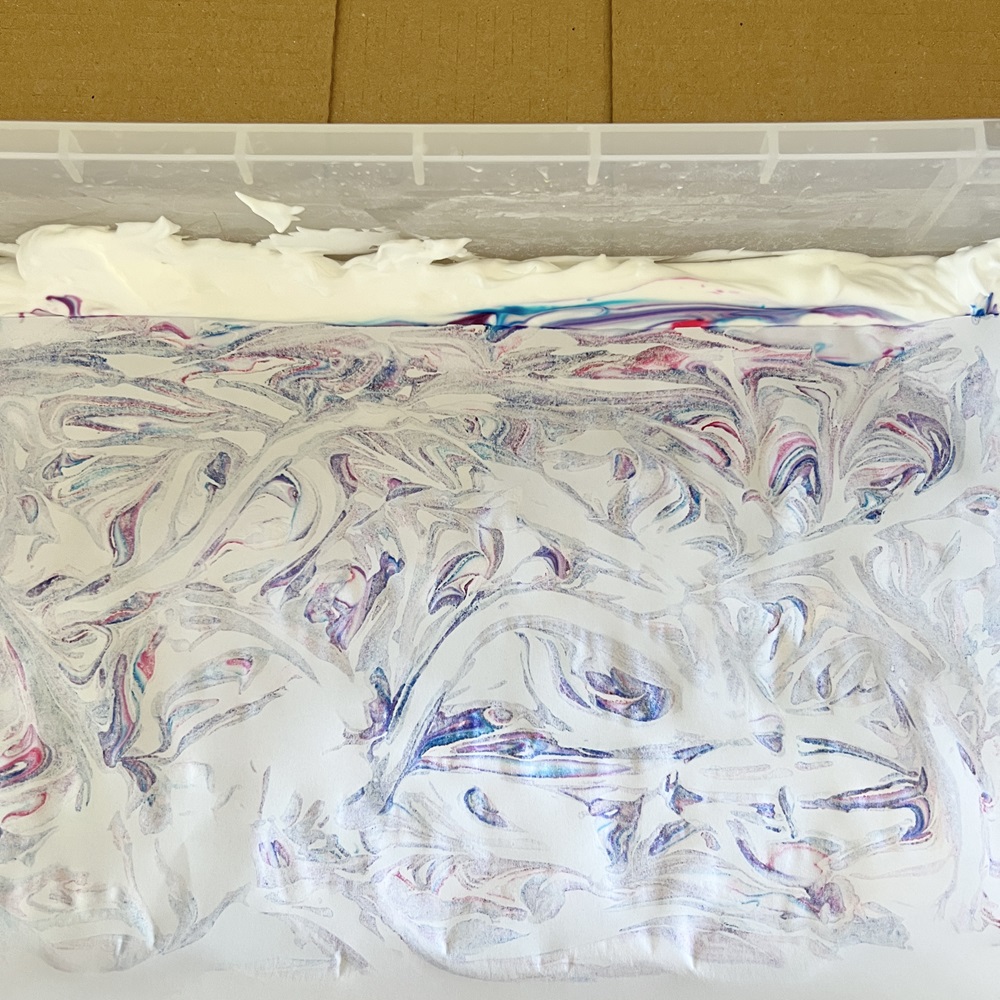
Step 7
Take your piece of cereal box and scrape the foam off the paper, pushing down enough to fully remove the foam, but not too hard so the paper rips. This will create the marbled effect. You make need to go over some areas a couple of times to ensure all of the foam is removed. Leave to dry.
Step 8
When completely dry, take the piece of paper and lay it horizontally, pattern side down on the table. Place the spine in the middle of the paper. Where the spine is, draw a line at 45(ish) degrees, from one side of the spine to the edge of the paper. Repeat for the other side of the spine and then also repeat for the other end of the spine.


Step 9
Cut the lines you have just drawn and fold the shape back onto the paper. Apply a line of double-sided tape to the spine and place the spine back on to the paper.
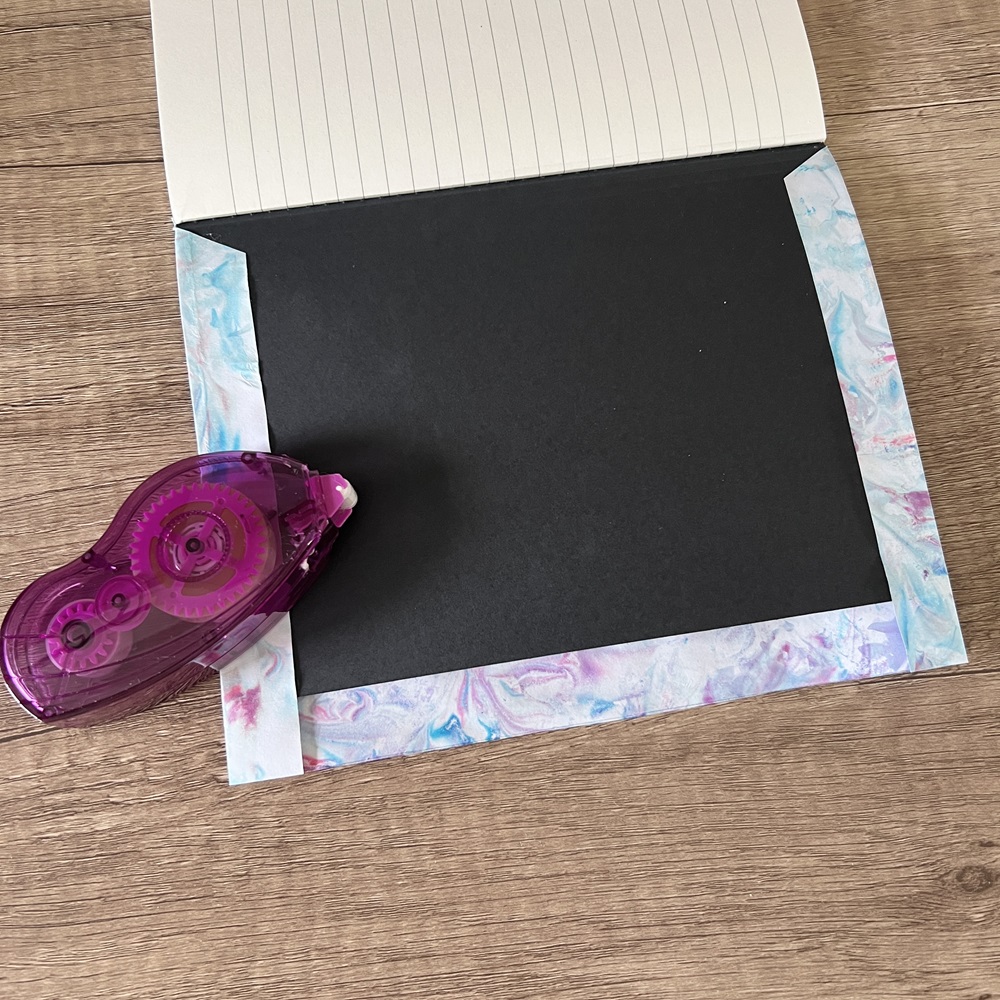
Step 10
Apply a line of double-sided table to the top and bottom of the inside of the front of the notebook. Fold the paper flaps on to the tape and stick. Repeat on the back side of the notebook.

Step 11
On the longer edge of the paper, fold the corners in (like when wrapping a present), apply double-sided tape to the long edge of the notebook and stick the paper down. Repeat on the front of the notebook.
Tips and ideas:
- If you do not have food colouring available, you could use drops of acrylic paint in the foam to create the marbling.
- When removing the foam from the paper, be very careful not to rip the paper as you scrape the foam.
- Ensure your table/surface is covered with newspaper/table covering as this will be messy!
- If you would like to also cover the inside of the notebook cover, cut a piece of paper to size, marble the paper (as explained above) and stick on to the inside of the cover.
- You should be able to marble multiple pieces of paper with the dyed foam mix you have created. You may have to add a couple more drops in some areas and then mix them in.
- You could use the marbling technique to create other items such as cards, gift wrap and gift tags.
- You may wish to press the paper if it has become a little crinkled after bring wet with the foam. Place the paper pattern down, place another piece of paper on to the back, and press on a low heat until the paper has flattened.
Pen Holder for Journal
Skill level: Beginner
You will need:
- Cotton fabric
- Two pieces – 18cm x 5cm
- One piece – 12cm x 5cm
- 20 cm of 6mm elastic
- Sewing machine
- Thread
- Ruler/tape measure
- Scissors/rotary cutter
- A5 Notebook
- Clips/pins
- Knitting needle/chopstick
To make:
Step 1
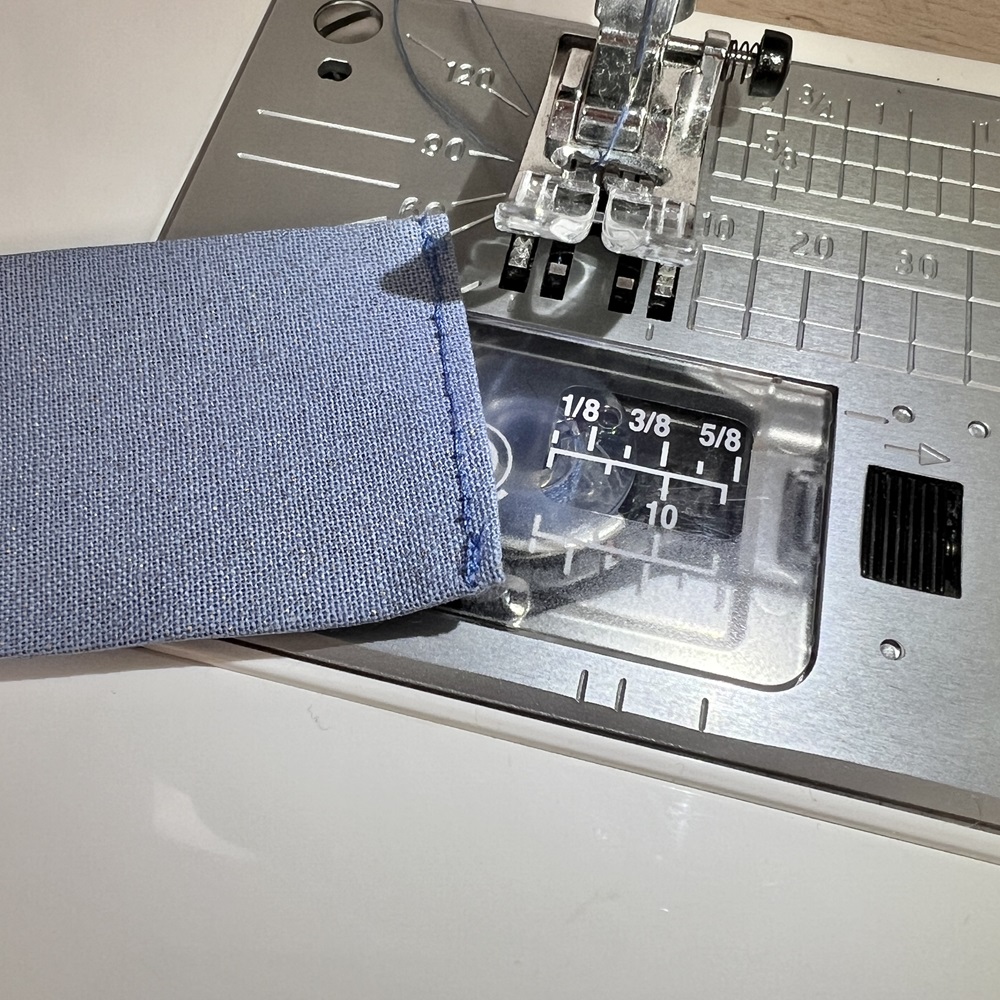
Take the shorter piece of fabric and press a 5mm hem around all edges. On your sewing machine, straight stitch along one of the short edges. Put the piece of fabric to one side.
Step 2
Take the two longer pieces of fabric and press a 5mm hem on one of the short ends of each piece.

Step 3
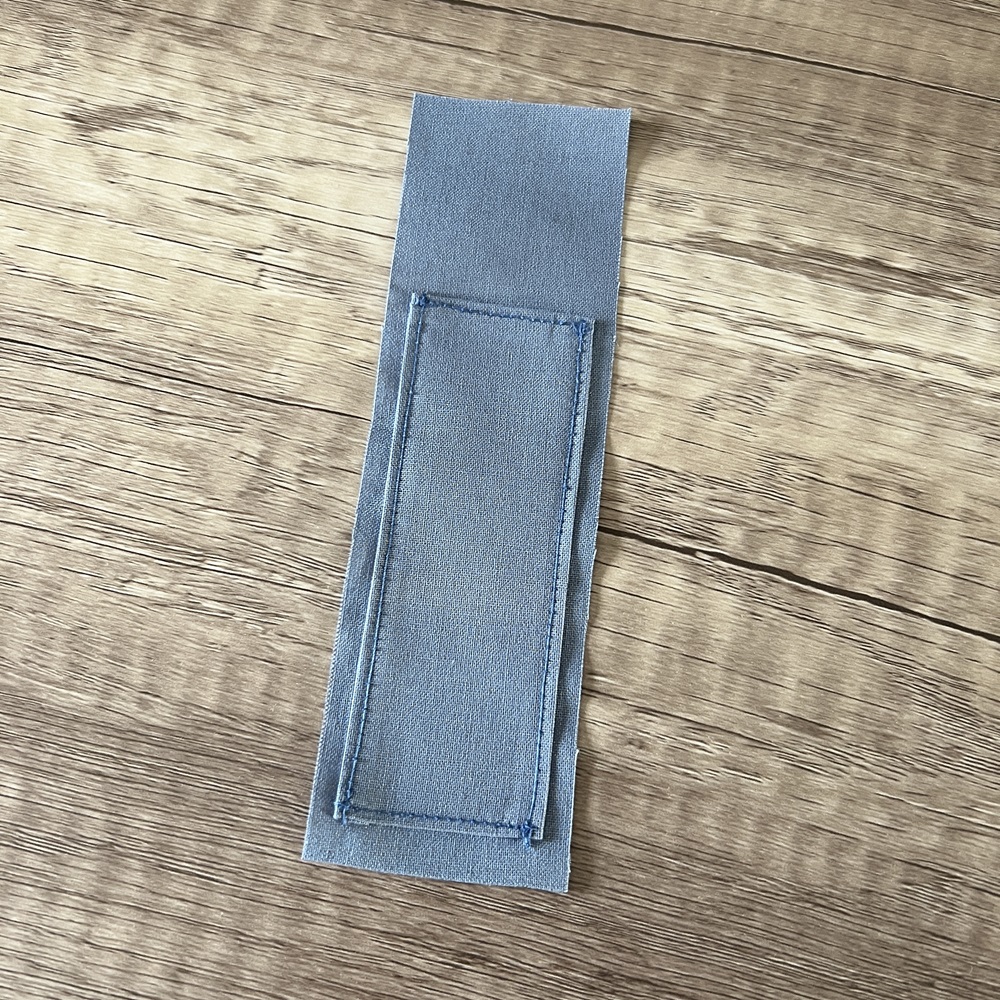
Place the small piece of fabric, right-side up, on top of the right-side of one of the longer pieces of fabric, in the middle vertically, and 1cm from the bottom edge – ensure the hemmed edge of the small piece is at the top. Straight stitch around three of the sides of the small piece, leaving the top hemmed edge open to create the pocket for the pen.
Step 4
Lay one of the pieces of fabric on the table, right side up. Place the elastic vertically in the middle of the fabric, there will be some excess elastic at the top/bottom.
Take the second piece of fabric and place it right side down on to the first piece of fabric and the elastic, with the pressed hems at the same end. Clip/pin to hold.

Step 5
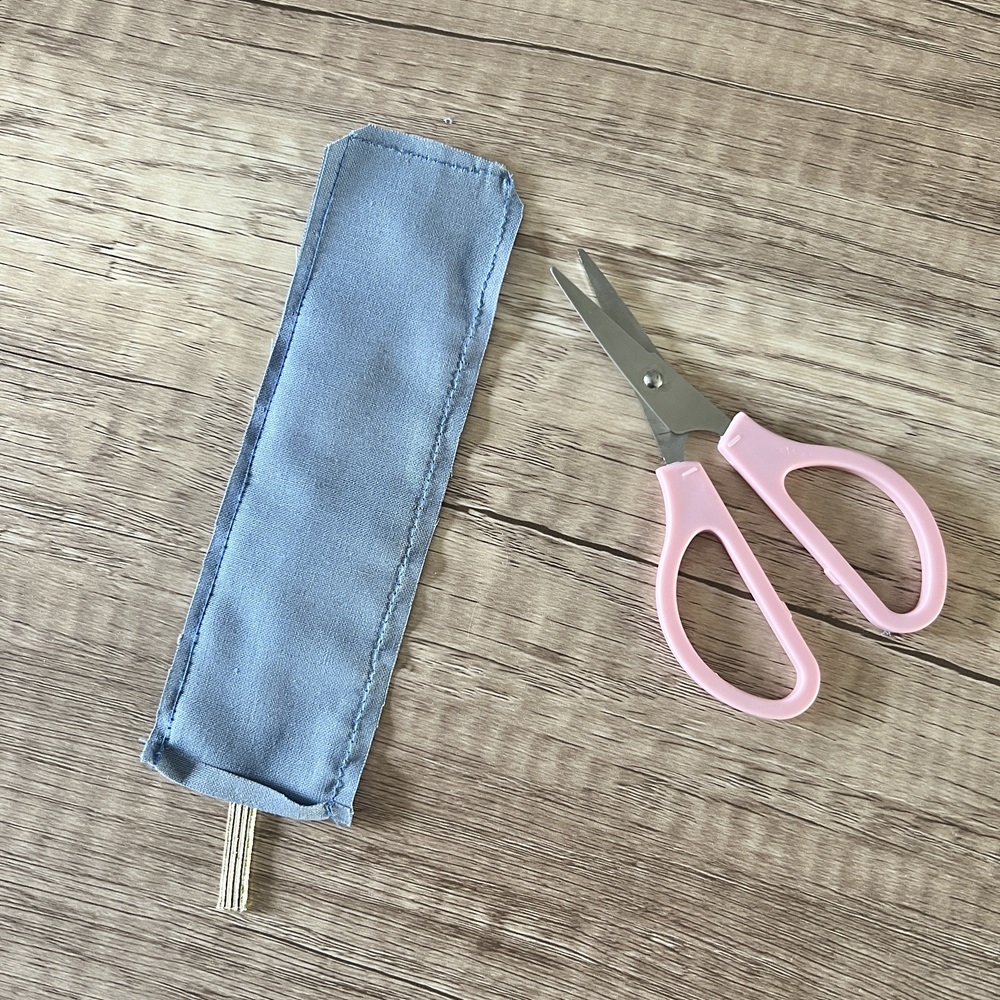
Stitch a 5mm hem around three of the sides of the fabric. Do not sew the hemmed end. Clip the two corners.
Step 6
Turn the fabric inside out so the right side of the fabric is now showing. Use a knitting needle/chopstick or another similar item to carefully push the corners out to create a point. Press. Placing the loose end of the elastic in the middle of the bottom of the open end (place it in by 1cm), stitch along the bottom of the fabric, closing up the end and stitching in the elastic.

Tips and ideas:
- If you would like to add more than one pen to the holder, increase the width of the fabric pieces by approximately 1.5cm for each additional pen.
- As little fabric is required, you could use fabric scraps from your other projects.
- If you would like to use the pen holder for a larger notebook, you will need to extend the length of your elastic.
- Embellish the pen holder with vinyl or sewn on initials.
- Create a personalised pen holder to pair with a notebook to give as a gift.