Let’s Create and Bake…
Whether you are looking for inspirational, seasonal recipes and cooking tips or fun activities to enhance your crafting passion and skills, members can enjoy a wealth of resources to create culinary delights in the kitchen and beautiful crafts for the home, all of which help promote better physical and mental well-being.
Meet our own WI Member Marvels, Lucie Wilson (Hampshire Federation) and Gillian Cain (Bowes Belles WI, Tyne & Wear South Federation), who each month will share with you a snippet of their food and craft wisdom…
Time for New Year

Love or hate them we all use clocks as our lives revolve around time. These clocks have a nod towards Steampunk. It’s a stylised Victorian-era industrialism genre that was created in the late 1980s describing a fantasy fiction featuring technology powered by steam. It tends to be dark and grungy but not always, if you search online you will find many different steampunk genre. It has a huge following worldwide with regular running festivals and conventions and can be spotted being used within the movie industry. It’s one of my favourite styles for jewellery craft and other crafts.
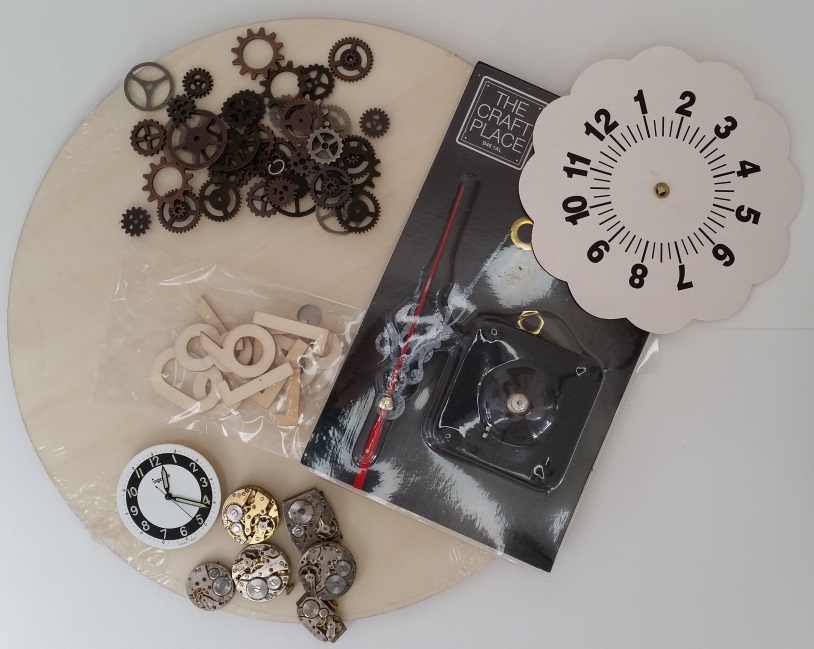
Materials:
- Wooden clock face blank (if you search ‘wooden clock face’ online you will find various styles)
- Clock mechanism battery operated
- Clock face positioner (or print out a clock face template), ruler, pencil
- Paints, wood stain, glitter glaze, clock background paper, decoupage glue
- Cogs, watch movements, clock numbers (or stickers), contact dries clear adhesive, vinyl die cut word stickers
Instructions:
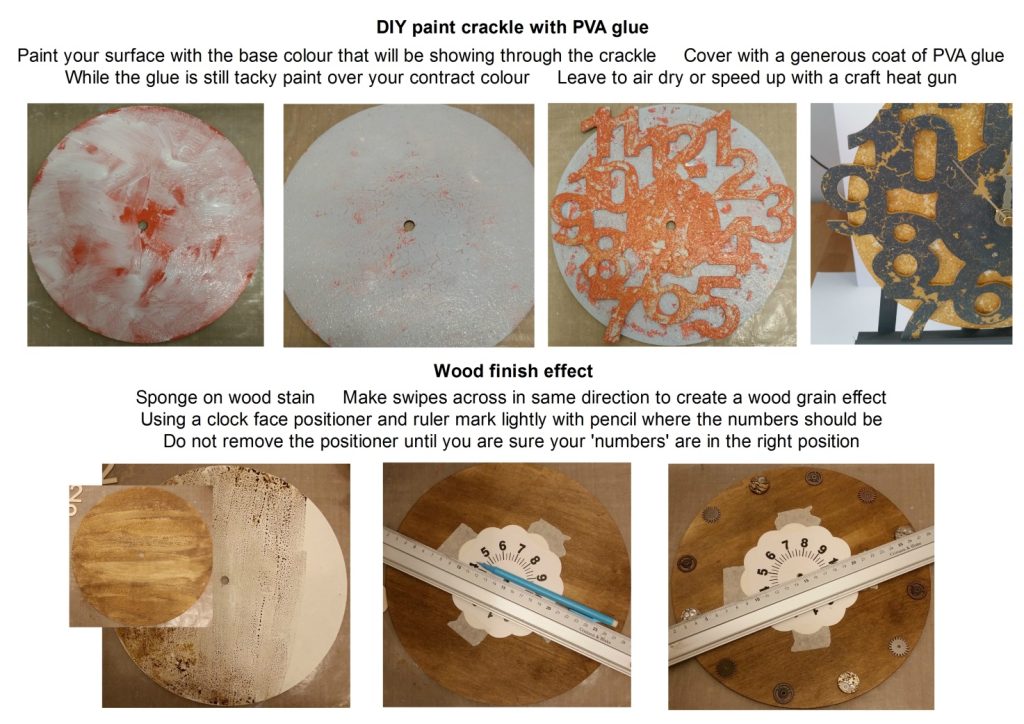
- Prepare your clock face with whatever medium you decide to use not forgetting to cover the back as well as the front for a better finish.
- The bottom two clocks on the image above I used wood stain. The one on the left simply had wood stain added with swipes over the bare wood to create an oak wood grain. The one on the right had cream paint added first then wood stain over that. The wood stain was not waterproof, by dabbing on glitter glaze, it reactivated the stain and I was able to create a burr wood effect. I added cogs and vintage watch mechanisms as numbers to the oak design. I added black painted wooden numbers to the burr design finishing with vinyl word stickers centrally.
- The top left hand clock on the image above has been paint crackled using PVA glue. There is no need to buy specific crackle mediums which cost a lot more. It has a cut away chipboard clock face overlay crackled with a darker colour glued onto the back wooden clock face.
- The top right hand clock has been painted to match the clock background paper before attaching to the clock face with decoupage glue. The gold number stickers were included with the clock movement.
- Add the clock movements after decorating following any given directions. Ensure all pointers move freely without colliding into each other.
- To set the time put all pointers to 12, add the battery, move pointers clockwise to the correct time.
As 24th January is the International Day of Education I wanted to include a DIY for crackle painting technique (as well as summarising steampunk style) which is so easy to do and can be used on much bigger items. It is lovely watching the crackle develop as the paint dries. You can run your fingers over as I’ve done so larger flakes peel away.
Block Perpetual
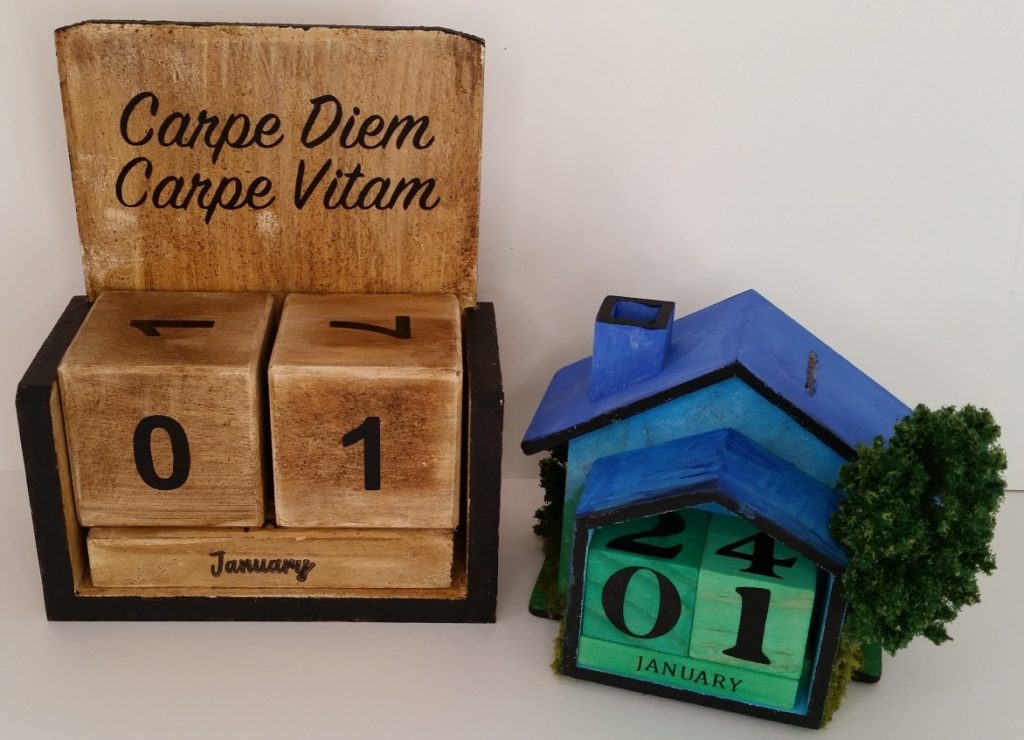
January welcomes the start of a new year. Everyone uses some sort of calendar, most likely digital, but it’s always useful to have a visual to refer to. I’m intrigued by perpetual calendars so that’s what this month’s main make is. The house version on the right has been attached to a money box for dual purpose.
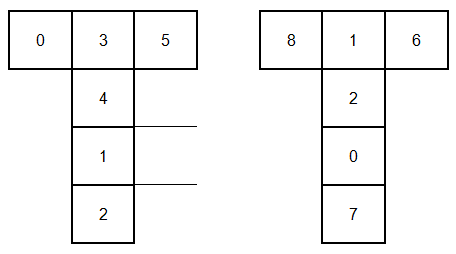
I was confused with the numbers so referred to a ready printed version. These show the date and month only so can be used every year. One block has the numbers 0, 1, 2, 3, 4 and 5. The other has the numbers 0, 1, 2, 6, 7 and 8 (9 is an inverted 6). Alternating blocks allows for the dates 1st to 31st.
Materials:
- Medium oak – wooden block perpetual calendar holder blank, cream paint, wood stain, vinyl die cut number stickers, calendar clear stamps, black dye based ink (fast drying and fade resistant), vinyl die cut word stickers (Carpe Diem – seize the day, Carpe Vitam – seize life), black acrylic paint
- House money box – wooden house shaped perpetual calendar and money box, contact dries clear glue, acrylic paints and matching marker pens, miniature model making foliage, felt self-adhesive pads
- A5 card calendar – A5 card blanks, backing papers, double sided adhesive tape, mini tab tear off calendars, paper/mulberry flowers, PVA glue
- Hanging wooden board calendar – 20x20cm wooden backing boards with two holes, hanging wire (or ribbon/twine), mini tab tear off calendars, double sided adhesive tape, backing papers, background downloads – capture the moment, today is the tomorrow you dreamed about yesterday, book binding glue, fine sandpaper
Instructions:
- Medium oak – Paint the holder/blocks with cream paint to act as a resist for the wood stain and leave to dry. Paint all again with wood stain, I used a combination of mostly pine with a small amount of oak wood stain to create a medium oak colour, leave to dry. Add the number stickers to the blocks as shown in the order given below. Stamp the months on the long blocks (January-April, May-August, September-December). Add the vinyl die cut wording stickers to the front of the holder. Paint the edges of the holder with black acrylic paint for contrast.
- House money box – Paint the money box and calendar in colours of your choice with acrylic paints and leave to dry. Colour the ready printed blocks with marker pens to match the colour theme so they blend in (much easier than painting). Glue the money box to the calendar with contact glue and leave to set. When the glue is fully set add felt self-adhesive pads to the bottom of the calendar part to stabilise as it is resting on the money box plinth. Use contact glue to attach miniature trees/foliage around the bottom and leave to set.
- A5 card – Cut backing papers to A5 size and stick to the front with double sided adhesive tape. Stick on the tab calendar with double sided tape. Using PVA glue add paper/mulberry flower embellishments.
- Hanging wooden board – Assemble as for the A5 card but stick backing paper on with book binding glue. Trim off excess paper by sanding around the edges with sandpaper. Add hanging wire through the holes.
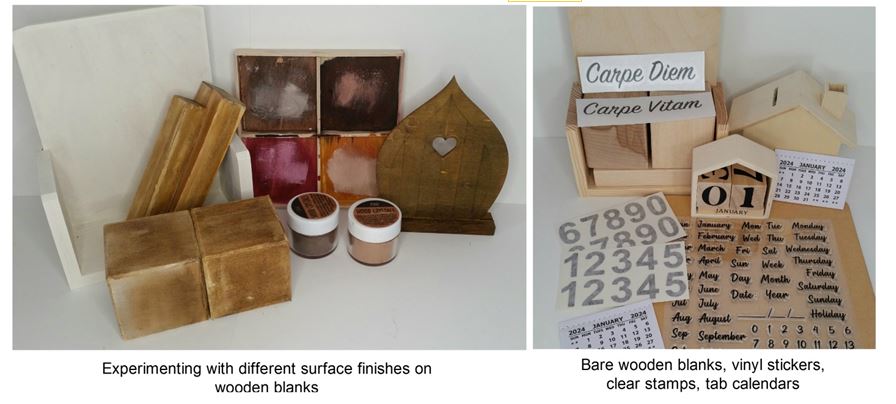
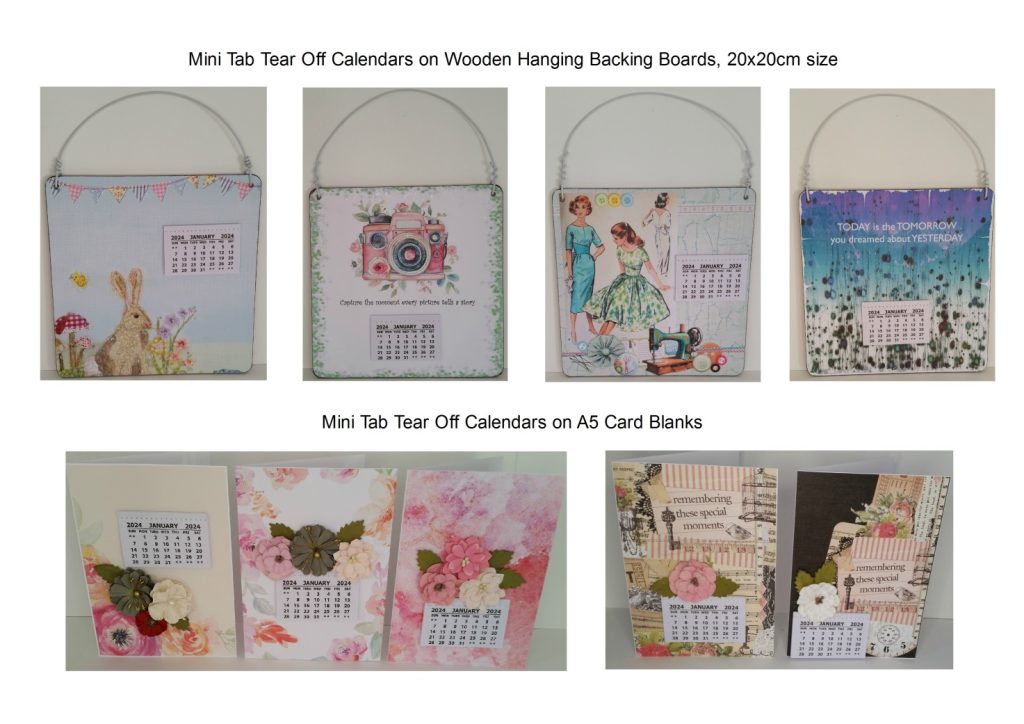
The hanging wooden boards can be used next year by carefully peeling away the calendar and replacing. The cards make great New Year or thank you cards that can then be displayed on a fridge with a magnet. The 20x20cm complimentary downloads can be used on 8×8 card versions.
January 2024 – Block Perpetual Calendar Printer Friendly PDF
Meet Gillian Cain
 Hi I’m Gillian, I am a craft enthusiast and I enjoy the whole process; I hope to offer something a bit different for beginners to advanced abilities. I love all arts and crafts and have dabbled in many but there are still others to try! Even before upcycling was a ‘thing’ I was using old and unwanted items in my projects.
Running my own small business, I am part of local craft cooperatives, attend handmade craft markets and have started up workshops which is something I always wanted to do. I love showing others what they can achieve. My WI always build two crafty evenings into the programme and over the last few years I have led on these; they are always great fun.
I do have a guilty pleasure for knitting character tea cosies which started in lockdown and it’s still going strong; many more patterns and not enough time!
To read more of Gillian’s fabulous blogs, visit www.theWI.org.uk/MyWI


