

February 2024
The February makes are all about rainbows and hearts celebrating LGBTQ+ history month and Show the Love campaign which can easily be adapted for Valentine’s Day. There is a colourful ribbon bow wreath, embroidered heart tote bag with additional heart box frame projects, and a very useful handmade paper book tutorial. I am most excited for when I will be able to start my ‘temperature’ project(s) in the future but until I have more weather readings all I can do is record them daily in my pretty notebook.
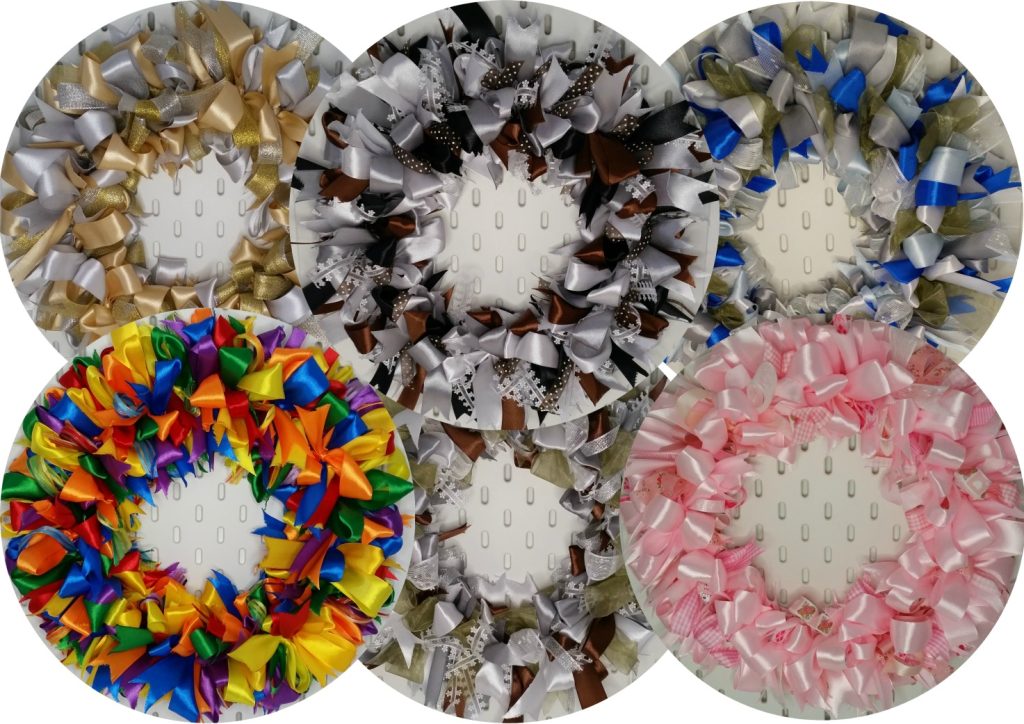
Rainbow Ribbon Wreath
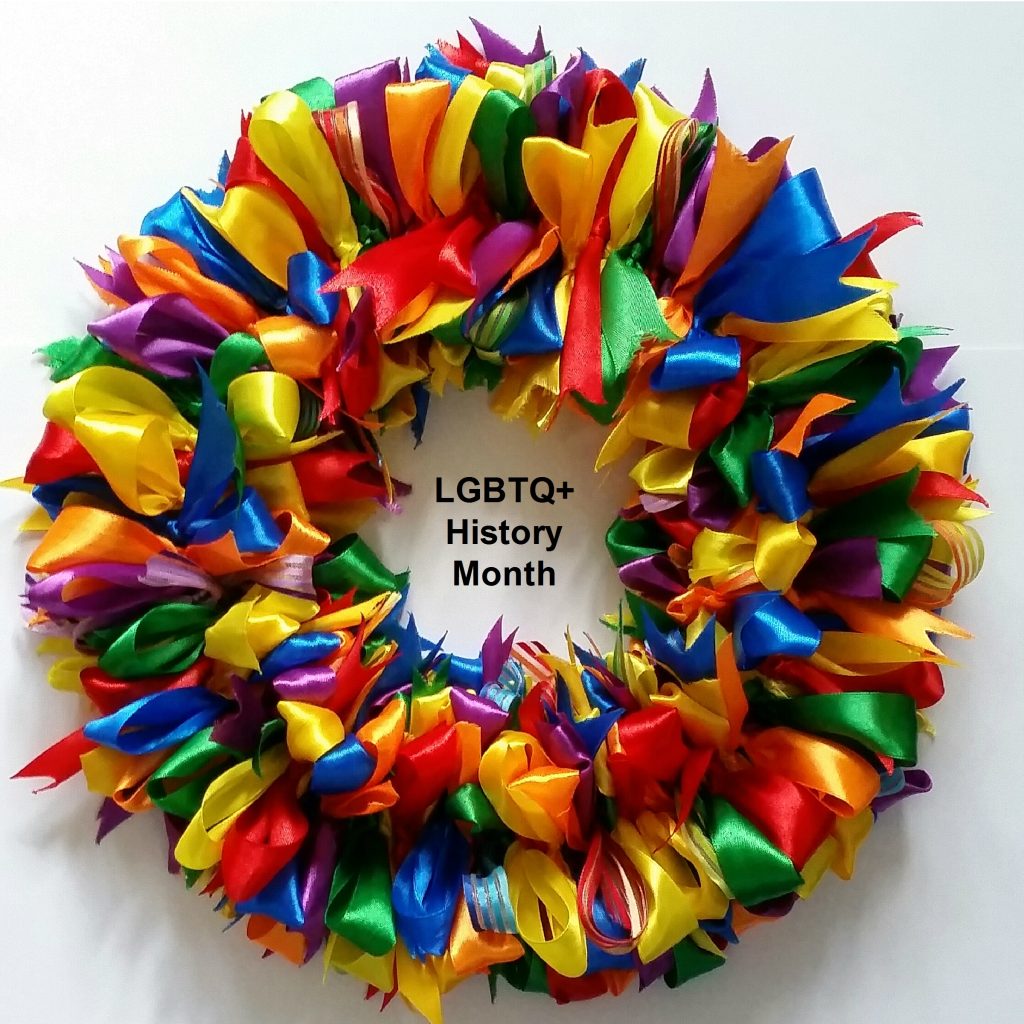
February is LGBTQ+ history month focussing on the present and future rather than the past of the Pride movement. So rainbow was the running theme this month symbolising hope, inclusivity, diversity and a sign of social change.
The beginning of the year is dull weather wise so a rainbow wreath is a great way to bring back colour and joy. I may have got a bit carried away with all the wreaths I ended up making but loved experimenting with different colourways. It was also a way of using up my ribbon stash from past frequent visits to a floristry warehouse where the odd reels kept jumping into the trolley. Pink is not usually a colour I use very often but it became a favourite and I think would make a great addition to a baby shower. The wreaths can be used outdoors and indoors.
Materials:
· 10 inch diameter wire wreath base, widely available in various sizes and shapes
Once the ribbon is added this will increase by about 4 inches
· Ribbons in colour and finish of choice
I used mostly 2.5 cm wide ribbon – approximately 100-120 (20 inch/50 cm) cut lengths depending on colour pattern – the more added the fuller it becomes. Total length required about 56 yards/50 metres – 67 yards/60 metres. More cost effective to buy full reels so check yardage before starting to make sure you have enough to finish.
· Sharp scissors, sewing/bulldog clips
Instructions:
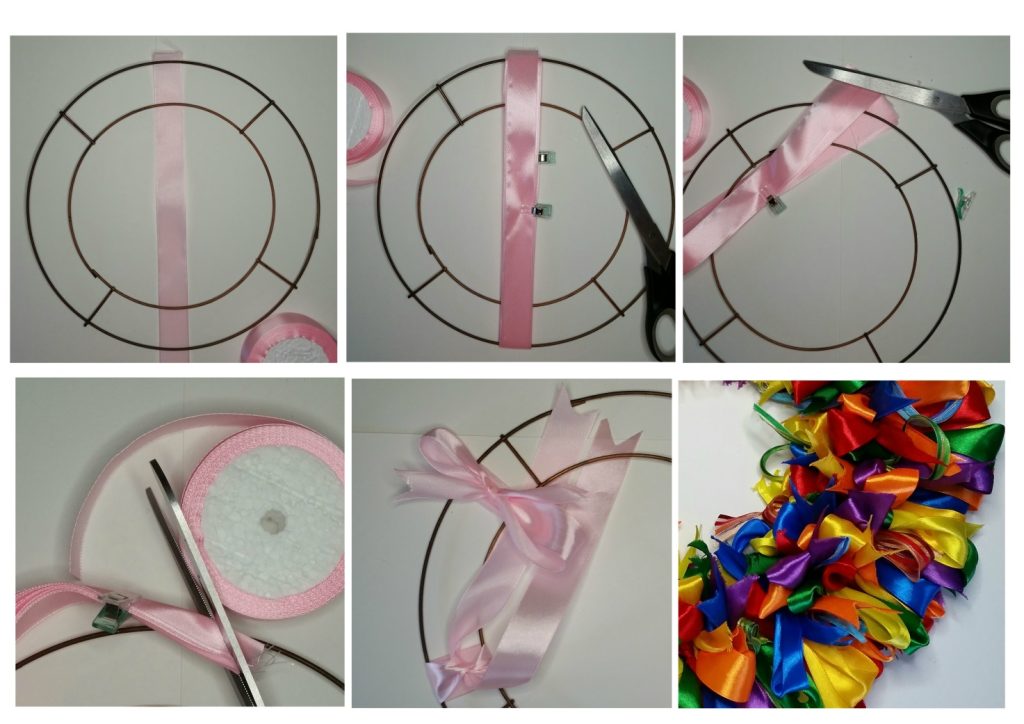
1. Prepare and cut ribbon lengths. Place one ribbon end underneath the wire base at the top and wrap as many times as you dare finishing with the other end at the top again. This can be done in stages if you find it easier. Keep adding clips to keep the ribbon together to prevent slipping. This is a good way of counting lengths from your ribbon instead of having to measure and cut individually.
2. Slide the ribbon wraps to the side and cut through at the top to separate. Carefully remove and clip back together. Fold the ribbon ends in half as shown and cut in swag tails at both ends to prevent fraying or cut diagonally if preferred.
3. Tie the ribbons with a standard shoe lace knot/bow in your colour pattern around both rims. Push close together after tying. Make sure both ends are the same length when tying for an equal looking bow.
4. Neaten the ‘bunny ears’ after tying each ribbon rather than doing this at the end, much easier and you won’t miss any. Keep the bows flat until finished tying them all especially if you are using a specific colour order. When happy with the amount added finish by ‘fluffing out’ the bows to create a fuller finish.
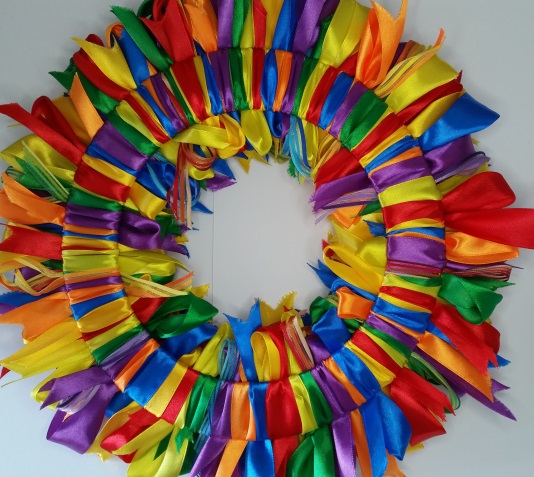
5. I’ve used mostly satin ribbon but have incorporated organza and lace ribbon on some. You could add embellishments such as fake flowers or baubles for a seasonal wreath. The wreath back shown below has a neat finish if hanging on a glass fronted door.
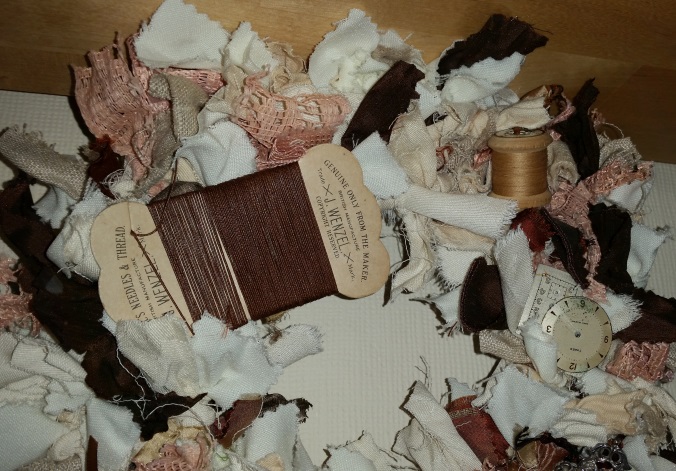
6. If you are not great at tying bows then simply knot smaller lengths on the inside and outside rim as shown on the vintage sewing ephemera example below.
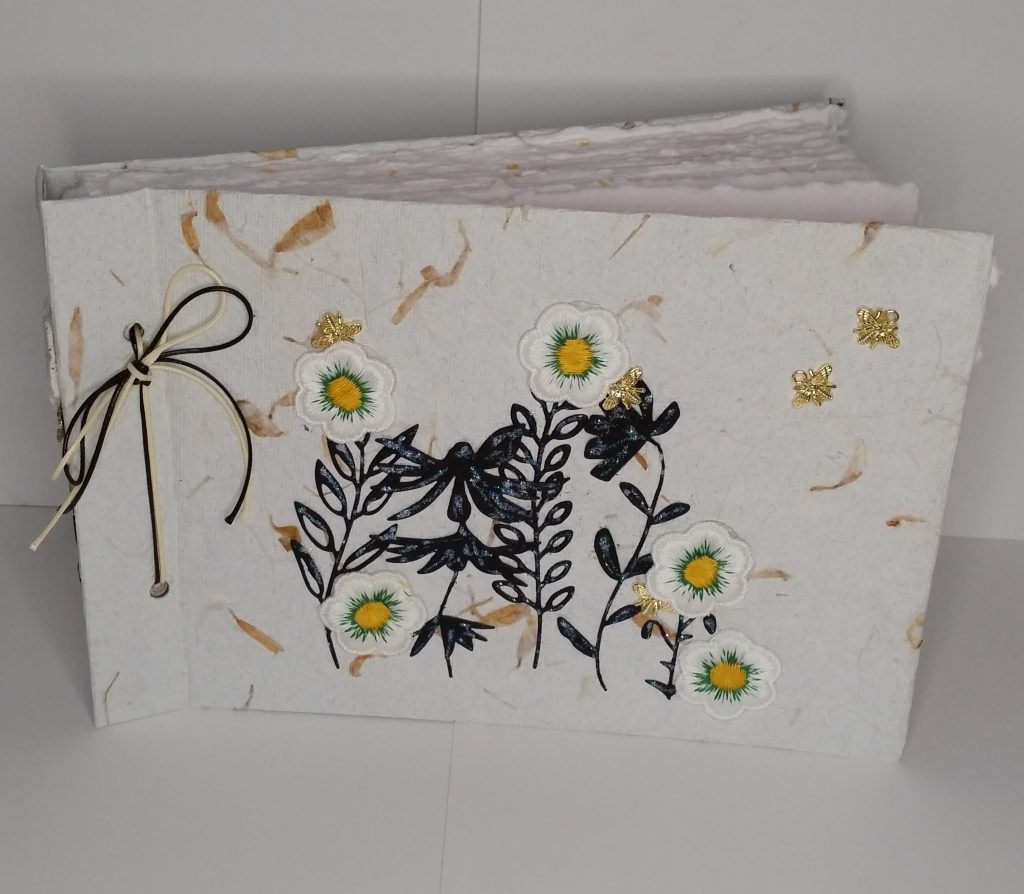
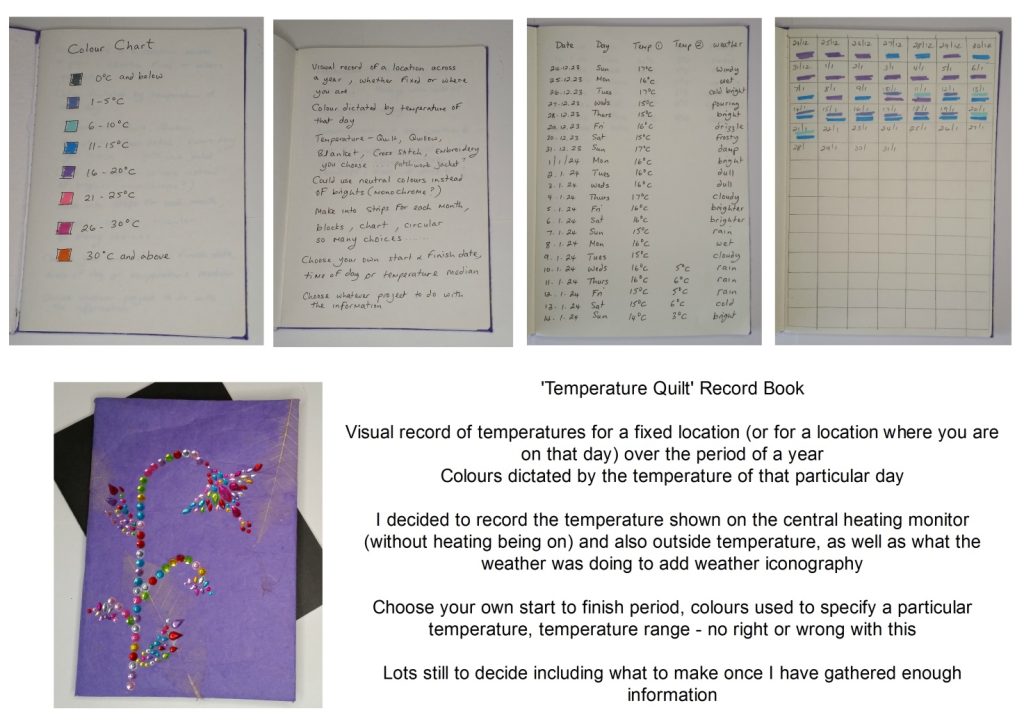
'Save The Bees' Handmade Paper Book
February is Show the Love month where WI groups get together to highlight climate change. I decided to start a ‘temperature quilt’ project to show temperature change during a yearlong period. I am using a notebook to record information for the remainder of the year so added pretty handmade mulberry paper to the covers to change from utilitarian to pretty. It will be interesting charting temperature changes.
My ‘temperature’ project is still undecided! Quilt, quillow, blanket, patchwork, cushion cover, tapestry, embroidery, collage, rainbow bright, neutral tones – the choices are endless. My plan is to use the handmade paper book as a scrapbook to record ideas and progress once the actual making starts. I have made them before as presents personalising to people’s interests. A great idea for brag books, visitor books, wedding book planner, wedding guestbook, any use! If used as a photo album, make sure to use acid/lignin free papers to prevent aging/browning.
Materials:
- Grey board (recycled packaging)
- Recycled 130gsm A5 deckle edge flower paper blanks (pack of 50)
- Recycled heavyweight mulberry wrapping paper
- Book binding glue, scissors, craft knife and metal ruler, smoothing tool (bone folder), two hole office punch, hole punch tool
- Strong cord
- Optional embellishments – black foliage die cuts, metal bee charms, embroidered flowers
Instructions:
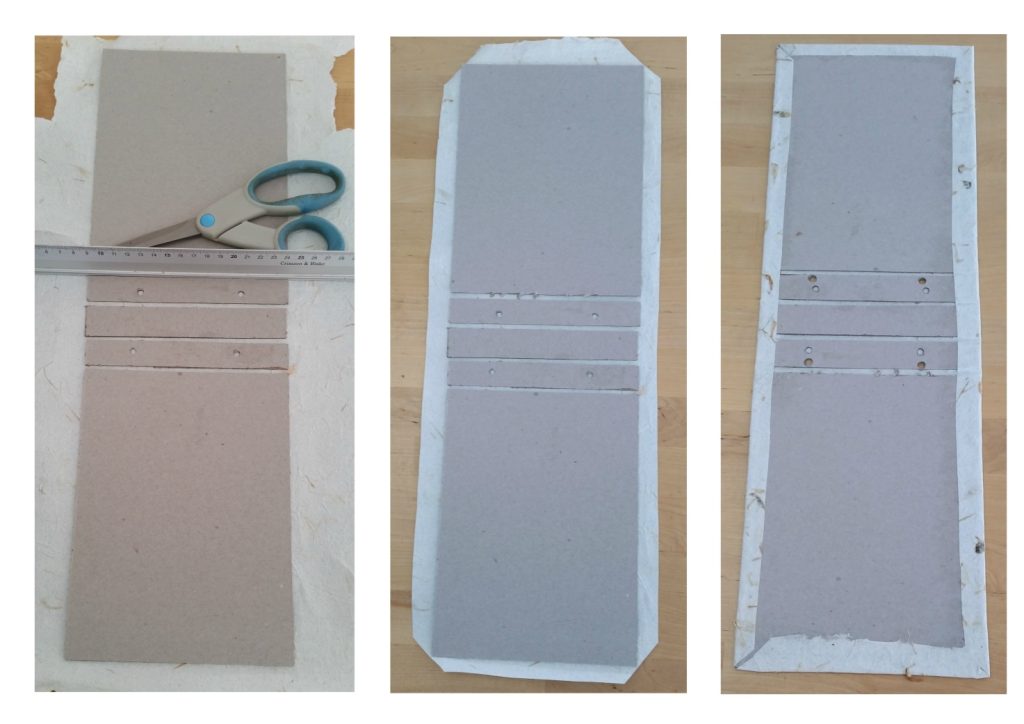
- With a metal ruler and craft knife cut the grey board to the size of page papers being used. Slice off a 2cm strip from the front and back pieces plus an additional 2-3cm strip for the spine (make sure it is wide enough for the stack of pages being used). Once covered there will be a slight increase in size so your papers will sit nicely inside.
- Glue the grey board pieces to the mulberry paper with book binding glue (dries quickly and does not bleed through) or with PVA glue sparingly. Use a ruler as shown below to create space for a folding line between pieces. Trim the edges and snip away the excess at the corners to mitre. Glue edges onto the grey board and burnish down with a bone folder.
- Punch holes in your page papers with the office paper punch. Transfer the hole placement to the grey board front and back cover strips. Punch holes through all layers with a punch tool.
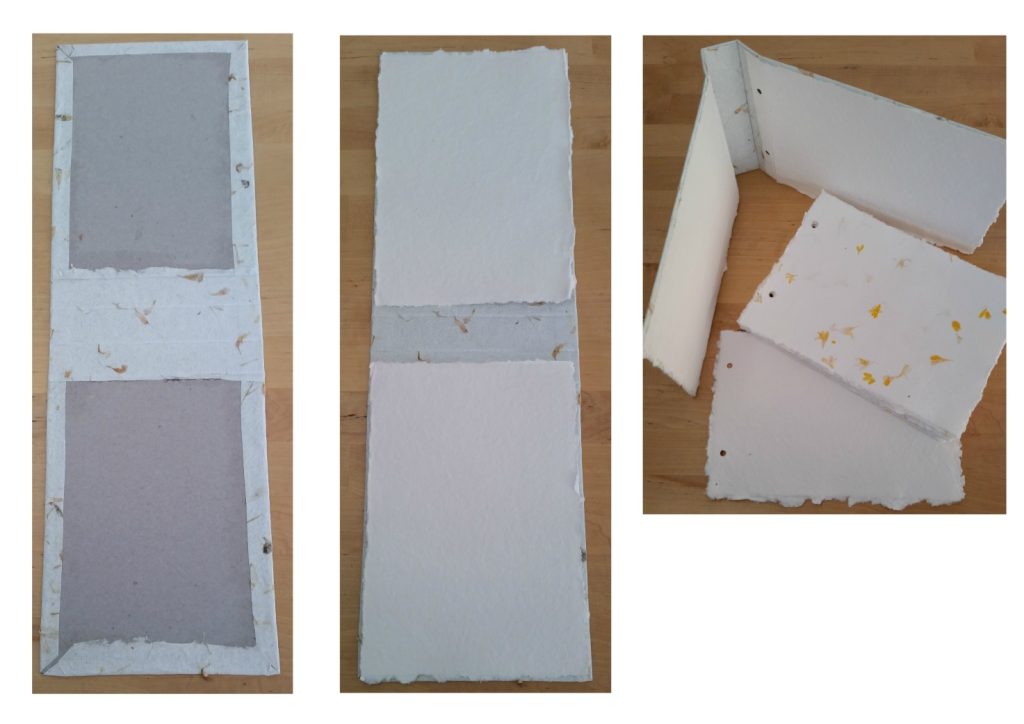
4. Cut a rectangle of mulberry paper, glue over the three centre strips. Burnish down and score in some fold lines. Cover the inside covers with handmade paper and punch in the holes again.
5. Stack your page papers inside and thread your book together. Tie in a bow or simple knot at the front making sure it is tight enough to keep the papers together without becoming ‘floppy’ but not so tight that you struggle to turn the pages.
6. Embellish the front with your theme of choice or leave undecorated. The handmade mulberry paper looks just as lovely left as is. I chose to also decorate the spine so it looks lovely stored on a shelf or book case.
Love Is Love
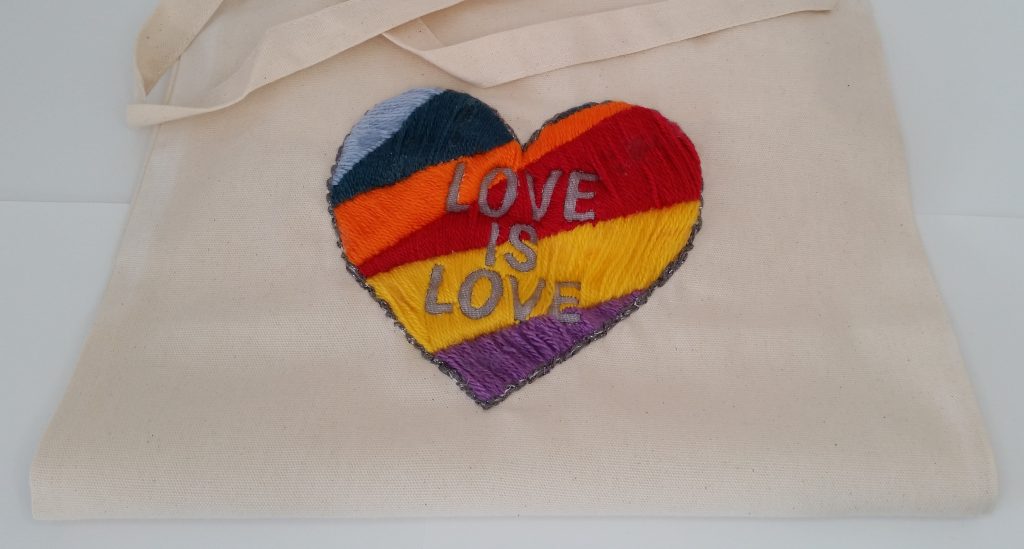
February as well as being LGBTQ+ history month is also International Embroidery month and of course Valentine’s Day is on 14th February. What better way to celebrate all the ‘love’ than with an embroidered heart emblazoned tote bag. This is a really easy make as the heart panel is backstitched to the bag after it has been embroidered, but does take time to get all the ‘white space’ filled. There is a heart motif download to decorate in any way you choose and you could use fabric paints for a quicker make. I’ve used the same heart motif for the box frames.
Materials:
- Fabric tote bag
- Printable canvas, printer, black permanent marker, ruler
- Love is Love PDF
- Coloured double knit yarn, large eye pointed sewing needle, sharp scissors
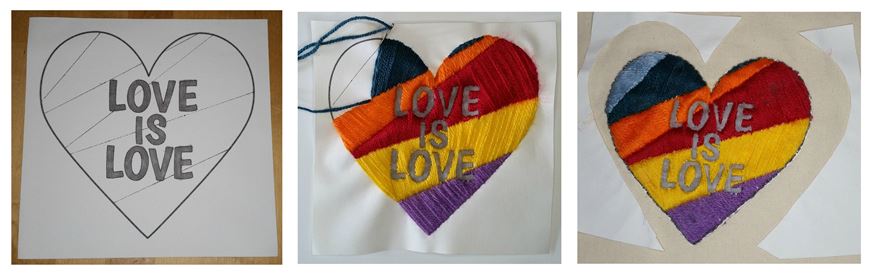
- Print the heart download onto printable fabric of your choice. I used printable canvas which meant I could embroider onto it without having to use a sewing hoop as it stayed firm and flat. Alternatively trace the pattern onto normal fabric or even straight onto the bag.
- Colour ‘love is love’ with a black permanent marker to make the words ‘pop’. Draw lines across for the rainbow look. Trim the canvas into a square to make it easier to handle.
- Fully cover the heart with double knit yarn in satin stitch to get the coverage needed, adding quick dry glue under some of the wider satin stitch areas to keep flat.
- When the heart is fully embroidered place the square onto the front of a fabric tote bag and backstitch around with a contrasting colour yarn. Cut away the excess fabric with very sharp pointed scissors. I then backstitched round the heart again to cover any fabric left showing after trimming.
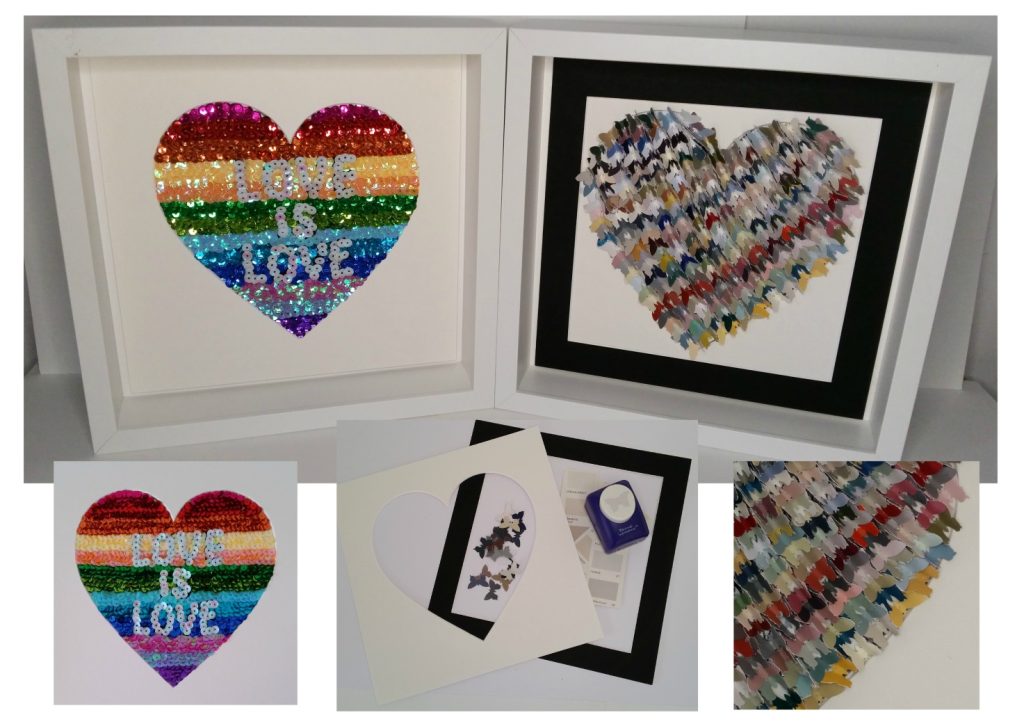
Use the template for box frames. I had the right sized heart shaped picture frame insert to fit over the template and glued this to the printed canvas before attaching sequins/butterflies.
For the sequin encrusted version above left glue rows of different coloured sequins, using tweezers as a helping hand to place down, with tacky PVA. Do this in stages leaving rows to dry before adding others (they kept moving until the glue set). It would be much easier to use sequin trim where all the sequins are sewn together but I was using up left over individual sequins. I originally added black sequins for the letters but felt it did not show up well enough so went back over with white sequins.
For the butterfly version above right I punched out butterflies from paint colour charts I no longer needed (you could modify by using coloured copy paper). The charts gave a good selection of colours and was a good way to recycle them. Glue in rows with PVA glue. Squeeze a blob of glue onto a non-stick surface, pick up each butterfly with tweezers (wings together) and swipe through the glue, stick down. I found the rows remained straighter by adding the next butterfly the other way up on alternate rows. So many have been added it is actually hard to see what they are until close inspection. I found out a collection of butterflies is called a kaleidoscope which seemed appropriate for this months rainbow makes.
Meet Gillian
 Hi I’m Gillian, I am a craft enthusiast and I enjoy the whole process; I hope to offer something a bit different for beginners to advanced abilities. I love all arts and crafts and have dabbled in many but there are still others to try! Even before upcycling was a ‘thing’ I was using old and unwanted items in my projects.
Running my own small business, I am part of local craft cooperatives, attend handmade craft markets and have started up workshops which is something I always wanted to do. I love showing others what they can achieve. My WI always build two crafty evenings into the programme and over the last few years I have led on these; they are always great fun.
I do have a guilty pleasure for knitting character tea cosies which started in lockdown and it’s still going strong; many more patterns and not enough time!
To read more of Gillian’s fabulous blogs, visit www.theWI.org.uk/MyWI