

March 2024
The March makes are bright and cheerful, welcoming the warmer weather and longer brighter days. The theme I had in mind was Spring, Mother’s Day and Easter, although they can all be made for other occasions. There is some cross over on the projects with an additional one this month, so four in total to have a go at if you choose to, I just couldn’t decide which ones to use! There is the rag paper book set and matching cards, rag paper crackers, exploding treat box and favour box, and lastly knitted bird chocolate egg cosy and crochet nest to perch in. I enjoyed making every one of them and hope I’ve inspired you to have a go.
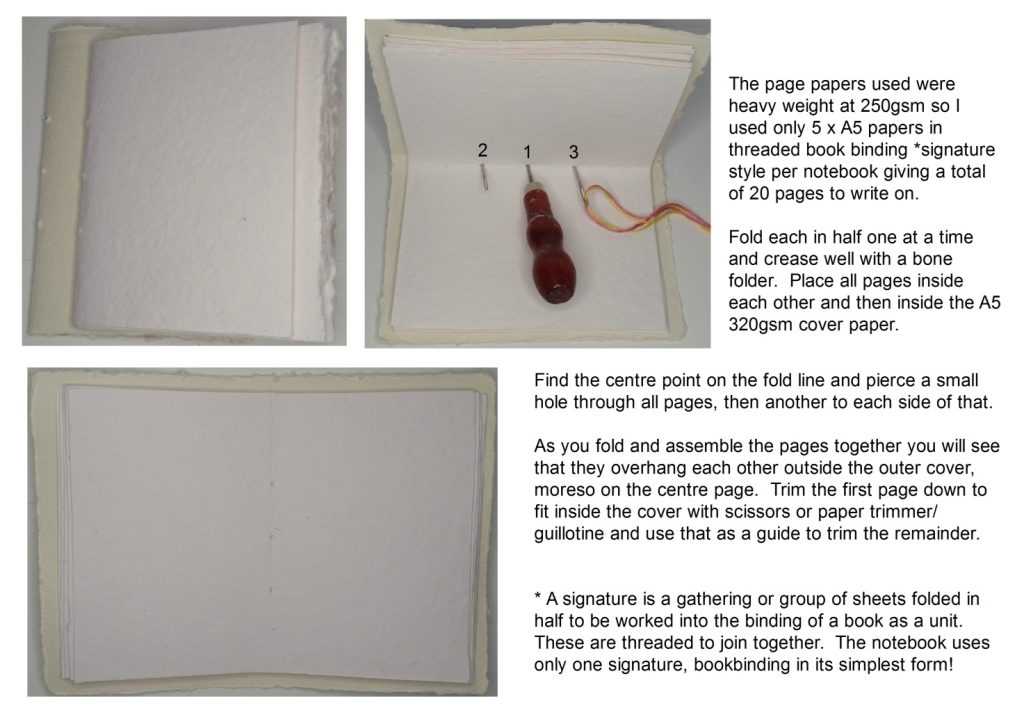
Cotton Rag Paper Book Spring Set

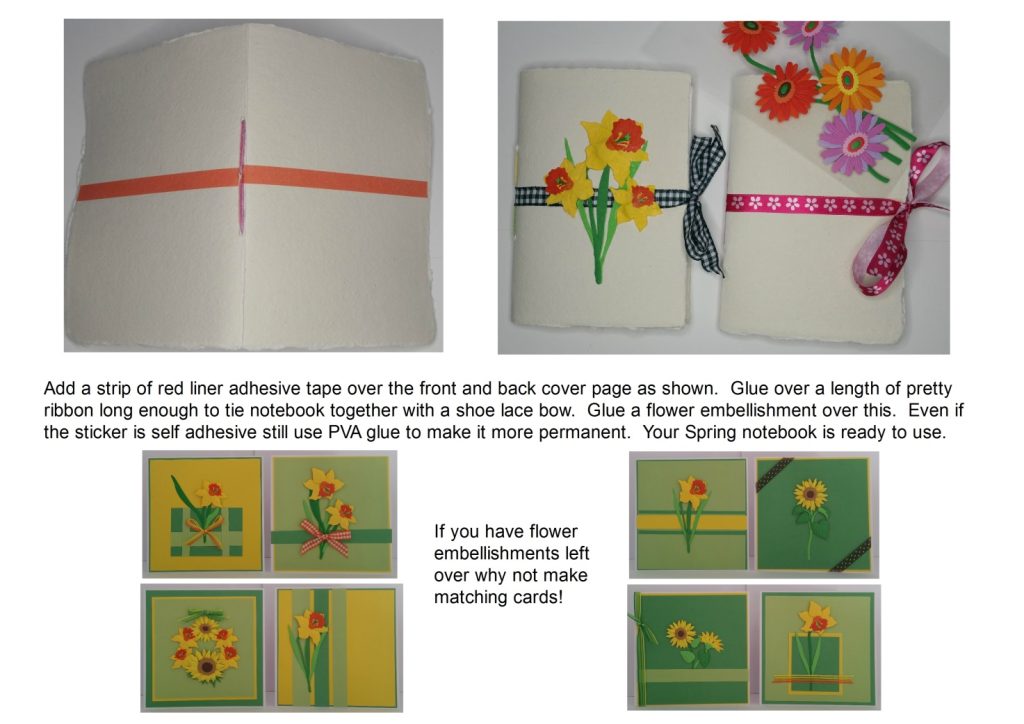
In March we have a number of celebrations with Mother’s Day on the 10th and Easter weekend beginning 31st, and I think most of us will be welcoming the first day of spring with the promise of warmer weather and more daylight hours. By now our gardens are ‘springing’ back into action with green and colourful floral displays for us to enjoy. This inspired me to create pretty floral gift sets of a handmade notebook (made as a book ‘signature’), pen, and packs of wildflower/sunflower seeds to plant, brought together in a presentation box that can be reused. A fabulous Spring, Easter or Mother’s Day gift.
Materials
- 6×6 flat pack die cut aperture card box
- 100% recycled A5 cotton rag papers, 320gsm for cover, 250gsm for pages
- Blunt tapestry needle, embroidery threads, ribbon, handmade flower embellishments
- Red liner double sided adhesive tape, PVA glue
- Scissors, paper trimmer/guillotine, bone folder, pokey tool
- Seed packs, mini pens or other ‘additions’
Instructions
Assemble the card box creasing with a bone folder on the fold lines for nice crisp edges and sides. Glue together with red liner adhesive tape which is super sticky and has stronger adhesion compared to normal double sided adhesive tape.
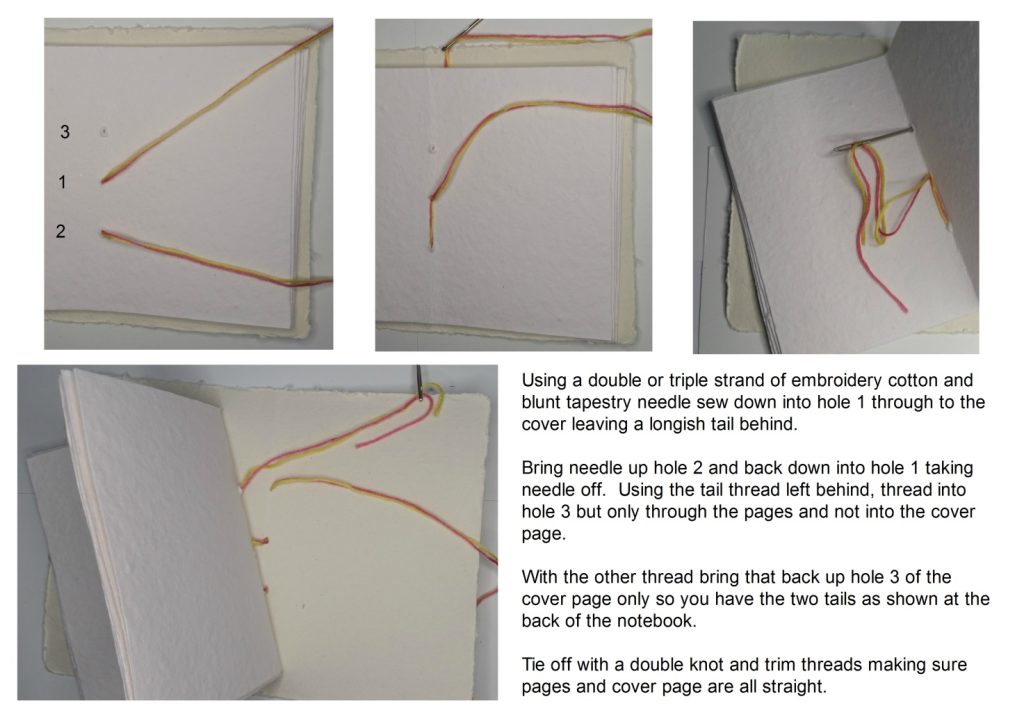
Assemble the cotton rag paper note book as shown below. Decorate ready to use – if you feel you can – I think it’s maybe just a bit too special to write in!
Handmade cotton rag paper is fabulous quality, 100% recycled and biodegradable. Perfect for watercolour, inks or other drawing mediums so the book could be used to create small artworks in. As it is handmade each sheet has its own personality giving everything made with it its own originality. Being heavy weight it works well in any mixed media artwork or project.
March 2024 Cotton Rag Paper Book Spring Set Printer Friendly PDF
Spring Crackers
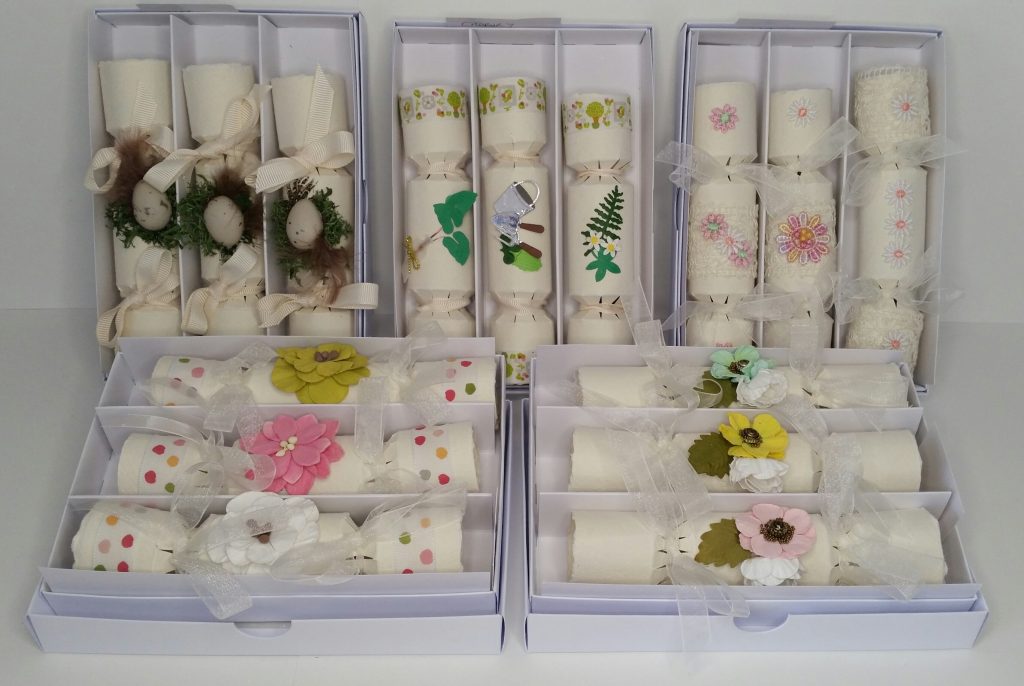
Crackers aren’t just for Christmas and used increasingly on other occasions. With the remaining cotton rag paper l couldn’t resist making these to fit in with March occasions and celebrations – Easter, Mother’s Day and Spring parties. They are saucer crackers so only a very small ‘gift’ will fit inside. Best of all, no one-use ‘snaps’ have been used and the heavy weight paper allows reuse time after time. Perhaps make some to use as table favours for an up and coming wedding or anniversary – make to match your theme.
Materials
- 100% recycled A5 cotton rag paper 250gsm
- Masking tape, pencil, ruler, scissors, ball tool, bone folder, PVA glue
- Inner cardboard tube from kitchen foil
- Optional – A5 flat pack aperture card box and white card
- Embellishments, fillers of choice (each contains a covered small chocolate treat)
Top left – dried reindeer moss, craft feathers, half craft egg, twill ribbon
Top middle – twill ribbon, garden themed paper craft stickers
Top right – organza ribbon, lace ribbon, cotton flower braid
Bottom left – twill ribbon, organza ribbon, mulberry paper flowers
Bottom right – organza ribbon, mulberry paper flowers and leaves
Instructions
Using the measurements below allows for making two A6 size crackers from each A5 sheet.
Mark the shorter edges of the paper lightly with a soft pencil at the intervals given and half way point on the longer edges. Using a ruler and ball point tool score in fold lines where the pencil lines are shown below. Cut A5 sheet in half and erase the pencil marks. Making in this way is less time consuming than having to mark out on two A6 pieces of paper.
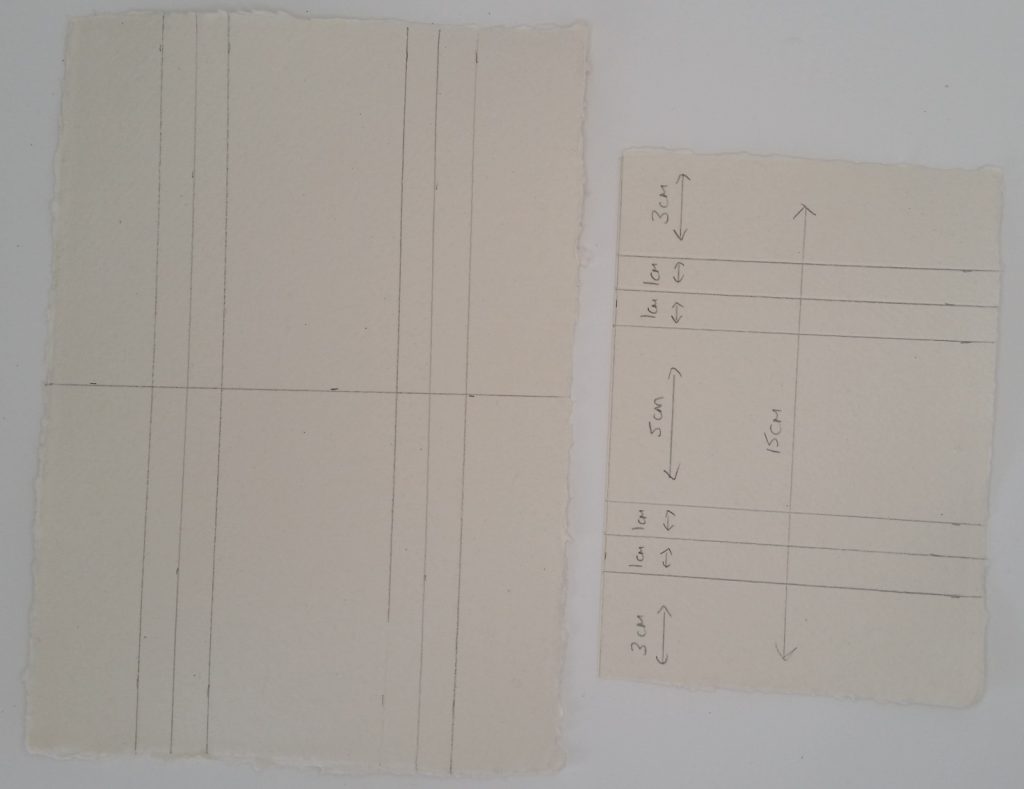
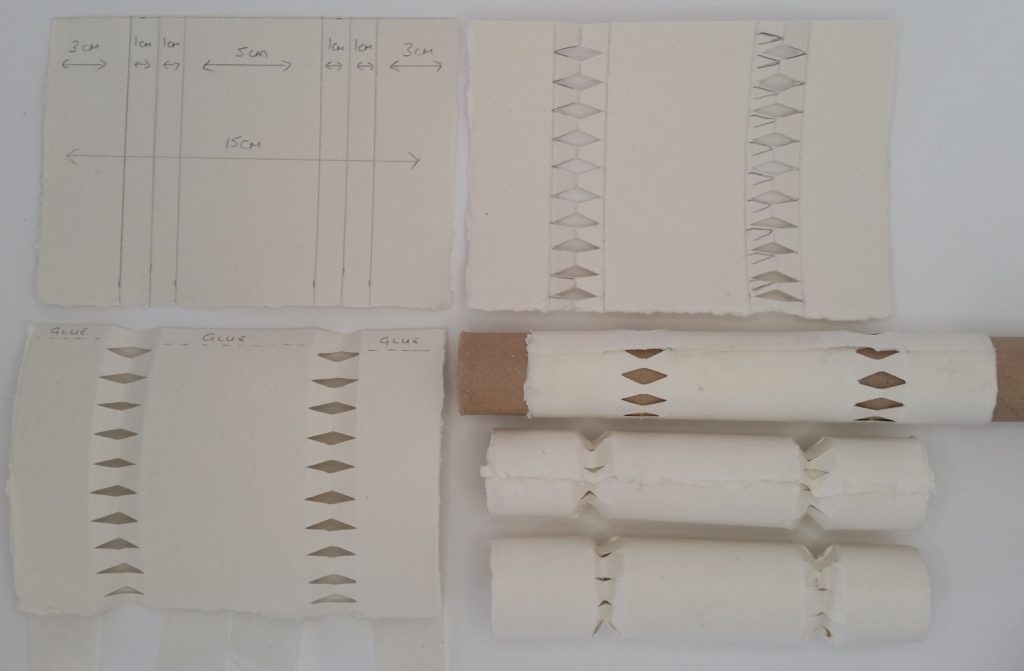
Cut in ‘diamonds’ as shown below. I did this by eye and cut 10-11 on each side, they will be covered with ribbon so not seen. Fold over the line between the two 1cm marks where it is scored and cut in triangles to form the diamond shape. The centre line is a valley fold and the outer lines are mountain folds.
Mould the cracker to round off. Take one end and run it over a table edge a few times to warm the paper and break the fibres, then the centre and other end.
Wrap round the cardboard tube, perfect size and great surface to press on so not to flatten the cracker while gluing. Add a line of PVA to one end on the cut edge leaving the feathery uncut edge for the outside. Wrap the other side over and onto the glue, press down and hold for a few moments, add a small piece of masking tape to hold as it dries. Repeat for the centre and other end. Slide from the cardboard tube. Leave to thoroughly dry before filling, decorating and tying the ends closed.
Assemble an A5 card box. A presentation box is a lovely add on and also acts as a storage box to keep for another time.
Make a three compartment box insert from white card to hold and separate each cracker, measurements below. The decorated crackers were bigger than the depth of the box so the insert gave added height allowing the crackers to fit inside without being flattened. Score and fold where the lines are shown. Fit inside the box and add your crackers. The box can then be wrapped shut with more ribbon or elastic cord.
Chocolate Egg Cosies
Materials and Instructions
Full details of the knitted bird chocolate egg cosy and crochet birds nest are given on the Tweet Easter Treats PDF
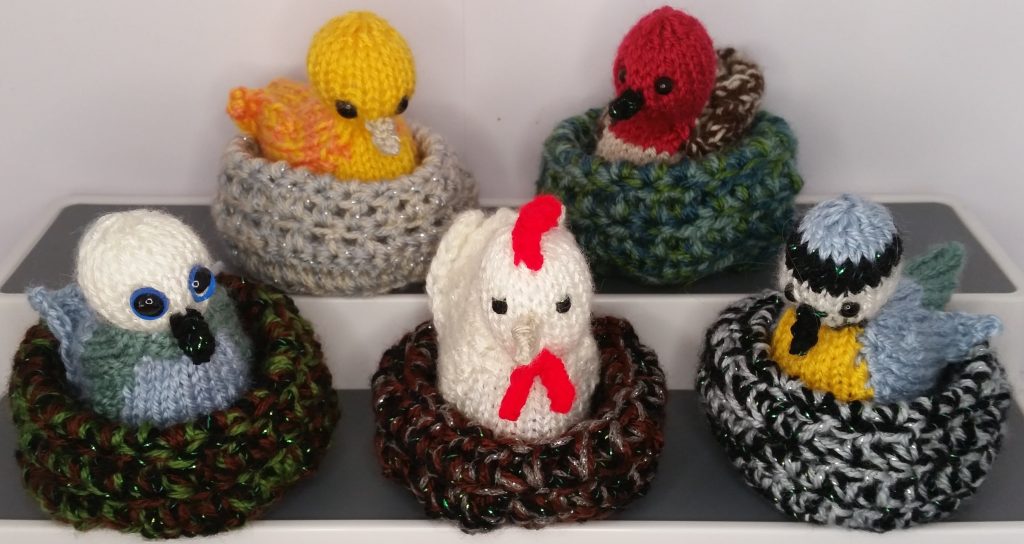
The UK Easter Bank Holiday weekend is at the end of March and into the beginning of April this year. Having the patterns from the beginning of March means you will have more than enough time to make for Easter. It’s a good yarn buster for those small amounts of leftover double knit and a nice idea to sell at your meetings. The nest can be filled with chocolate treats with no need for a bird sitting in it. As you can see below the nest and bird are the perfect size to fit inside an exploding box, another of this month’s projects. The knitted birds can be sewn closed at the bottom and stuffing filled for a bird hanging decoration with the addition of matching beads.
March 2024 chocolate egg cosies Printer Friendly PDF
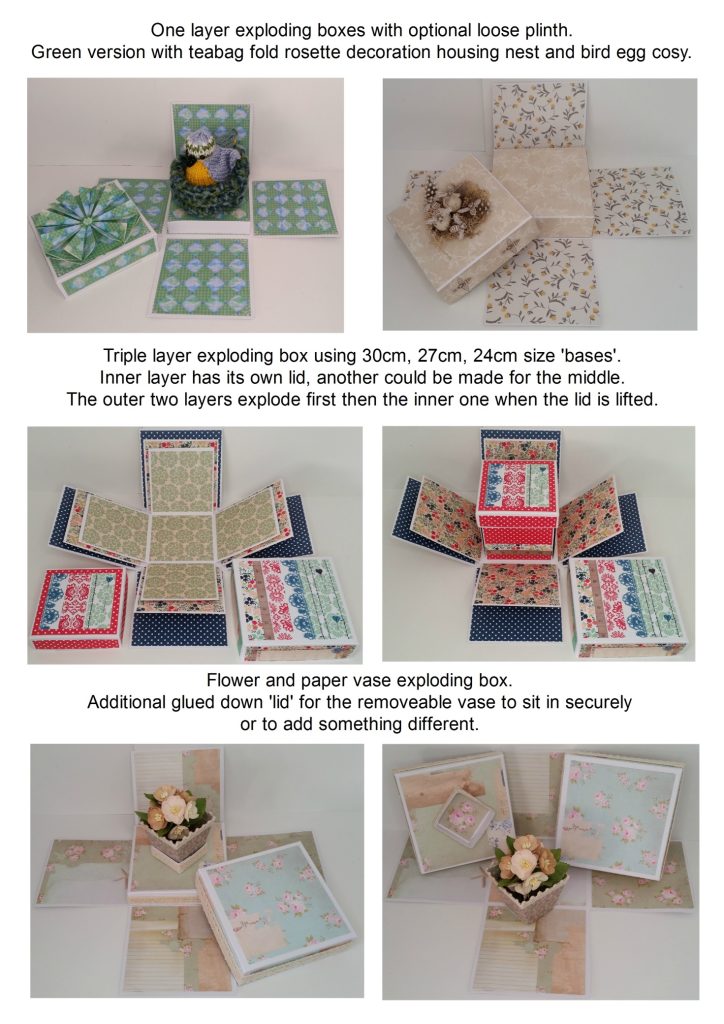
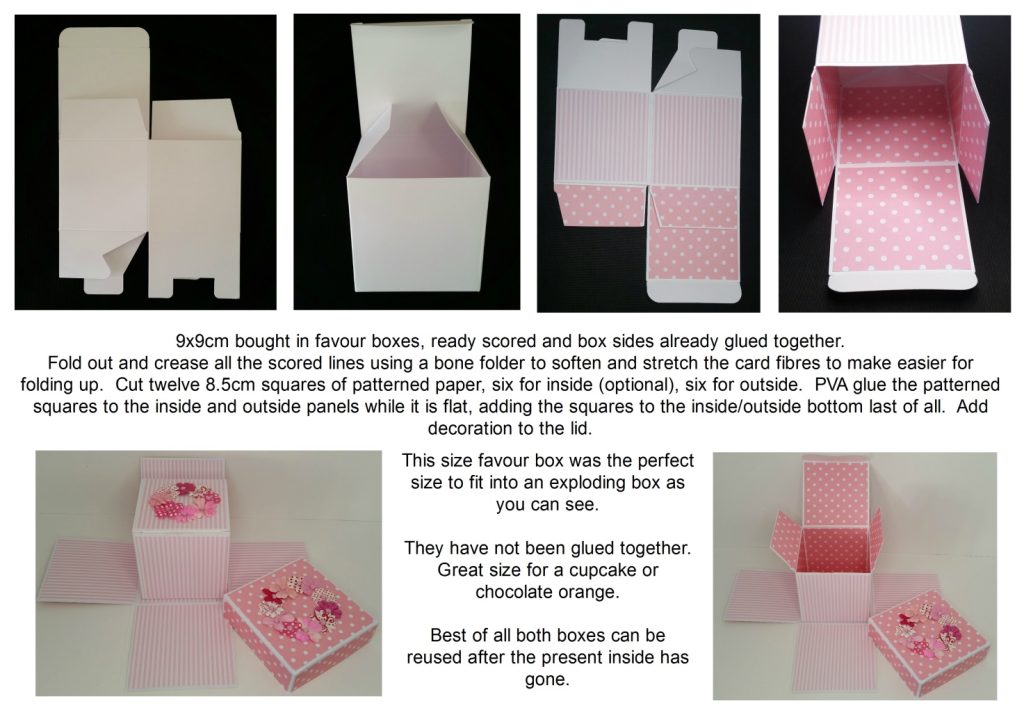
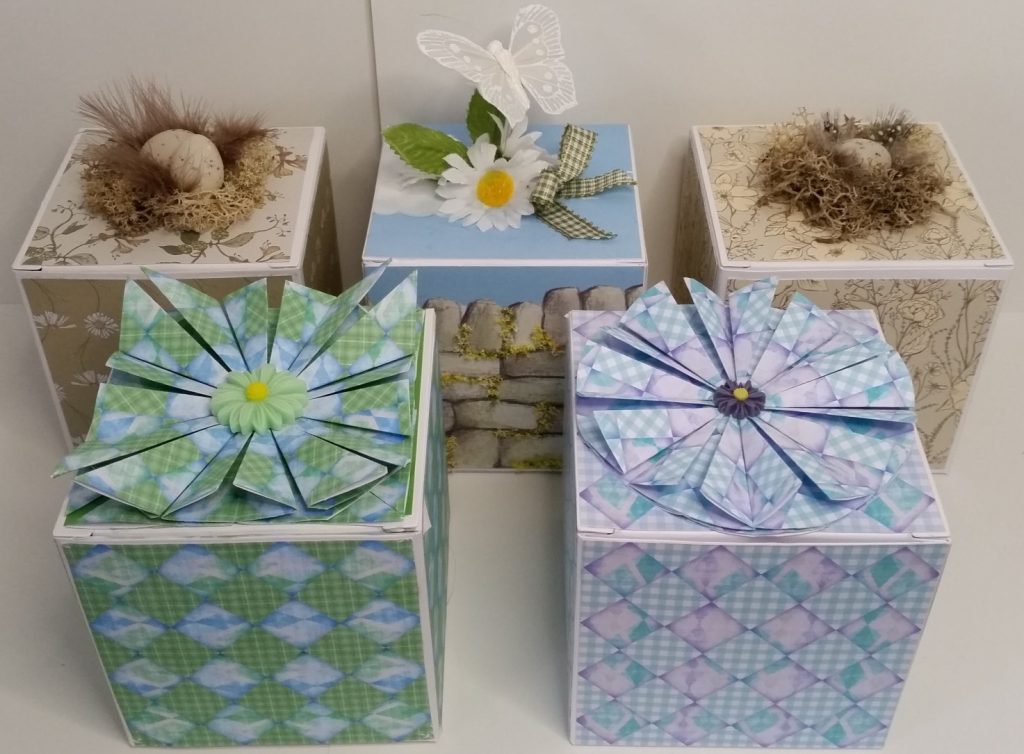
Exploding Treat Boxes

There is nothing as special as pretty wrapping and packaging especially a handmade box. I’ve given instructions for ‘exploding’ boxes, and also for those not so adventurous decorated flat pack favour boxes. An exploding box is so called because when you open the lid the sides fall down and ‘explode’, very safe no need to call the emergency services! I don’t apologise for offering up another paper craft project this month as it is useful to know how to make and can be adapted through the year for other occasions. The crochet birds nest and knitted bird egg cosy fit inside perfectly and together make a lovely combination.
Materials:
- 12×12 (300gsm) construction weight card (2 sheets per basic exploding box), ready cut/scored versions available online
- 9x9cm white square flat pack favour boxes
- Patterned papers and matching embellishments
- Paper trimmer, score board, ball tool
- Scissors, bone folder, PVA glue
- Teabag Fold Instructions PDF
Instructions
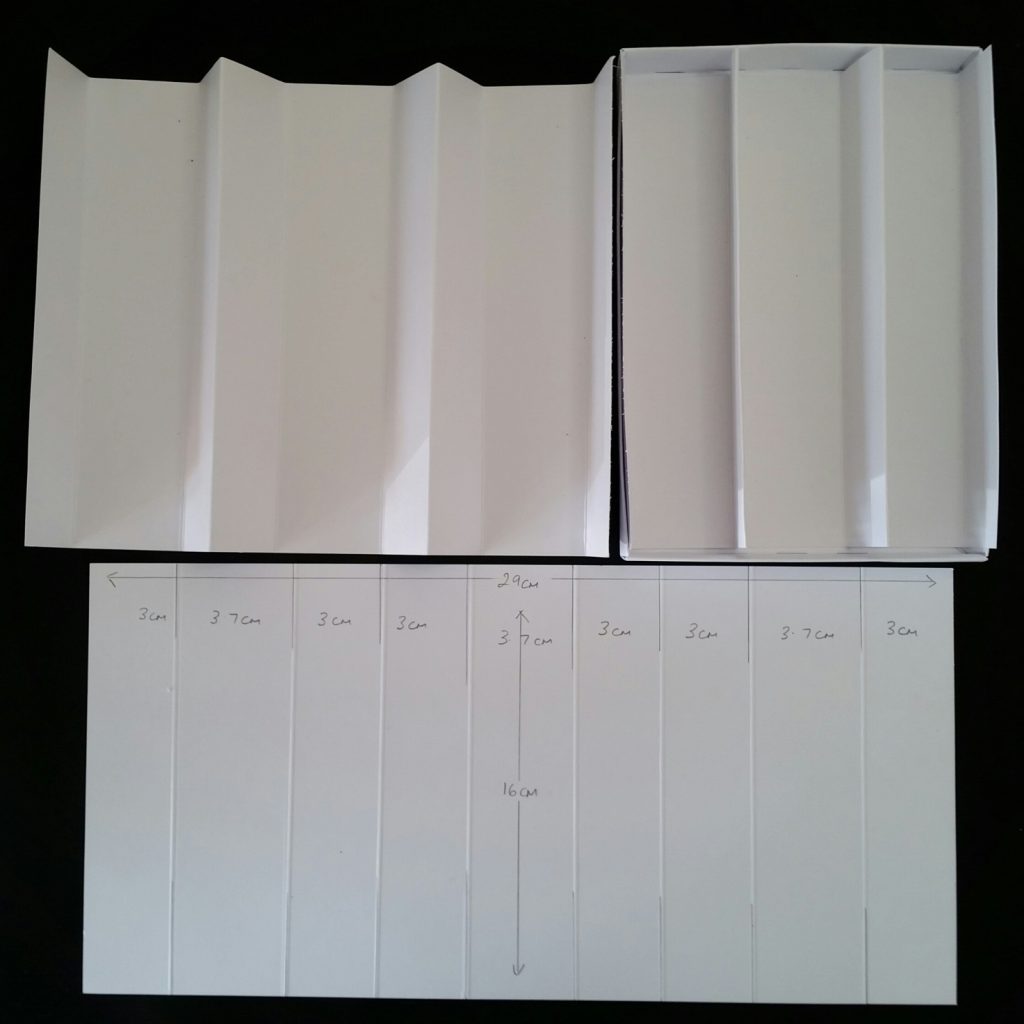
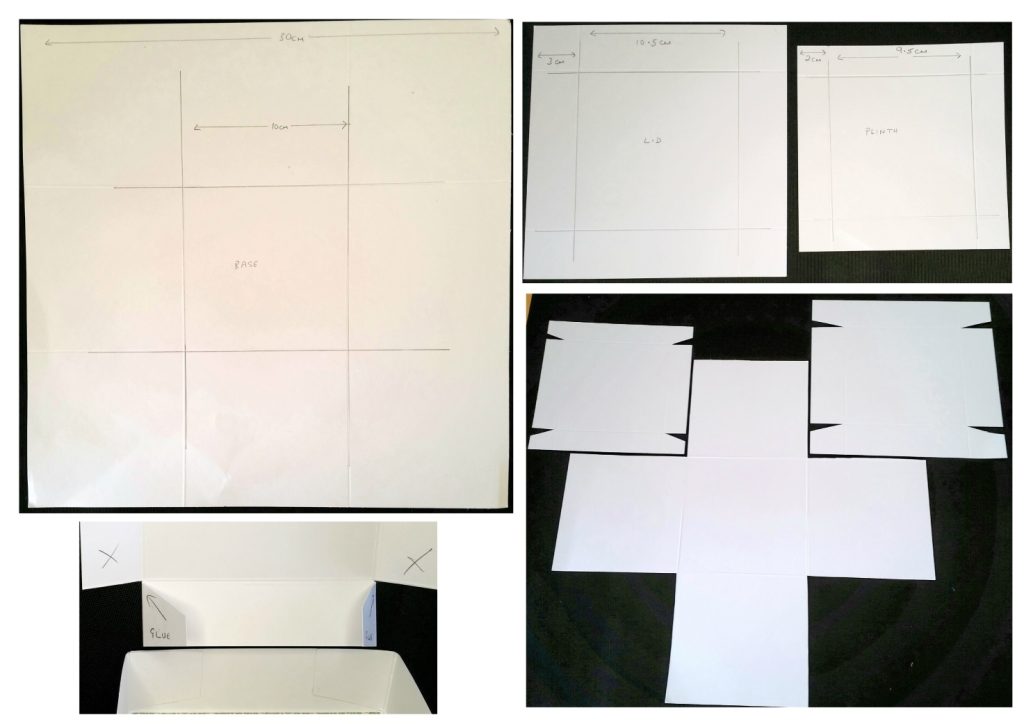
Trim 12×12 card to 30cm square using a paper trimmer, or mark measurements with pencil and ruler cutting away excess with scissors. Mark the sides at 10cm points; emboss lines between these across the page using a scoreboard, or with ruler and ball tool leaving a 3×3 grid effect.
Cut a 16.5cm square for lid, embossing 3cm fold lines for the sides; the plinth if using is from a 13.5cm square with 2cm sides. The plinth is intentionally left loose to hide additional surprises underneath (do let the recipient know).
Cut away the four corner squares from the base. Cut in notches for the lid and plinth as shown. Crease the embossed lines with a bone folder to stretch the fibres for easier crisper folding.
Cut 9.5cm square ‘mats’ from patterned paper for the panels of the base, four for outside, five for inside. Cut two 10cm ‘mats’ for the inside and outside lid, and two 9cm ‘mats’ for the plinth. Glue on while all pieces are flat.
Glue the notched ends to the inside lid/plinth sides and burnish down to adhere well. If there is patterned paper left over add strips to the sides of the lid if wanted.
The 10cm3 inside space is more than big enough to house a lovely gift. For Easter a small bag of chocolate eggs/sweets, a chocolate orange or the crochet nest and knitted egg cosy as shown in one of the samples. A mini cake, candle or other small gift for Mother’s Day. Hide money or a gift card under the plinth as an additional surprise.
You could replace the patterned paper with family photographs, mementos and keepsakes to really personalise your gift. Once the gift is gone the box can be reused on another occasion.
For a double/triple layer exploding box (as I’ve done in one example) decrease each layer by 3cm incrementally. Measure a panel for what size ‘mats’ to cut taking 0.5cm off that measurement to fit. Decorate the layers with patterned papers while flat before gluing the central bottom squares on top of each other.
Meet Gillian

Hi I’m Gillian, I am a craft enthusiast and I enjoy the whole process; I hope to offer something a bit different for beginners to advanced abilities. I love all arts and crafts and have dabbled in many but there are still others to try! Even before upcycling was a ‘thing’ I was using old and unwanted items in my projects.
Running my own small business, I am part of local craft cooperatives, attend handmade craft markets and have started up workshops which is something I always wanted to do. I love showing others what they can achieve. My WI always build two crafty evenings into the programme and over the last few years I have led on these; they are always great fun.
I do have a guilty pleasure for knitting character tea cosies which started in lockdown and it’s still going strong; many more patterns and not enough time!
To read more of Gillian’s fabulous blogs, visit www.theWI.org.uk/MyWI